Monday, July 30, 2012

Terrific Tuesdays # 26 {& $50 Amazon Giveaway}

Today's post is sponsored by Appliances Online.


I am super excited because they are offering a $50 Amazon gift card to one lucky reader!!!

Want to win?
There's just three easy steps

1 - Link up just like you always do

2 - Copy and paste the following tagline into the post you linked up today.{This MUST be in your post in order to win}
 
My entry into Terrific Tuesdays @ Adventures of a DIY Mom sponsored by Appliances Online and their best Range Cookers.

3 - Leave me a comment with your link party number(s).

The giveaway will be open until Saturday night and I will announce the winner at next week's link party.

Now on to the party!!

As always, I really appreciate the time you take each week to link up. Thank you!
The most viewed link:
Jessi from Practically Functional shared with us how to prevent our pictures from being pinned. I think this is especially helpful with pictures of our kids - most of us don't want them all over the web. Now that I know this I might start sharing more photo's of my kiddos. {By the way, you all have my permission to pin anything from my blog}

Circle Skirt by Mandy Made. I haven't tried circle skirts before, but now I want to. She even made one for her daughter. It's adorable too - you better go see for yourself.

House Number Sign by Alderberry Hill. This is just gorgeous. I wish I had a spot for something like this at my house. Beautiful.


Check out my posts from last week:
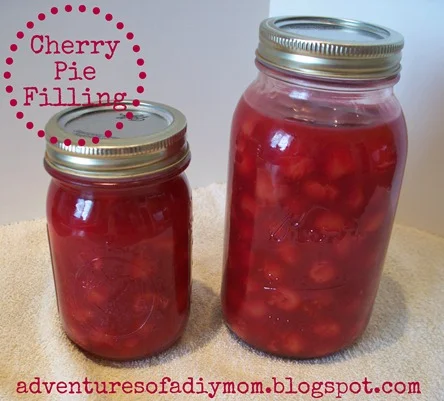
Cherry Pie Filling
and
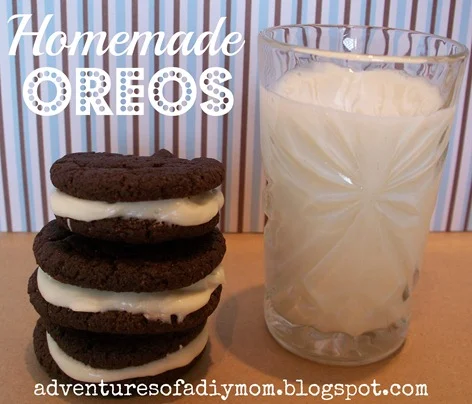
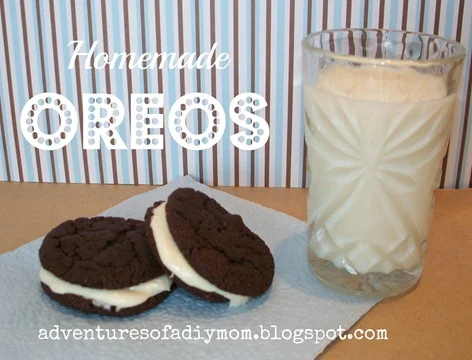
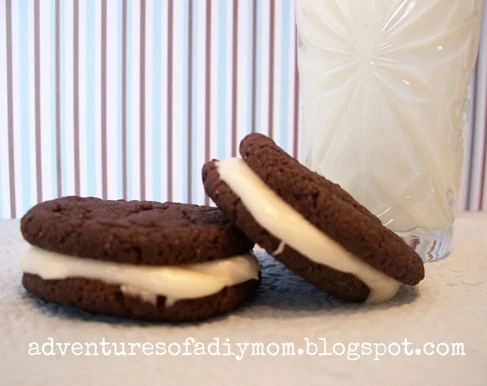
Homemade Oreo Cookies 


Now let's see all the terrific things you've been up to.
Here are my guidelines:
1. Link up any projects, crafts, or recipes you have blogged about recently. You can definitely link up several projects. No shops or link parties please.
2. Comment, comment, comment.  My vision for this link party is not to link and go. Please comment on two other links.
3. I'd love for you to follow my blog.{This is not required, but I’d love for you to take a minute and check it out.} Also if you're so inclined, you can follow me on facebook and pinterest as well.

4. Display my button somewhere on your blog - in the post, the sidebar, or on a party page.


Friday, July 27, 2012

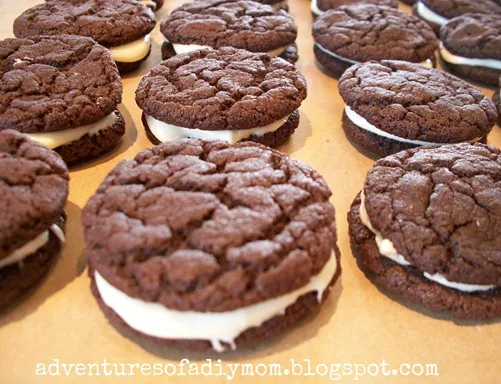
Homemade Oreo Cookies

homemade oreos5
Homemade Oreos are soft and chewy and filled with yummy cream cheese frosting.

Want to see more of our favorite cookies: Visit our Best Cookie Recipes page.

Want to make some?
Homemade Oreos Collage


1 - Gather your ingredients {see recipe below}

2 - place them in a mixing bowl

3 - mix well {I use my kitchen aid}

4 - Roll dough into quarter sized balls

5 - Bake at 325 for 9 minutes. They will not look done. {If you cook them too long they will be crispy instead of chewy} Let them sit one the pan a few minutes before transferring to wire rack to cool.

6 - Mix together your frosting ingredients. Then make you're oreos by frosting the back of one cookie then placing another cookie on top of the frosting.

homemade oreos8


homemade oreos7


Told you it was easy! This will usually make about 100 individual cookies and 50 oreos. I like to make them at Christmas time to give to the neighbors. They also freeze quite well.
Another yummy cookie are these cake mix snickerdoodles!


homemade oreos9


Homemade Oreo Cookies

Homemade Oreo Cookies

Yield: 40
Author: Rachel Nielsen
prep time: 20 Mcook time: 9 Mtotal time: 29 M
Homemade oreos are soft and chewy and filled with a yummy cream cheese frosting.

ingredients:

Cookies
  • 2 pkgs Devil's Food Cake Mix
  • 1 1/2 c. shortening
  • 4 eggs
Cream Cheese Filling
  • 8 oz. cream cheese, softened
  • 1/4 c. butter, softened
  • 3 1/2 c. powdered sugar
  • 2 t. vanilla

instructions:

How to cook Homemade Oreo Cookies

Cookies
  1. Mix all ingredients using a stand mixer.
  2. Roll the dough into quarter sized balls.
  3. Bake at 325 for 9 minutes. They will not look quite done, but they are.
  4. Let sit on the cookie sheet for 1-2 minutes. 
  5. Transfer to wire rack to cool completely.
  6. Once cooled frost the back side of a cookie, then top with another cookie.
Cream Cheese Filling
  1. Mix together cream cheese and butter. 
  2. Add powdered sugar and vanilla and mix until smooth.

NOTES:

I like butter flavored shortening.
Calories
178.68
Fat (grams)
10.27
Sat. Fat (grams)
4.61
Carbs (grams)
21.13
Fiber (grams)
0.16
Net carbs
20.97
Sugar (grams)
15.82
Protein (grams)
0.67
Sodium (milligrams)
113.62
Cholesterol (grams)
10.22
Nutritional information is automatically generated and is not guaranteed to be correct.
homemade oreo cookies, chocolate cookies with cream cheese filling
Dessert, Cookies
American
Created using The Recipes Generator

Wednesday, July 25, 2012

Cherry Pie Filling


Cherry Pie Filling
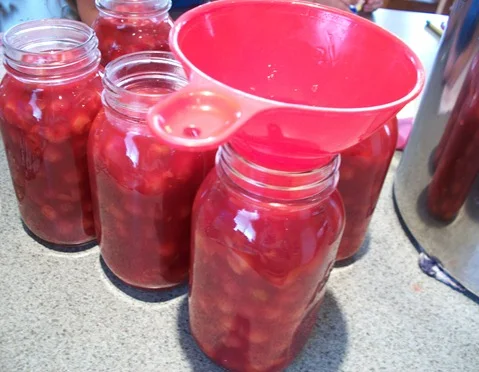
Canning pie filling is not something I do every year. We only have cherry pie a few times a year, but it’s nice to be able to use your own pie filling. 

Probably the hardest part about canning cherries, is pitting them. Luckily there is a local cherry plant about 15 minutes away from where I live. So I buy them pre-pitted.

homemade cherry pie filling


When canning be sure to use recipes that have been tested and approved by the USDA. {I use my Ball Canning Cookbook a lot and they have it online so you don’t need to purchase one.} 

Another good resource for canning recipes is your states extension center. That’s where I found this cherry pie filling recipe along with several others. 

Pie Filling Recipes {the cherry pie filling recipe is on the third page}


102_4722

This recipe calls for Clear Jel. It is a modified cornstarch that doesn’t breakdown and become runny over time. I asked my local grocery store if they had it and they didn’t but they had Ultra Gel, which was supposed to be the same type of product. So that’s what I used.  For more info on where to get Clear Jel in Utah go to the  pie filling recipes and scroll through to the last page. I'm sure there are plenty of places to buy it online as well.

These recipes are from the Utah extension service and our state is high in elevation the processing time may be longer than what is required in your area.
If you find a recipe from your state’s extension center it the processing time should be correct. If you use a recipe from the Ball Canning Cookbook you may need to adjust the processing time using an altitude chart.

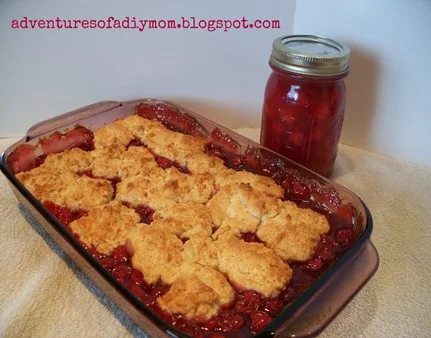
Cherry Cobbler and Cherry Pie FIlling
Now go make yourself some cherry cobbler or cherry pie. You can find my pie crust tutorial here. Another delicious dessert you can make with fresh cherries is cherry crisp.

Monday, July 23, 2012

Terrific Tuesdays #25

Before we start the party, I'd like to invite you all to Blog Swap with me. What is a blog swap? Basically, we will be guest posting for each other on a predetermined date. If you are interested, please leave a comment or send me an e-mail.  I'd like to do a swap once a week, so the more the merrier.

Now on to the party!!

Thank you all SO much for sharing your projects with me each week. I really appreciate it.
The most viewed link:
Shirley from Motivated Mommy of Two shared how to make your own goldfish crackers.
Go find out how she made her fish cracker cutter. It's very clever. 

Some of my other favorites:
lightbox done
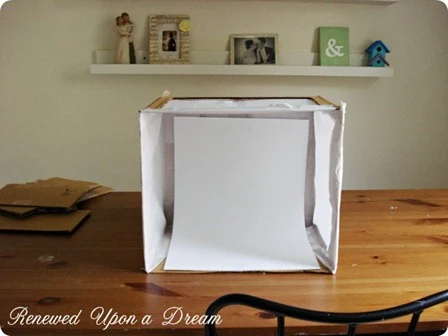
DIY Light Box by Renewed Upon A Dream
You probably have all the supplies already. And if you don’t you can probably find them at the dollar store. Go find out how she made it.
img_4083-1
Painted Wedge Sandals by Made in a Day.
These are so cute!
July 18,  2012 p030
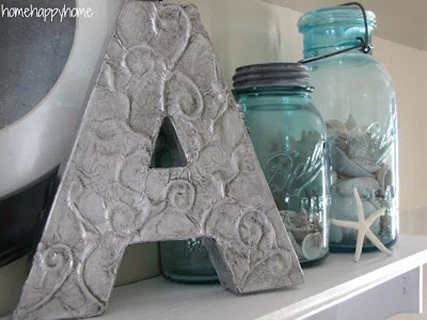
Check out this awesome foil monogram by Home Happy Home

Check out my post from last week.


Now let's see all the terrific things you've been up to.
Here are my guidelines:
1. Link up any projects, crafts, or recipes you have blogged about recently. You can definitely link up several projects. No shops or link parties please.
2. Comment, comment, comment.  My vision for this link party is not to link and go. Please comment on two other links.
3. I'd love for you to follow my blog.{This is not required, but I’d love for you to take a minute and check it out.} Also if you're so inclined, you can follow me on facebook and pinterest as well.

4. Display my button somewhere on your blog - in the post, the sidebar, or on a party page.


Wednesday, July 18, 2012

Jelly Roll Skirts

I'm loving the patterns and colors in this jelly roll. 

Do you remember when my daughter made herself a jelly roll skirt back in April? If not check it out {here}. When I bought that jelly roll for her, I also bought one for my two little girls. One jelly roll made two skirts {sizes 3 & 5} 

These are cutest and cheapest skirts I have made. The Jelly Roll was $12 at Joanns. I used a 40% off coupon so that made it just over seven dollars for TWO skirts. You will also need some elastic for the waist and ribbon. {I used elastic that I had on hand, but I bought ribbon only to realize that I already had some in very similar colors} Even if you have to buy elastic and ribbon, it is still dirt cheap.  And SO much cuter than skirts you can buy. 


Want to make one? I used a tutorial from Moda Bake Shop. It is very detailed and teaches you how to make any size. 

These skirts were really quick to put together. I cut everything out in under an hour. Then spent an afternoon sewing them up. 

Here they are wearing them. I love the pink leggings, purple socks, and tennis shoes;) Do any of you have two year-olds? After 3 other kids, I've decided the clothes battle is so NOT worth it. She gets to wear what she wants and I just smile at her "outfits". 


Monday, July 16, 2012

Terrific Tuesdays #24

Before we start the party, I'd like to invite you all to Blog Swap with me. What is a blog swap? Basically, we will be guest posting for each other on a predetermined date. If you are interested, please leave a comment or send me an e-mail.  I'd like to do a swap once a week, so the more the merrier. 

Now on to the party!! 

Thank you all SO much for sharing your projects with me each week. It was our biggest week so far! 

The most viewed link:
by The Crafty Blog Stalker. She's gathered up the most creative ways to use an Altoids tin. Her post made me want to start buying Altoids.

Some of my other favorites:
DIY Play Kitchen by Adventures in Creating
I love that she made this for her son. She did a great job, and I love all the little details.


Check out this Yardstick Stool Makeover by Creative Passage.
I really, REALLY like this. I love all the colors. Go find out how she did it.

Chalk Paint Console Table by A Heart-ful Home
She shares her homemade chalk paint recipe. As I've said before, I really need to try chalk paint.
I love how her table turned out, I also love how she accessorized her table.

I just realized all the features are all furniture makeovers. Must be on my mind - I have a couple makeovers that I need to finish up so I can share them with you.


Last week I was all about hair. Check out my amazing braids. {if I do say so myself}
Double Braid
Double Waterfall Braid
and
Triple Braid


Now let's see all the terrific things you've been up to.

Here are my guidelines:
1. Link up any projects, crafts, or recipes you have blogged about recently. You can definitely link up several projects. No shops or link parties please.


2. Comment, comment, comment.  My vision for this link party is not to link and go. Please comment on two other links.

3. I'd love for you to follow my blog. Also if you're so inclined, you can follow me on facebook and pinterest as well.

4. Display my button somewhere on your blog - in the post, the sidebar, or on a party page.


Friday, July 13, 2012

Mini Hair Series - Triple Braid

Today is the last day of my mini hair series.


If you missed it, I shared the Double Braid 

Today I'll show you how I do the Triple Braid.


This braid works best on thick hair. In fact, I was showing my sister how to do the Double Braid on her daughter's hair. After I got the first waterfall braid done, my sister made the comment, "good luck getting the rest of her hair in the bottom braid". And that was how the triple braid was born. She was right - her daughter's hair is thicker than anyone I've ever known. I probably could have done a quadruple braid if I wanted.  

 The Triple braid looks complicated, but it's not that hard. 
It is a combination of the Double Braid and the Double Waterfall Braid. It might help to review them.

To do this braid you need to know how to do two braids, a waterfall braid {go here} and a french braid {go here}

Start out by doing the Double Waterfall Braid.  I braided each waterfall braid all the way to the end of the hair.


Next, do a french braid right below the second waterfall braid.  Just like in the double braid, you will want to make sure you just grab the "waterfall" section when you add the top pieces into the braid.


When you get to the end, add those braided pieces in and continue braiding down.


Doesn't that just look amazing?  What did you think of my hair series?


Thursday, July 12, 2012

Mini Hair Series - Double Waterfall Braid

Welcome to day two of my mini hair series. 


If you missed it, yesterday I posted the Double Braid
Tomorrow I will share the Triple Braid

Today I'm going to show you the Double Waterfall Braid.


I actually came upon this by mistake. I was doing the triple braid and stopped to take a picture at this point. Then I realized this is really pretty! It's a very classy hairstyle. I want to try it in my own hair one of these days.

For this braid you need to know how to do a waterfall braid. You can find a great tutorial here.

I started by parting the hair on the side, then began the waterfall braid on the side with more hair. 
I braided diagonally across the head, ending at the ear on the opposite side of the head.
I braid it down a ways and have my daughter hold onto it for me.

Now start your second waterfall braid right below the first.   When you grab a piece of hair to add to the top grab just the "waterfall" pieces.


Braid all the way around. When you get to the end, you have a few options. You could add the first braid into the second braid and continue braiding to the end. Or you could tie it off with an elastic and add a cute bow.  


Do you like it?  Tell me what you think. 


Wednesday, July 11, 2012

Mini Hair Series - Double Braid

I'm so excited for the mini series I'm doing this week. It's all about hair. Braided hair to be exact. 

Here's the line up:

Today - Double Braid
Friday - Triple Braid

Isn't that so pretty?!! I am so loving it. 

I actually made a video. After 18 takes, I realized don't know how to edit the dvd so I can upload only the clip that turned out right.  {any help with that would be appreciated}

So I'll do my best to explain it and if/when I figure out how to share the video, I will.

To do this braid you need to know how to do two braids, a waterfall braid {go here} and a french braid {go here} Cute Girls Hairstyles is an amazing site with tons of super cute hair styles. Go check them out. Just make sure you have an hour or two to spend as you drool over amazing hair-dos, all with video tutorials.


I parted the hair on the side, then started a waterfall braid on the side with more hair. 
I braided it diagonally across the back of the head ending at the ear at the opposite side of the head. Then continue braiding to the end of the hair.

This is what it should look like at this point: {you like my laundry basket in the background? - at least it's folded}

Next, you are going to do a french braid starting on the same side that you started the waterfall braid on. 

 As you add the top sections into the french braid, you are going to want to grab just the waterfall pieces. {see the arrows? that's the piece of hair you want to add in}

The bottom part of the braid will be added in as normal, just make sure not to grab a piece of the waterfall.


I opted to end the braid at the base of the neck. It's really cute if you braid it all the way down too.


So what do you think? Is it something you would try? Were you able to understand my rambling instructions? Would a video be more helpful?

I'd love to hear you thoughts.


Monday, July 9, 2012

Terrific Tuesdays #23

Thank you again for the time you all take to link up each week and to comment on other links!

I'm super excited for a mini hair series I'm doing this week. Be sure to come back each day and check it out.

The most viewed link:

Fishing Line Trellis by About Blogging Time!
This is going to be so pretty when the vine spreads all over it.

Some of my other favorites:

 Custom Cell Phone Case by Crafty Endeavor
I love that you can change it out to match any outfit, or occasion. Go see how she did it.


Giant Outdoor Chalkboard by Vixen Made
This is so fun! It looks really easy to make too, go check it out.

Cookie Dough Fondue by Crazy for Crust
I definitely want to try this. The biggest reason I make cookies is so I can sneak the dough. {I know, I know... raw eggs, but I take my chances} With this recipe though, we can eat our cookie dough without taking chances.


This is what I've been blogging about the last week:
and 

Now let's see all the terrific things you've been up to.

Here are my guidelines:
1. Link up any projects, crafts, or recipes you have blogged about recently. You can definitely link up several projects. No shops or link parties please.


2. Comment, comment, comment.  My vision for this link party is not to link and go. Please comment on two other links.

3. I'd love for you to follow my blog. Also if you're so inclined, you can follow me on facebook and pinterest as well.

4. Display my button somewhere on your blog - in the post, the sidebar, or on a party page.