Wednesday, October 30, 2013

Bracelets and Charms

Pearl Bracelet

Here are a few different ways I utilized the supplies Prima Bead sent me this month. 

how to use charms
I really loved these little sewing charms and wanted to incorporate them into my sewing room. I use this painted tin can as a mini garbage can. It sits on my sewing table and when I'm sewing I can stick thread or small bits of fabric in it as I'm working. Basically I just grabbed some twine, strung the charms on and tied it in place around the can. Super simple and adds some charm ;)

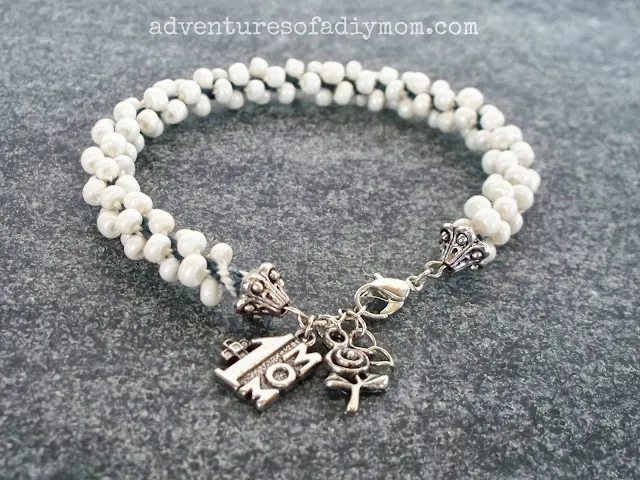
You may remember these Kumihimo Bracelets I shared a few months back.  Well, I had made one for my mom for her birthday. It just so happens that her birthday is in October so when I received these charms I knew I needed to add them to her bracelet before I gave it to her.

Kumihimio Bracelet with charms

I made some bracelets. When I make bracelets, I like to lay out the beads to come up with a pattern. I really like random bracelets, but my mind does not work that way. For an in-depth tutorial see my How to Make a Bracelet post.

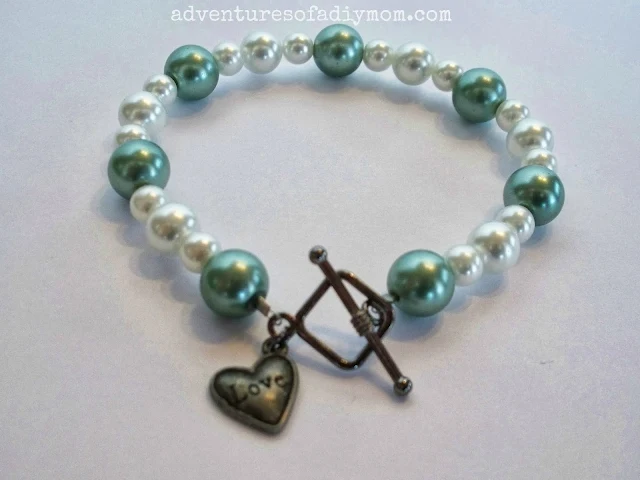
Pearl Bracelet

Here are two of the bracelets I made. 

Pearl Bracelet
 
You can find these two bracelets in my etsy shop - Bits of Sparkle and Lace.

Pearl Bracelet
I'm loving the little charms on the clasps. It just adds a little extra cuteness. 

 I am a Prima Bead Blog Team Member. I receive product from Prima Bead. In return, I create jewelry pieces from that product, and share about them through my blog and other social media outlets. All opinions expressed in this post are mine.

Monday, October 28, 2013

Sanding Tips and a Furniture Makeover

Furniture Makeover

 Over the summer, I found this cute little cabinet at a yard sale. The problem was the paint. Nothing wrong with it really, just not my style. Here's the before.

Furniture Makeover
I really like the dark stain with white paint look that I've seen everywhere. So that's what I decided to try.

Sanding Tips
To start with I sanded down the door. I also sanded all of the paint off of the top.


I wanted to share a few sanding tips with you all, so I asked the pro, my dad. My dad has worked with wood his entire life. The smell of sawdust always reminds me of him. So here are his tips:

Sanding Tips:

*The first thing I do is pull out a piece of carpet to protect the opposite face of the wood as I sand on it. It also helps to keep the piece from getting away from you.

*I have found a Random Orbital Sander- (some folks call it a palm sander) is easier than a big 1/2 Sheet Vibrator Sander. I like Porter Cable or Bosch. I use a sticky back paper and have a big eraser I use on the pad to keep it free of dust and debris between changes. I suppose a damp cloth would work as well.

*Start with 80 grit sandpaper to get planer marks or abrasive marks out.  Sand in the direction of the grain.  Go to a 120 grit sandpaper and for a fine finish to 220 grit. You will find that 220 grit is optional.

*Folks have a tendency to oversand the corners- remember that corners usually get more passes- so don't hover over the corners- try to maintain the integrity of the piece. You want it to be as square as when you started- you don't want dips or irregularities. You can take a small square or straight edge and place it on the face to see how you are doing. To sand the edge or end grain, leave the piece flat (hanging a little over the table edge) and hold the orbital sander perpendicular- so it is parallel to the edge or end. Here again, don't over do it near the corners.

*After sanding do a visual inspection with a good light to detect any scratches or marks still there.  Knots are harder and usually require a little more time to sand out.

*After you have completed all surfaces take a worn out piece of 120 grit sandpaper- fold it in half and ease the edges very lightly by hand. Generally, you don't want to round the edges- the purpose of this is to avoid cuts and slivers with future handling. Of course, if the part of the piece is a glue joint- don't sand the edge at all.

*It is not necessary to apply a lot of pressure when sanding.  The secret to sanding is a light touch and new paper- let the orbital action do the work. If it seems like you are not making progress- you need a new piece of sandpaper. I may go through 4, 5, or 6 pieces of sandpaper on a small project. I never feel bad about replacing paper- because I use the worn out piece for hand sanding.

*Sometimes when the lighting is bad I will take a pencil and scribble a wiggly line over the face of the wood. When the pencil line is gone I know I have done a pretty good job.


Next I stained the door and the top. My sister was nice enough to let me use some of her leftover stain. One of the reasons you want to do a good job sanding is because staining brings out all the imperfections. I let the stain dry over night and then sprayed with a few coats of spray lacquer. I let that dry a few days and then taped off the top.

Furniture Makeover
I painted the whole cabinet brown, inside and out.

Furniture Makeover

Then I painted just the outside a creamy white.

Furniture Makeover

Next, I went to town with my little orbital sander that my dad gave me, scuffing up the paint until the brown showed through. That was the fun part!

Furniture Makeover
Reattach the door and add a new handle and she's all done. I really like how it turned out. And I found the perfect spot for it in the entry way. Right now the kid's scripture bags and dance bags are hidden inside.

What do you think? Have you refinished any furniture lately?


This is my latest project:


Gel Stain Glaze Hutch Makeover


You may also like: {Just click on the picture to take you to the post}


Thursday, October 24, 2013

Tin Can Mix and Match Magnetic Jack-O-Lantern

Tin Can Mix and Match Magnetic Jack-O-LanternA few weeks ago, I made pumpkin chocolate chip cookies. I kept the can because I wanted to figure out something to make with it. This is the result.   This can is not only festive, but fun for the kids.
My 6 year old helped me make this. She kept asking me the whole time, "So we get to play with this when we're done?" I guess too many of my projects are not for the kids to touch :)

For this project you will need:
an empty tin can {Mine was a pumpkin can}
orange spray paint
black paper
magnetic sheets
scissors
jack-o-lantern shapes {you can draw them yourself, use a silhouette, or search the web for faces}

First spray paint your can. I used some leftover paint I had and there wasn't much, so I just did the outside of the can. 

While the can was drying, I started cutting out my jack-o-lantern faces on black paper. I used my silhouette, since I had downloaded some jack-o-lantern a few years ago to make my reversible beadboard pumpkins

Tin Can Mix and Match Magnetic Jack-O-Lantern

Next, trace the faces onto the magnet sheets and cut them out. Peel off the paper backing {this was my 6 year old's job} and attach the black paper. You may need to trim the magnet closer to the paper.

Tin Can Mix and Match Magnetic Jack-O-Lantern
Once your can is completely dry, {I waited a day} you can mix and match the pieces to make unique faces.


One thing I noticed is that you have to kind of bend the mouths so they will wrap around the can. Also if you can find a can that is not corrugated, the magnets will stick a little better.

You may also like: 


Wednesday, October 23, 2013

Boy Bedroom Tour

Boy Bedroom

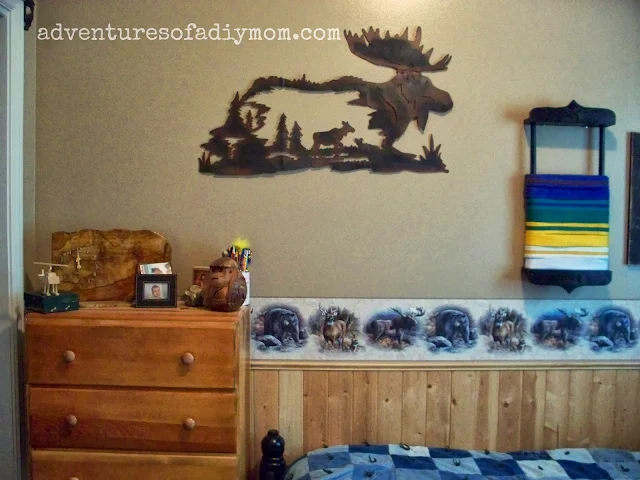
Today I'm sharing my son's bedroom. His room continues with the hunting theme that we have in the living room. About 7 years ago, I did this room completely by myself. My husband and I had bought the wood and never gotten around to putting it up. So when he was gone for a few days hunting, I surprised him by having it all done. Over the years we've added a few things here and there. For example, the karate belt holder is a newer addition.

Boy Bedroom

The blue jean patch work quilt I made for him. It's super warm, but quite heavy.

Boy Bedroom

I also made the bookshelf, which doubles as a nightstand.

Boy Bedroom

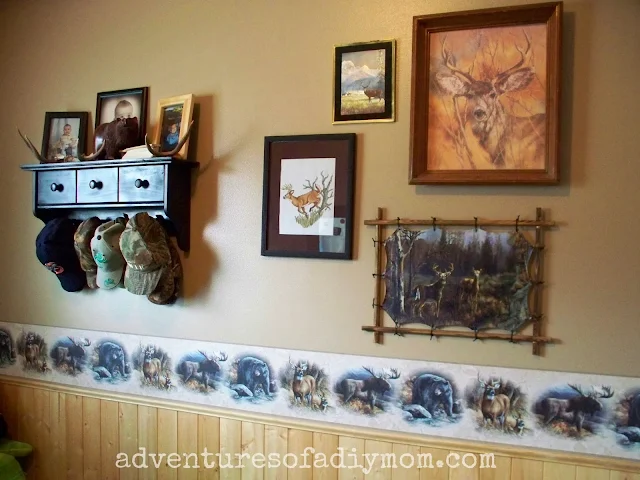
Coming around we have his tote of stuffed animals and legos. He's outgrown these big legos, but the little girls still play with them. The black shelf on the wall was originally just pine. I painted it and it's perfect to hang all his hats.

Boy Bedroom

 We have several deer pictures. The first is a cross stitch that I made for him. I made it from a book with several deer patterns. I don't think he'll get any more, that thing took FOREVER to make and it was hard because there were at least ten different shades of browns, greys and greens. The top two pictures are ones that were handed down from Grandpa, I think. And the canvas stretched between sticks was a yard sale find for $2.

Boy Bedroom
I just had to share this target on the back of the door. I had no idea it was there. Isn't that what little boys do though? And do you see the child proof handle? He sticks his little sisters in his room and shuts the door to tease them. He drives us nuts, but we love him!

Boy Bedroom
And here's the closet. This is just a controlled mess. All summer long, he would cart out at least 2-3 buckets of legos/toys to the kitchen table and set up his game. It would be out all day until dinner time.
I must say that I'm rather enjoying having my table back now that school's back in session.

Be sure to check out other areas of my house:


My Living Room
My Kitchen
Pink Girls Bedroom
My Entry
Master Bath
Princess Bedroom
Lavendar and Blue Girls Room

Monday, October 21, 2013

How to Make Easy Dangle Earrings and Necklace

How to Make Easy Dangle Earrings and Necklace

Today I'm going to show you how to make some super easy dangle earrings and matching necklace. You can probably make the whole set in 10 minutes or less. I love projects like that.

I used to think that making jewelry was too hard and not something I could ever do. My sister showed me the basics about two years ago. Things like opening a jump ring and forming a loop. Two of the most basic, but often used parts of jewelry making. I realized that it wasn't really that hard. Well, to be honest, at the time I had long fingernails and it was kind of hard to hold onto those little beads. But the techniques weren't hard at all. So if any of you have wanted to try to make your own jewelry, but have been intimidated, I encourage you to try. You may surprise yourself like I did. 

 This is part of my October challenge with Prima Bead. We answered a survey and we each got our own unique box of supplies tailored to us. It's been fun to see the different stuff we all come up with when we get the same thing. It's going to be really exciting to see all the projects this month.


Our coordinator, Laura, put a lot of time and thought into what she sent. My favorite color is green. Now I have plenty of different shades and styles of green to add to my creations. I was glad to see the bronze findings, since I only had silver.  Do you see those cute little sewing charms? And I was especially touched by the mom charms, with the little boy and girl. I feel that being a mom is my most important job and somehow Laura picked up on that. Thanks again Laura!

How to Make Easy Dangle Earrings and Necklace

Lets get on with the tutorial.
How to Make Easy Dangle Earrings
1. Supplies needed: earwire, head pin, 3 jump rings, bead, and a two hole connector bead/charm.

2. Form a loop using a head pin.

3. Attach a jump ring to the earwire.

4. Using a jump ring, attach your bead to the first jump ring. I've learned from experience that you need two jump rings in order for the bead to face the forward and not twist to the side.

5. Attach your end bead with a jump ring.

That's it!  Super easy! Now just repeat for your other earring.


For the necklace, follow the same process, but instead of having two jump rings attached to an earwire, you will just use one large jump ring and slide it onto a chain. You can make your own chain or use a ready made one. To make your own chain, attach a clasp with a jump ring on one end of your desired length of chain. Add another jump ring to the other end of your chain.


I also made a coordinating bracelet.

How to Make Easy Dangle Earrings and Necklace
This is just as easy. Basically you form a loop, using eye pins, on each of your beads. Then attach them all together with jump rings. Add a clasp and you're done.

I hope this inspires you to make some jewelry.

 I am a Prima Bead Blog Team Member. I receive product from Prima Bead. In return, I create jewelry pieces from that product, and share about them through my blog and other social media outlets. All opinions expressed in this post are mine.

Thursday, October 17, 2013

How to make Pinecone Flowers

Learn how to make a flower out of a pine cone. Pine cone flowers add a rustic flair to your decor. They're inexpensive (even free!) and readily available.
How to Make Pine cone Flowers


Fall is definitely in the air. I love to decorate for Halloween/Fall, but I don't like to spend money to do it. Basically I bring out the same decorations year after year. And sometimes I'll make something new.

This year, as I was pulling everything out, I felt like I wanted to add something new. However, I didn't want to spend any money. I remembered something I had pinned last year and that was my inspiration.


Tuesday, October 15, 2013

Food Storage Organization and No More Link Parties

I just haven't been feeling the link party lately - actually for a few months. It seems like at the last minute I'm scrambling to get features and get the party up and running. Since for me, blogging is about sharing what I love to do, I'm going to end the link party. I hope you all understand.

You may have noticed that I wasn't around last week. I spent the beginning of the week organizing all of our food storage. Then I got busy making more menu boards for the etsy shop. I've added some new colors. And I also have a new option to create a custom order. Go check it out. Also the kids were out of school for fall break, so I took a little break from the blog too.

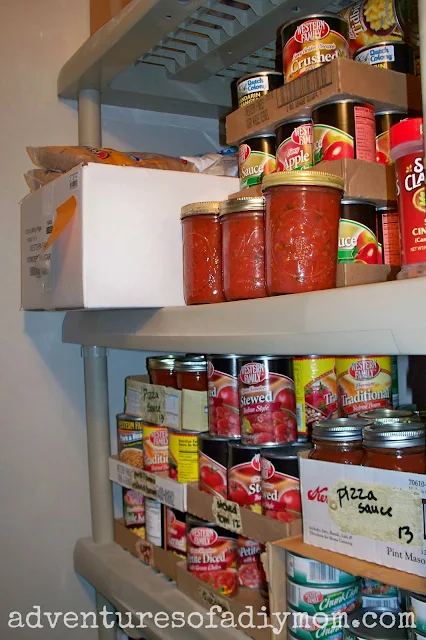
So today I'll be sharing my food storage organization. I've been canning the last few months and have just been stacking it down in the basement. Our local grocery store had it's caselot sale. So I grabbed some more canned goods and I needed to get it all organized again.

Here's a look at what I started with:
Food Storage Organization

After a few hours of organizing, I got it all in the closet.

Food Storage Organization

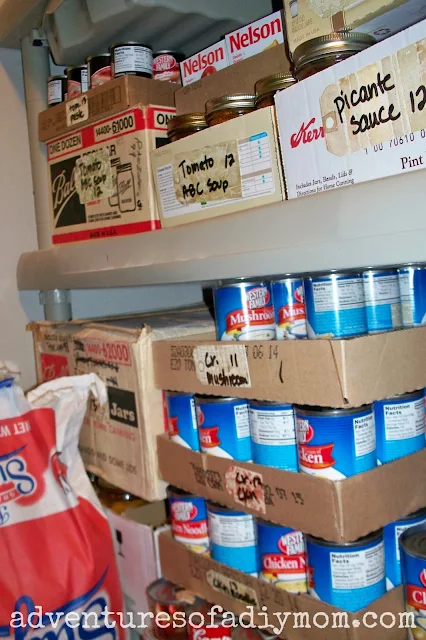
I even got a great idea and labeled it all with the contents and the year. I found some tag stickers in my scrapbook stuff and I tried out a dry erase marker on them. It worked great! Now each year when I can, I can just erase the tag and write the new contents on the box.

Food Storage Organization
Don't you just love this duct taped box? When you buy jars now, you don't get a good box with them, so I've got to make the ones I have last :)

Food Storage Organization
I even labeled the store bought canned food even though I won't be keeping those boxes. Sometimes when I send the kids down to look they can't find things. I'm hoping this will help.

Food Storage Organization

There is such a sense of satisfaction and accomplishment to have your food storage. Most of the canned food we will eat through out the year. Sometimes it may last two years. But there's not usually any waste.

Food Storage Organization
Our freezer is also fully stocked. My husband got an elk this year, which we had ground into burger. We also ordered a pig from our local slaughter house. So we have plenty of pork chops, roasts, bacon and sausage and burger. I love not having to buy meat at the grocery store. It saves so much money in the long run.

Do you store food storage? What tips do you have on organizing it, rotating it, or getting good deals?

Monday, October 14, 2013

Circle Wrap-Around Ruffle Skirt at UCreate

Today I'm over at UCreate sharing a tutorial for this cute wrap around ruffle skirt.  Be sure to come and check it out.


Monday, October 7, 2013

Terrific Tuesdays #84


My favorites from last week:


  Lined Bookshelf Tutorial by Emmie Loves - I love the different prints she chose. So pretty.

Mason Lid Pumpkin by The Simple Craft Diaries - I'm loving this so much. I've seen these around, but not painted. It adds just the right touch.


If you were featured grab a button!


Now let's see all the terrific things you've been up to.

1. Link up!  No shops, or link parties please.

2. Comment, comment, comment

3. Grab my button or add a text link.