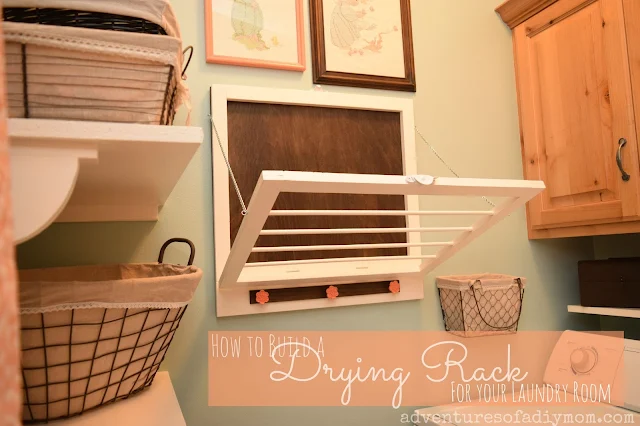
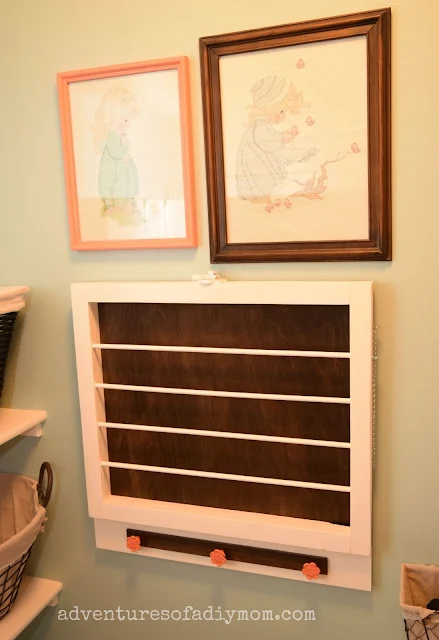
It closes flat against the wall and out of the way when not in use.
How to Build a Drying Rack
You will need:
- 2' X 2' plywood backing 1/4" thick
- 4 pieces 1" X 2" X 20 1/2"
- 4 pieces 1" X 2" X 21"
- 1 piece 1" X 4" X 24"
- 2 {3/8"} dowels cut into 4 pieces 24" long
- chop saw
- pocket hole jig and drill bit
- 1 1/4" screws
- drill
- 3/8" bit
- 5/8" wood bit
- wood glue
- nail gun and nails
- hinges
- sash lock
- chain and eye screws
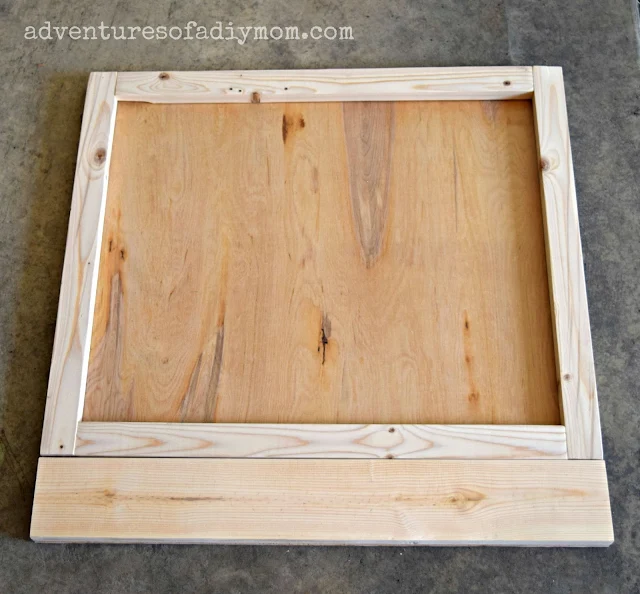
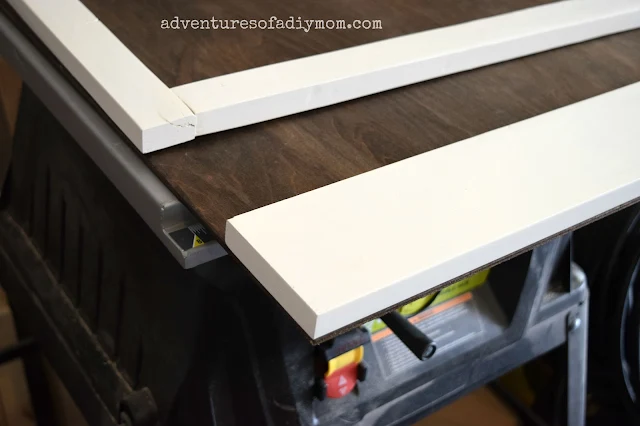
Begin assembly by using a pocket hole drill on two of the 21" pieces. They will be the horizontal pieces of our square. Attach 2 of them to two of the 20 1/2" pieces {the vertical pieces}.
Do a dry fit to make sure the pieces fit, setting the frame on the backing, then adding the 1X4 to the bottom.
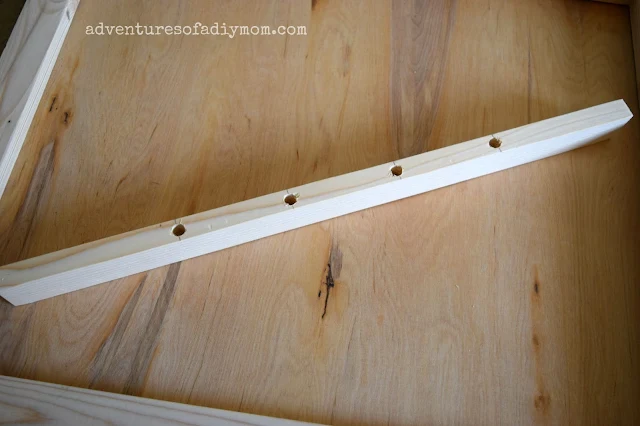
Next it's time to drill the holes for the rack. Use the remaining two 20 1/2" pieces for this. Measure and mark to evenly space the rods. Then drill the holes, making sure to only drill about halfway through the wood. You can add a piece of tape around the drill bit so you know when you've drilled deep enough.
I also decided to nail this frame together, since pocket holes would be more visible. So I pre-drilled some holes on the opposite side of the ends so that it wouldn't split as I nailed them together.
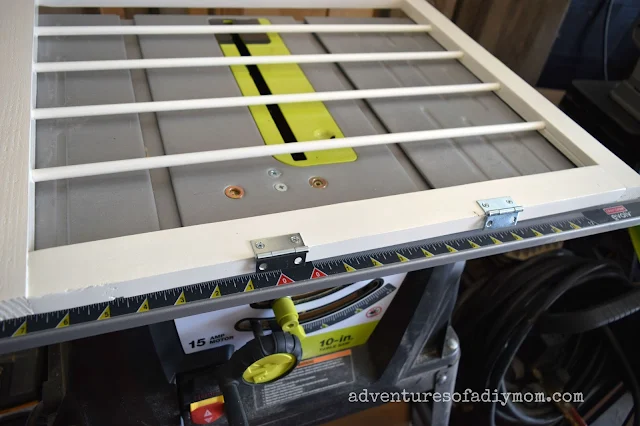
Assemble this frame with the dowels inserted. I used wood glue to help them stay firmly in place.
Next it's time for paint and/or stain. I decided to stain the backing with dark walnut and I painted the other wood white.
With a nail gun, I nailed the 1x4 to the backing, making sure the edges were flush.
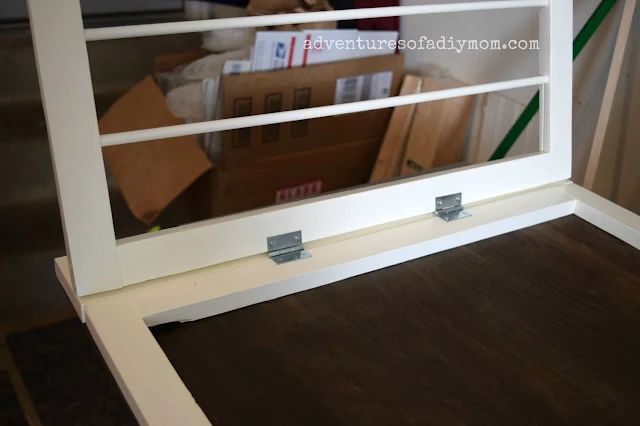
Next I nailed the frame in place.
Screw the hinges in place on the rack.
Then screw them to the frame.
At this point I wanted to add some knobs. However the bolts on the knobs were a little bit too long.
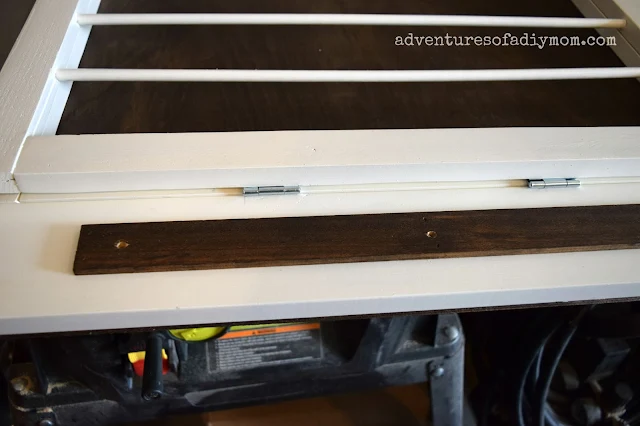
I found a large paint stick and stained it. It was the perfect thickness.
I added it to the center at the bottom, nailed it in place and drilled holes all the way through both pieces.
Flipping over the whole drying rack, I used the drilled holes as the starting point and drilled partway through with a wood spade bit. The washer and nut of the knob fit perfectly inside this new little hole.
A coat of guava jelly paint for the knobs and they were ready to go.
I added a sash lock to the tops of the rack - this holds it shut when not in use.
I added a chain to each side to support the rack when open.
Now when I wash a shirt that's a bit to delicate for drying, I can simply drape it over the rod.
For dresses or dress shirts I can grab a hanger.
The knobs are perfect to dry swim suits and the like.
I'm almost done with my Laundry Room Makeover series. Check out the other projects I've tackled:
Shortening the Laundry Cart
How to Build a Shelf
Another way to Build a Shelf
Paint
Clothesline Craft
Before and After Pictures
You may also like:










No comments :
Post a Comment