Thursday, January 29, 2015

Yearly Cleaning Plan

January has always been a cleaning/organizing time of year for me. I like to get the kids rooms all organized with their new toys from Christmas and just get all the clutter cleaned up from having them all home during the break. Then I always realize how many more areas of my house need attention.  That's where the idea for the yearly cleaning plan came from. I'm fairly good at getting the daily chores {like dishes} and the weekly chores {like bathrooms, laundry and vacuuming} done, because it's become a habit. But I have a hard time remembering, or figuring out a time to get things cleaned that don't need to be done regularly. The purpose of the list is to help remind me of those things and to establish a time to do it.

I figured that I would choose one day a week to focus on cleaning/organizing.  I decided on Mondays because I tend to be in a cleaning mood anyway for some reason.
Yearly Cleaning Plan

I organized my list into 4 main categories - Monthly Grocery Shopping, a Yearly Cleaning list, a Twice a Year list, and a Monthly list.


Each week I will work on a different section of the list. The first week of the month I will do my grocery shopping. Since I do 95% of all my grocery shopping in one big trip, and since that takes up my whole day, I chose not to add any other cleaning projects that day.

The second week of the month, I will work on an item that only needs to be cleaned once a year.

The third week of the month I work through the monthly cleaning list.

The fourth week I will do something that I feel needs to be done twice a year.

I've also included some extra items that I don't want to forget about. And a weekly cleaning list.

Below is my list. Feel free to copy and paste it into word document and then change it up to fit your life. I also have a printable version: Yearly Cleaning Plan. Or you can pin the image above and come back later.


Monthly Grocery Shopping – Week 1

Once a Year Cleaning List – Week 2
January – Clean and organize inside of kitchen cabinets
February – Clean outside of kitchen cabinets
March – Pull up the vents and vacuum out the dust and crumbs. Wipe down the vents.
April – Wash the window blinds and window sills
May – Do a thorough weeding outside.
June – Wash windows
July – Wash the doors and door jams
August – Thoroughly wash the table and chairs {all the legs and everything}
September – Canning season
October – Go through 72 hour kits, update food and clothing
November – Clean bathroom cabinets, baseboards and walls
December – Christmas

Once a Month Cleaning List – Week 3                                                Extra
Clean fridge – outside                                                                           Mop Laundry Room
Clean dishwasher – inside and out                                                         Mop Entry       
Clean stove/oven – outside                                                                    Clean out Vacuum Filter
Clean Microwave – inside and out                                                          Clean out a closet/drawer
Vacuum stairs
Vacuum basement                                                                                 Weekly Cleaning
Sweep Porch                                                                                        Bathrooms
Kitchen Sink                                                                                         Sweep/Mop
                                                                                                            Vacuum
Twice a year Cleaning List – Week 4                                                 Wash Sheets
January & July - Clean fridge – inside                                                 
February & August-  Clean baseboards
June & November - Clean kitchenette in basement
March & September - Clean/Organize Garage
April & October- Go through kid’s clothes


I've put wash sheets on the weekly cleaning list. However I have a confession: I am horrible at it. With 5 beds in the house, it just seems overwhelming to try to wash them all once a week, so I ended up just not washing them. My new plan is wash 1-2 sets of sheets each week, then over the month they'll all get washed at least once.
How often do you wash sheets? How often are you supposed to wash them?


Tuesday, January 27, 2015

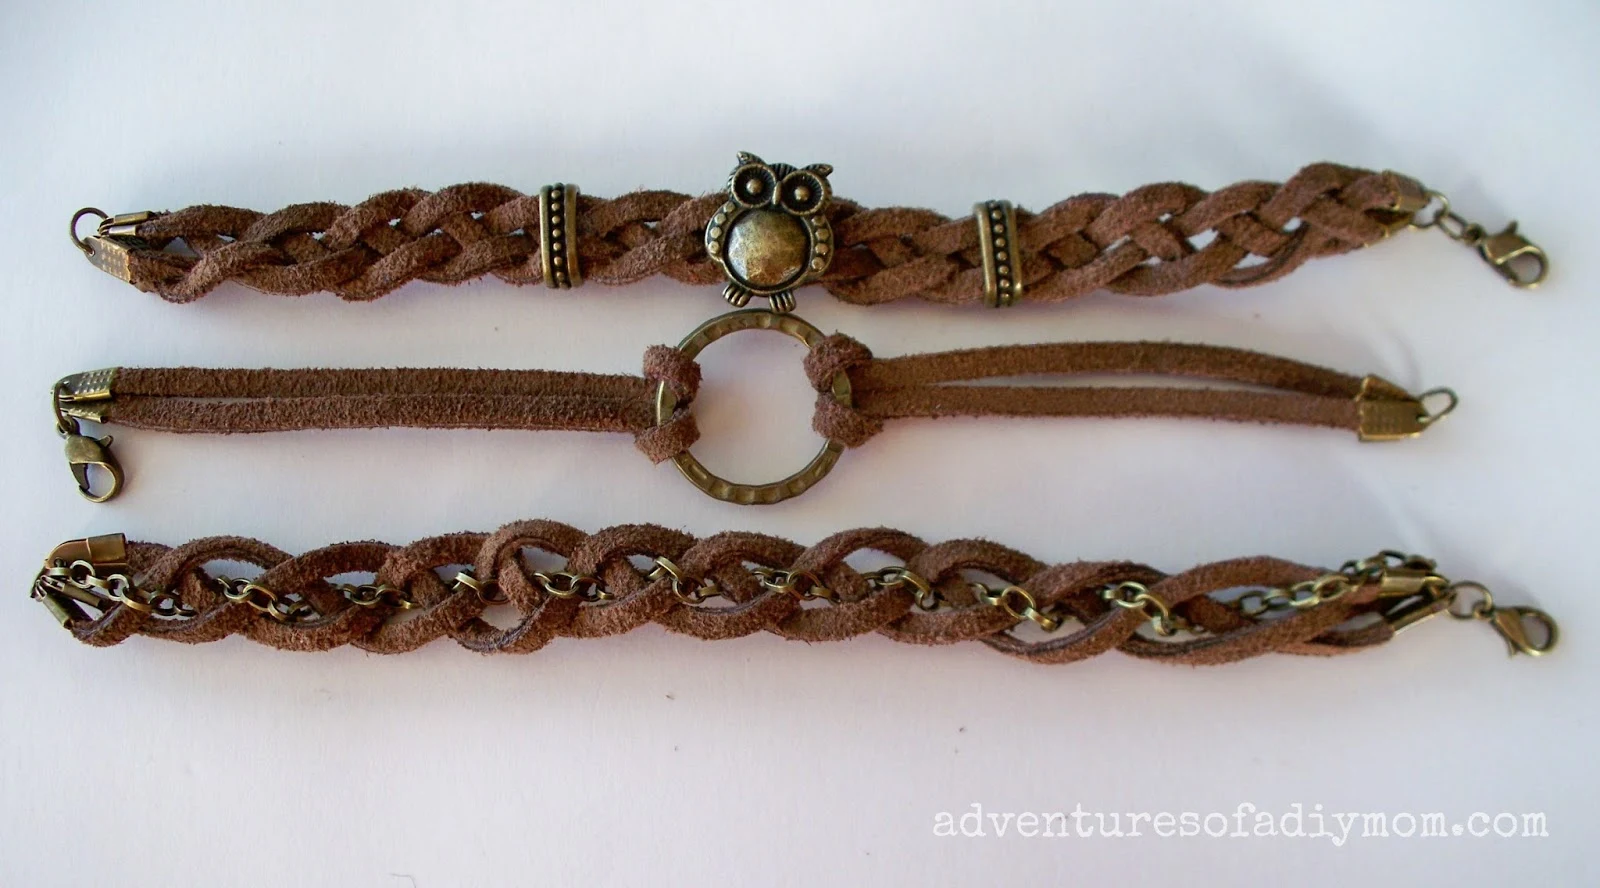
How to Make Braided Leather Stacked Bracelets

Learn how to make these fun braided leather bracelets. You can wear them alone or all together for a stacked look.

How to Make Braided Leather Stacked Bracelets
Something that's caught my eye lately in jewelry, is stacked leather bracelets. I've seen them in all sorts of fun colors and with trendy charms. So I set out to figure out how to make them myself. I decided to go with a neutral brown cord and antique gold accents. I love how they turned out.


Want to make your own Braided Leather Bracelets?


Here's what you need: {supplies courtesy of Cousin Corporation}
Suede Cord
3 pc Owl Metal Slide
Findings Starter Pack - Antique Gold
Ribbon Ends - Antique Gold
Large Circle Chain - Antique Gold
Chain - Antique Gold


We'll start with the Owl bracelet.
1. Cut 4 pieces of cord to 9". Add a ribbon end to one end of each piece of cord. Connect them together with a jump ring.
2. Begin weaving. I started with the left side and wove over, under over. Then repeated to the end of the braid always starting with the left side.
3. Once you get to the end of the braid, measure the bracelet around your wrist {keeping in mind that you'll need about 1/2" for the clasp} and trim excess cord. Add ribbon ends to the end of braided pieces. It will probably come unraveled a bit at the end as you do this. Just re-braid the ends. Connect the ends with a jump ring. Add a clasp to one end.
4. Slide on the metal sliders and owl charm.


How to Make Braided Leather Stacked Bracelets

For the braided bracelet with the chain interwoven, I did the same thing but used a different style of braid.  I used this 4 strand braid tutorial{use the braid in the first half of the video}  but in place of one of the leather strands, use a length of chain. I did 2 pieces of cord, one piece of chain and then one piece of cord when I started the braid. So the chain rotated between the 3rd and 2nd spots for the entire braid.  I normally use this braid in my girls hair, either with all hair or with a ribbon in place of one of the strands of hair. 

And lastly the middle bracelet is very simple.
1- Start with 2 lengths of cord 8" long. Remove a single link from the large chain.
2 - Fold one cord in half, place the loop through the chain link. Then pull the ends of the cord through the loop in the cord. Pull tight. Repeat with other cord.
3 - Trim cords, attach ribbon ends to each end of cord. Connect with jump rings and attach a lobster clasp to one end.

This was my first time using leather cording. I found it was easy to work with and brings a natural element to the bracelets.

You may also like making these Pura Vida inspired wax cord bracelets.

Thursday, January 22, 2015

No-Sew Winter Table Runner

I wanted to make a winter table runner for my kitchen table. I wanted something simple and easy. I settled on a felt snowflake table runner.  Since felt doesn't fray, it made it the perfect choice for a no-sew project.

No-Sew Winter Table Runner
 I will admit that cutting out the snowflakes took longer than I wanted, but once they were cut out, it came together really quickly. I can picture a Valentines table runner using the same idea. It would be even easier though since hearts are so much easier to cut out.


Want to make your own No-Sew Winter Table Runner?


You will need:
felt
snowflake template
scissors
hot glue

No-Sew Winter Table Runner

I started with a piece of felt 18" X 36" plus some to cut out 18 snowflakes. My snowflakes were 5" in diameter. I found my pattern and cut out a template with my Silhouette. I found that the best way to cut out the snowflakes precisely, was to tape the card stock snowflake over the felt with packing tape. Then simply cut it out. The tape helps keep it in place so it's not moving around when you're cutting. I used the same template for all of the snowflakes, by the end the card stock had quite the layer of tape over it.

Next I folded the felt in half longways. I took a bowl and traced around it to create a rounded edge. Cut along the line. Open up and place your snowflakes how you want them. I placed each snowflake halfway on the felt.  Then simply hot glue each snowflake in place.

No-Sew Winter Table Runner
There you have it, a simple winter table runner.

You may like this spring table runner too!


A few other winter projects:
crocheted winter hat
Crocheted Winter Hat
snowflake necklace Snowflake Earrings and Necklace
crocheted mittens
Crocheted Mittens

Wednesday, January 21, 2015

How to Make a Burlap Bag

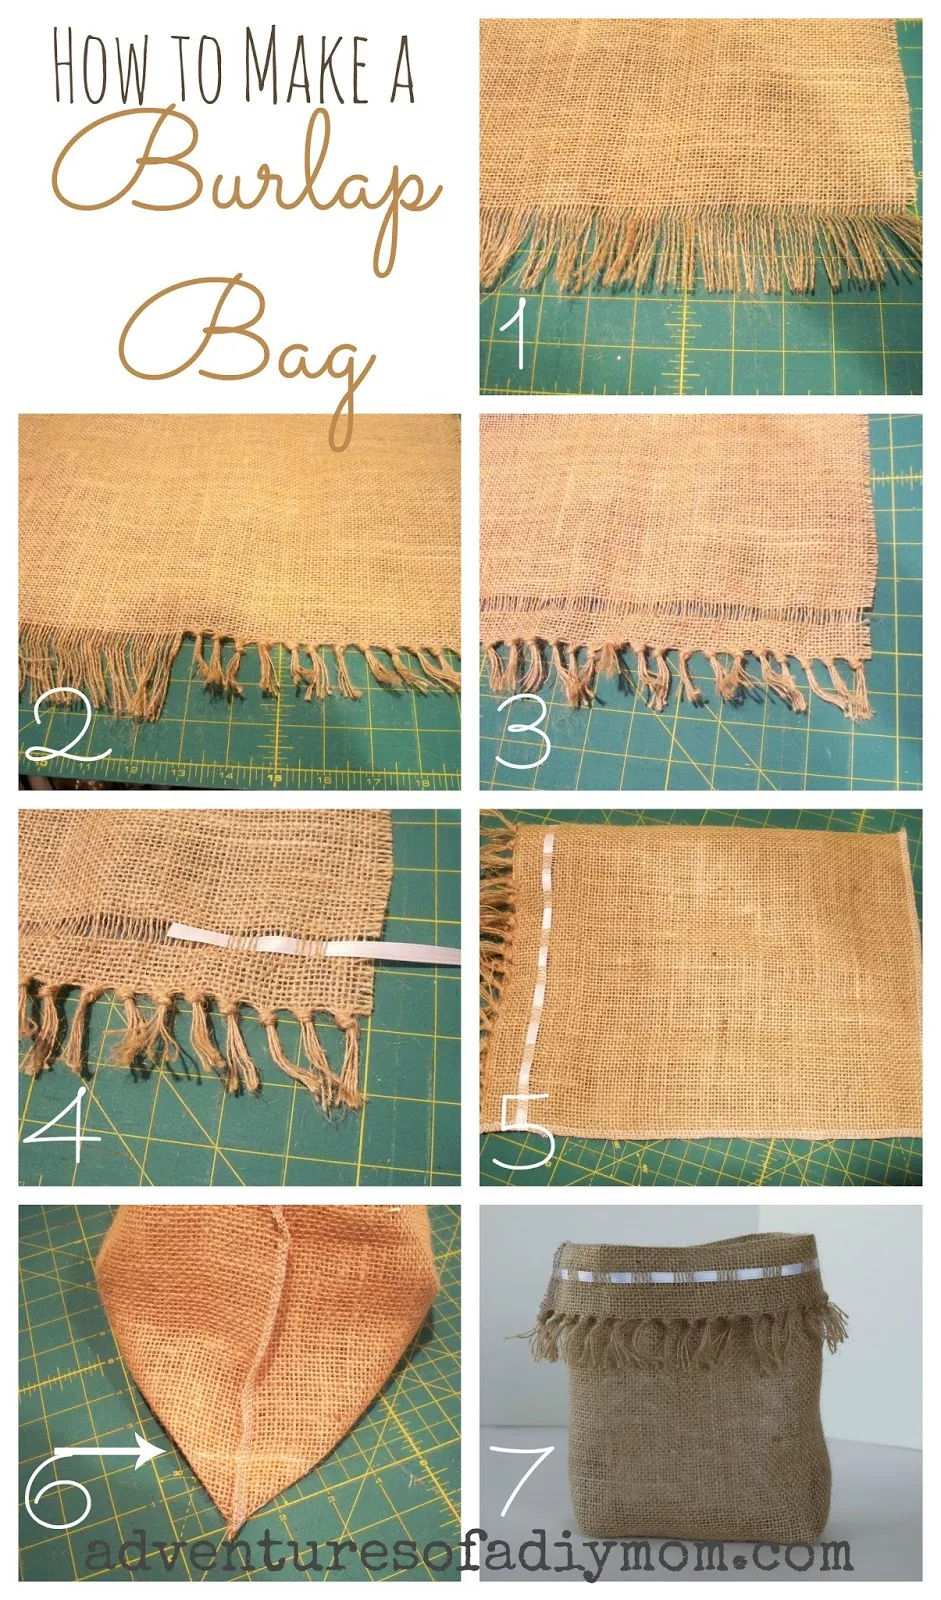
Today I'm going to show you how to make a decorative burlap bag. You can fill it with whatever you want, I chose pine cones for now.  I love the little knotted fringe and the ribbon interwoven through the burlap. 

How to Make a Burlap Bag

Want to make your own Burlap Bag?


You will need:
burlap
ribbon
sewing machine 

How to Make a Burlap Bag


Step 1 - Cut a piece of burlap 20" X 14". Then unravel 2 1/2" on a 14" side.

Step 2 - Take 6 strands at a time and knot them. When you get to the end, you may not have exactly the right amount. I had 10 pieces left so instead of 6 and 4, I did the last two knots with 5 strands each.

Step 3 - About 1 inch from the knots start removing strands of burlap. I used 1/4" ribbon, so I removed 4 strands.

Step 4 - Weave the ribbon through the burlap. I wove it through 6 strands at a time so it would match up with the knots.

Step 5 - Fold your bag in half and sew along the side and bottom. I would recommend either a zig zag stitch or surge it so it won't unravel.

Step 6 - With your bag still right side out, sew a straight stitch to make a little triangle as shown in the picture above. Repeat with both sides. This will form the bottom of the bag.

Step 7 - Turn right side out. Then fold over the top edge of the bag.

How to Make a Burlap Bag
What will you fill your bag with?

Other projects with burlap:

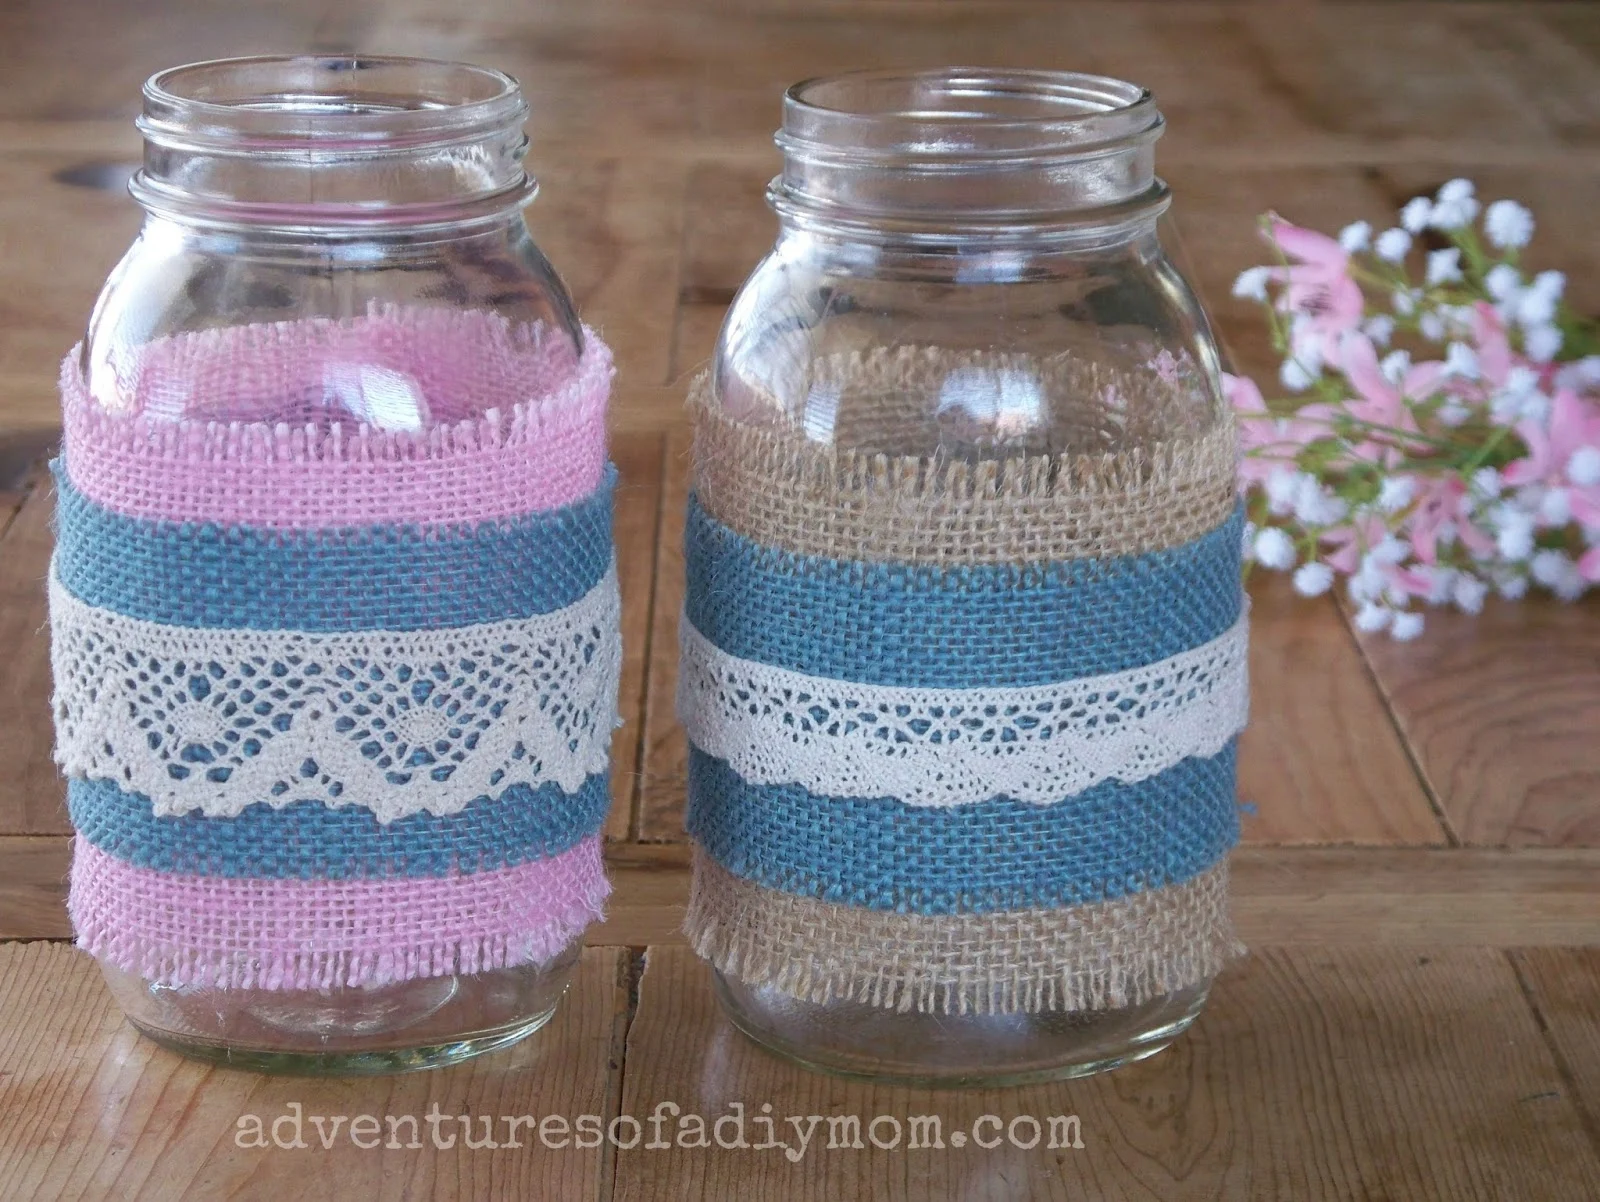
Burlap and Lace Mason Jars

Upholstery Tack Candles

Pine Cone Flowers


Monday, January 19, 2015

Doll Quilt and pillows for Farmhouse Doll Bed


Do your girls like dolls? My oldest never really got into them, but my little two LOVE them. They got "American" girl dolls {No, we didn't pay the big bucks for the real thing} for Christmas and it has re-sparked their interest in all of their old baby dolls too. They will spend hours playing with each other and their dolls.

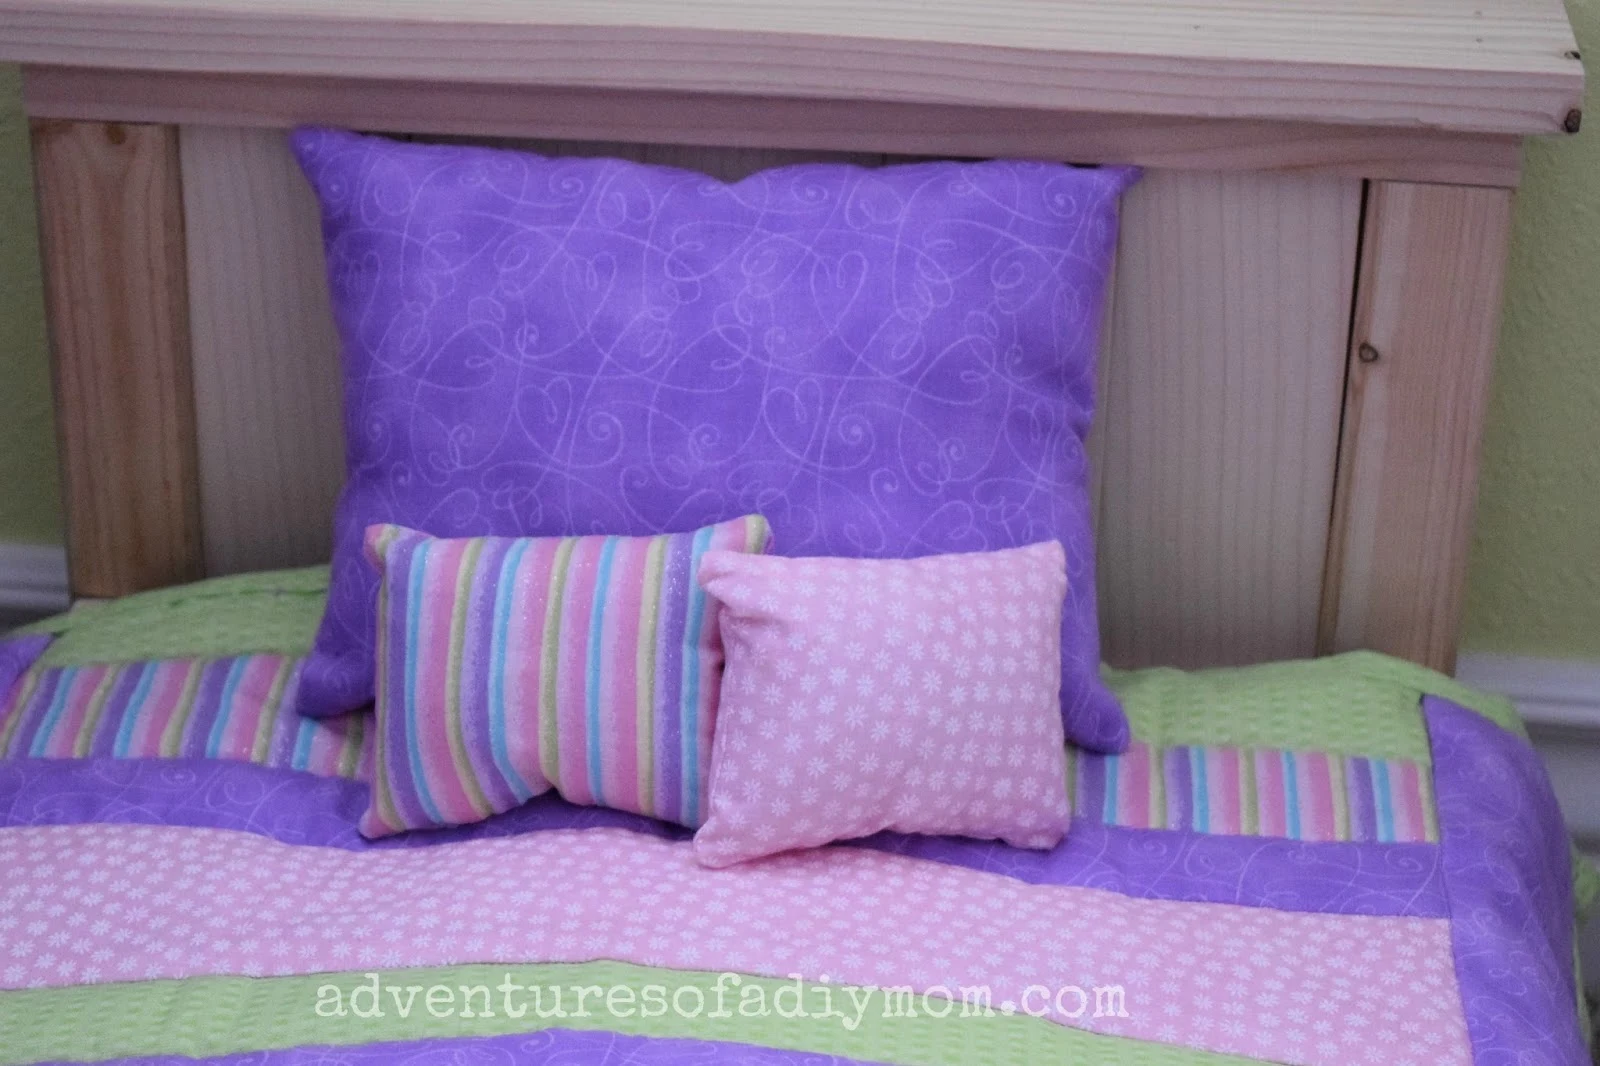
Of course, I had to make them some quilts for their dolls.These adorable little doll quilts perfectly fit the Farmhouse Doll Bed's my son made my girls for Christmas. I made the doll quilts to match with the girls bedspreads.


Doll Quilt for Farmhouse Doll Bed

  I ended up having just enough scraps to make it work.  Here's the other one:

Doll Quilt for Farmhouse Doll Bed

Want to make your own Doll Quilts?

You will need scraps of four different coordinating colors:
5 pieces 2" X 16 1/2"
3 pieces 2 1/2" X 16 1/2"
2 pieces 3 1/2" X 16 1/2"
2 pieces 4" X 19 1/2"

also for quilt:
a large piece for the back
batting
strips for binding {optional - see the binding section of the post}

Pillows:
2 pieces 10" X 7 1/2" for each large pillow
2 pieces 5" X 4" for each small pillow
polyfill

basic sewing supplies like:
thread
scissors
sewing machine


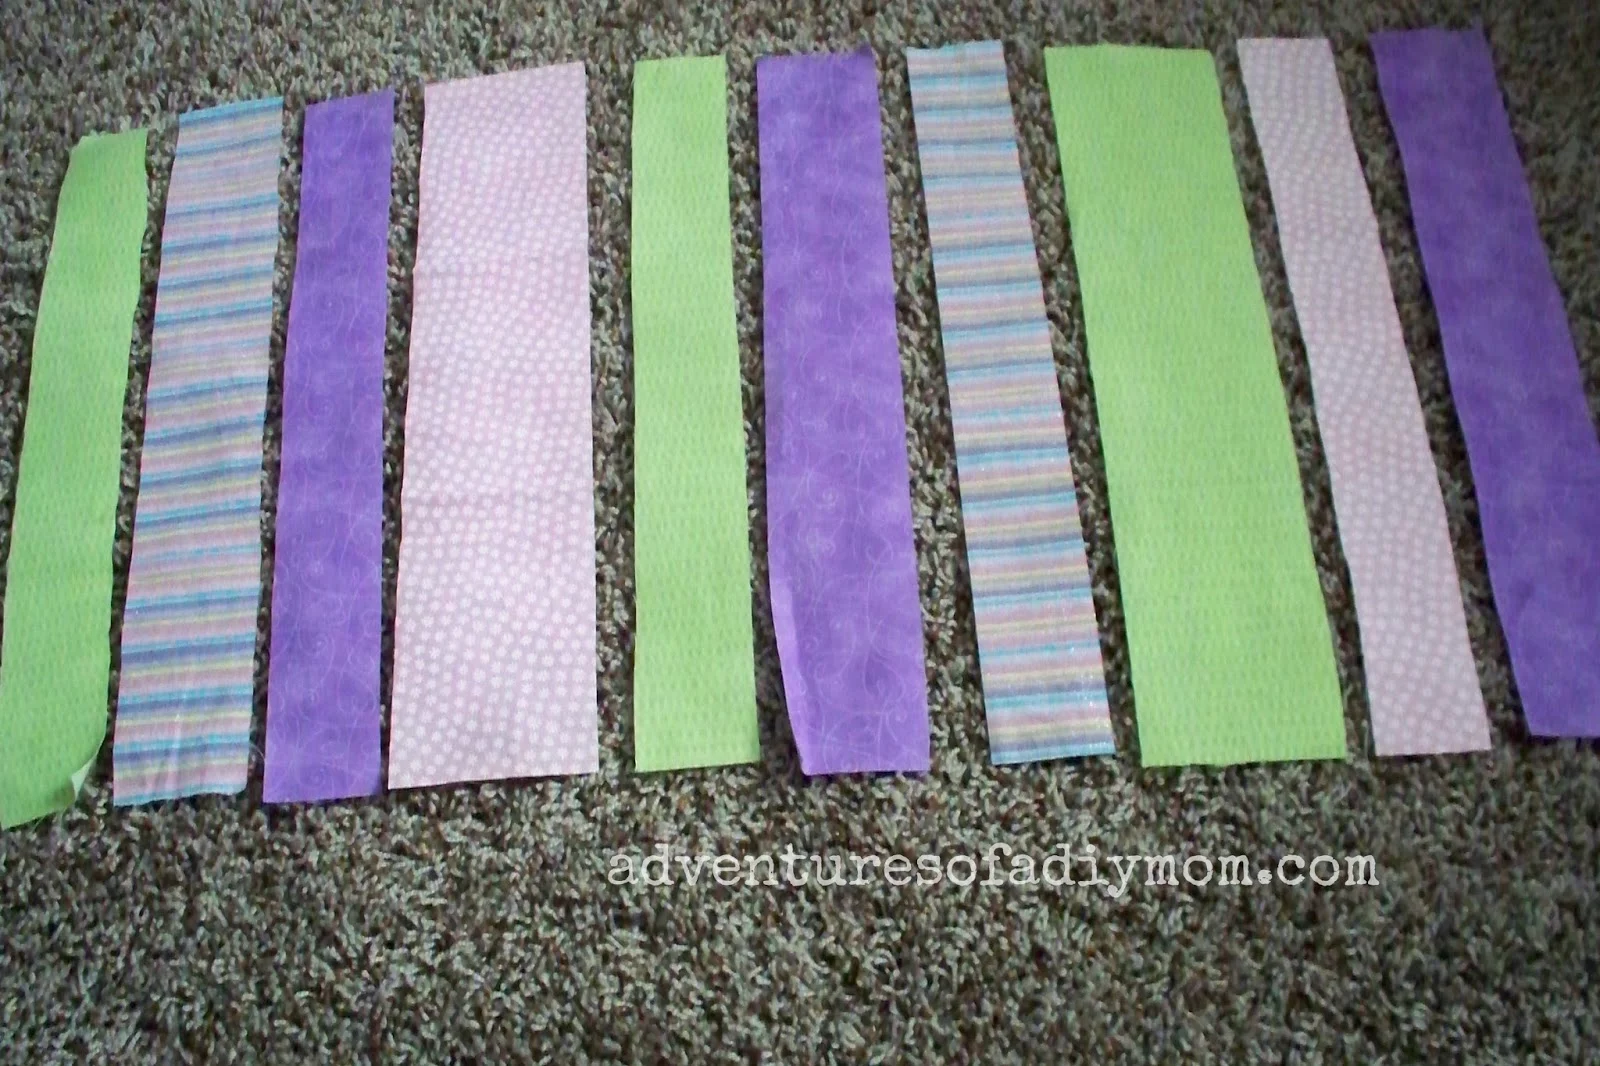
Cut out your pieces and arrange in the pattern you'd like them- I kind of went with a random pattern. {The edge pieces are not shown}

Doll Quilt for Farmhouse Doll Bed

Sew the 16 1/2" pieces together using a 1/4" seam allowance. Press the seams flat.

Doll Quilt for Farmhouse Doll Bed

Now sew on your 19 1/2 " pieces to the sides, using a 1/4" seam allowance. Press seams flat. It almost seems like the quilt should lay vertical like in the picture. However the beds are really wide so they end up working just right with the stripes horizontal.

Doll Quilt for Farmhouse Doll Bed

Now it's time to cut out your batting, back and binding. I used the top of the quilt as a guide and cut out the batting and the back. I luckily had a piece just big enough for the back on this one. You will also need to cut some 2 1/2" strips for the binding. I already have a tutorial on quilt binding, so I'll refer you to that post when you get to the binding part.
If you have a piece that's larger than your front, then you could use the back as the binding as I shared with my How to Tie a Blanket Series. If you decide to do it that way, then you'll need to cut the back about 1 1/2 inches larger all the way around.

Doll Quilt for Farmhouse Doll Bed
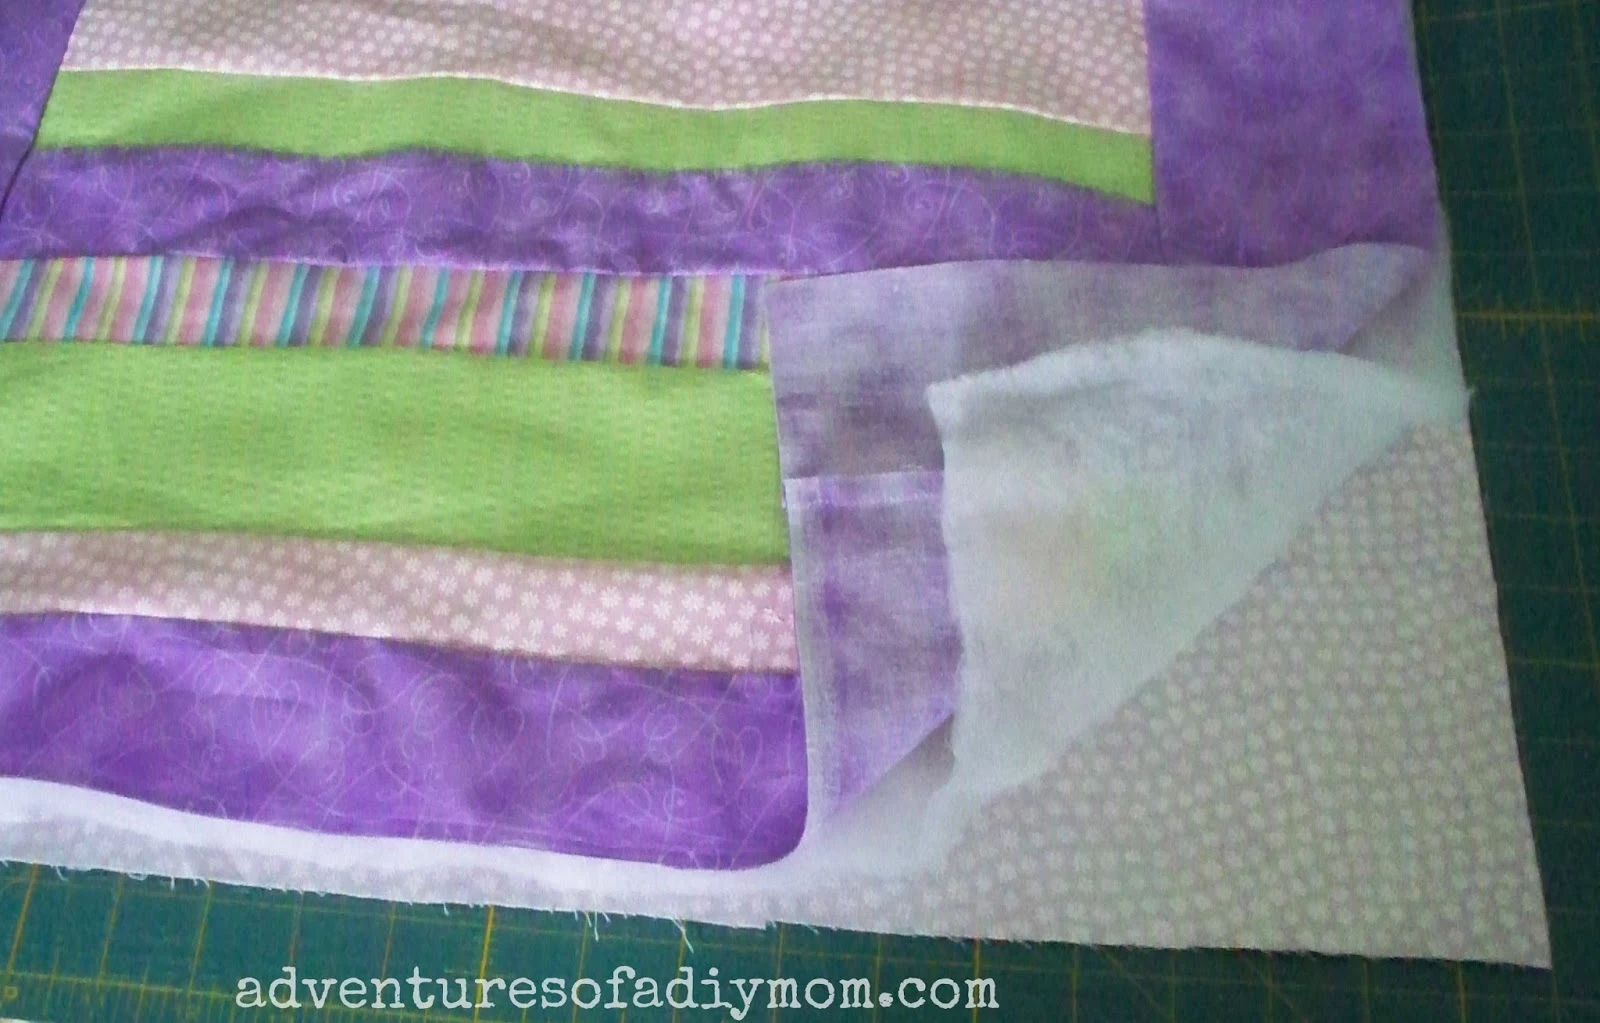
Layer your pieces with the back face down, the batting, then the front face up. Pin all over to keep the pieces from sliding around as you work. Now sew along each seam, stitching in the ditch. I did all the stripes first and then went back and did the two side seams.
Doll Quilt for Farmhouse Doll Bed

Next is the binding. I really don't see the point in re-creating tutorials for binding, so here are the links to the tutorials I've done already. How to Sew a Quilt Binding - this is the one where you cut an extra piece for the binding.   How to Bind a Blanket  - this is the one where you cut your back out a little larger and use it for the binding.
The quilt binding is the more correct way {according to my mom, who is a quilter}, but the blanket binding is quicker. I did one each way, simply because I didn't have a big enough piece to make the back larger.

Doll Quilt for Farmhouse Doll Bed

I also made some pillows. It's fairly basic and I'll walk you through it.

For the large pillow I cut two pieces 10" X 7 1/2". With right sides together, I sewed all the way around the rectangle, leaving 2-3" opening. Clip the corners, then turn right side out. Stuff with polyfill and then handstitch the opening closed.

Doll Quilt for Farmhouse Doll Bed

The small pillows were 5" X 4".

Doll Quilt for Farmhouse Doll Bed
Do your girls love dolls too?

You may also like: 
Quick and Easy Striped Quilt

Farmhouse Doll Bed

American Girl Doll Clothes

Thursday, January 15, 2015

Soft and Chewy Cinnamon Bread Recipe

Soft and Chewy Cinnamon Bread Recipe

You all know my love for breads. This recipe is one of my favorites. The bread is soft and chewy and filled with gooey cinnamon goodness. Perfect to surprise your kids with a warm-from-the-oven afternoon snack, or toast it in the morning with your breakfast. However you choose to eat it, you will love it.

Wednesday, January 14, 2015

Fabric Embroidered Bookmarks


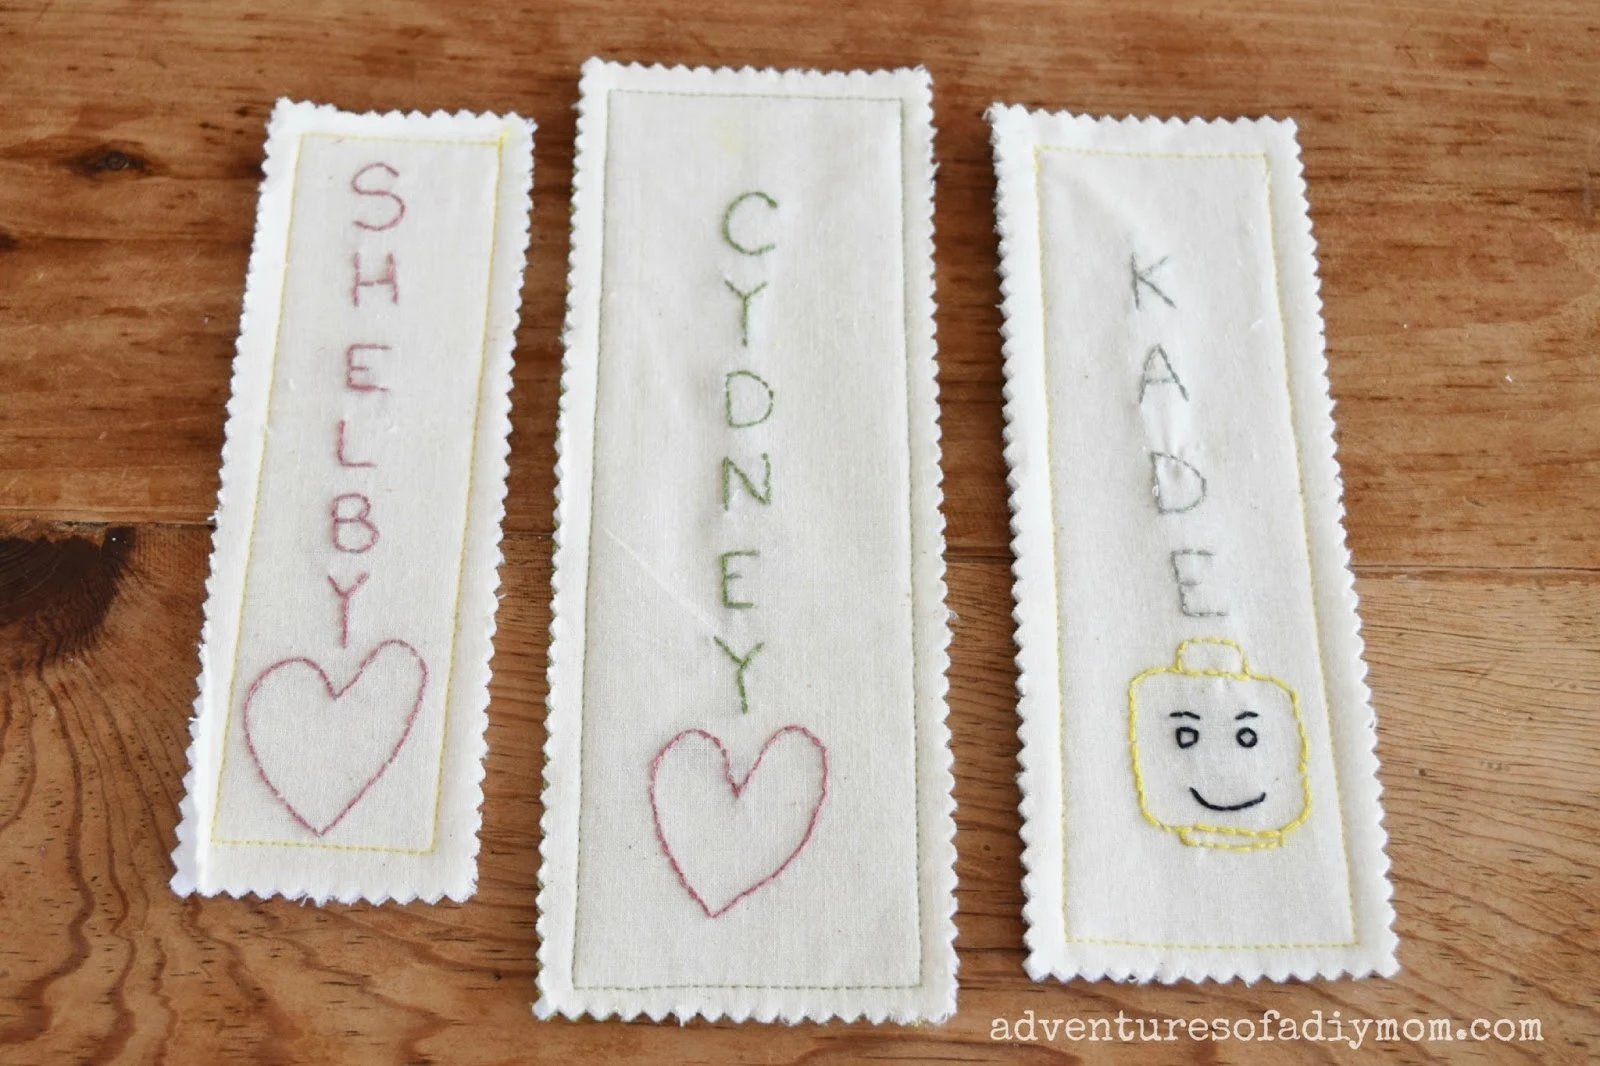
My youngest daughter embroidered these fabric bookmarks for her siblings for Christmas this year. She's only five. I am super impressed with her attention to detail and the fact that she stuck with it until they were done. I helped her knot the thread and tie it off, but she did all of the embroidery herself.
 
Fabric Embroidered Bookmarks

We started at the beginning of November and pulled them out every few days and she would do a little bit or a lot depending on her mood. I think one of the reasons that this was enjoyable for her was that I tried not to rush her. We started in plenty of time and I let her quit when she was tired of doing it.

Want to help your kids make Fabric Embroidered Bookmarks? 


You will need:
1 piece muslin 
1 piece fabric for back
1 piece pelton - this is a very stiff piece of interfacing
Cut all three of the above to 3 1/2" X 10"

embroidery thread
sewing thread
pinking shears

Fabric Embroidered Bookmarks
 1&2 - Write the letters of the name on a strip of paper. I had my daughter draw the hearts so that's why they are on a different piece of paper. You could totally do it all on one paper. Then tape the paper to the window.

3 - Tape a piece of muslin to the window centering it over the letters. Then trace over the letters with a pencil.

4 - This is how it should look now.

5 - Gather your embroidery thread and do a back stitch over the letters and heart.

6 - Once you're done press your fabric and then layer it with the embroidery on top face up, the pelton in the middle and your printed fabric on the bottom face down.

7 - With coordinating thread stitch in a rectangle around the embroidery.

8 - Using pinking shears, trim the edges to help prevent fraying and for cuteness:)

Fabric Embroidered Bookmarks

Here's a picture of them all together. She wants to make one for herself too, but we haven't quite had time to finish it yet.

Fabric Embroidered Bookmarks
 And the back - we went through the scraps and she picked out fabric she thought they would like.

Have your children done any embroidery? Do they like it?

Check out these ribbon bookmarks, or this huge list of handmade bookmarks.

Other handmade gifts:


Monday, January 12, 2015

DIY Pearl Cluster Necklace Tutorial in Young Women Value Colors

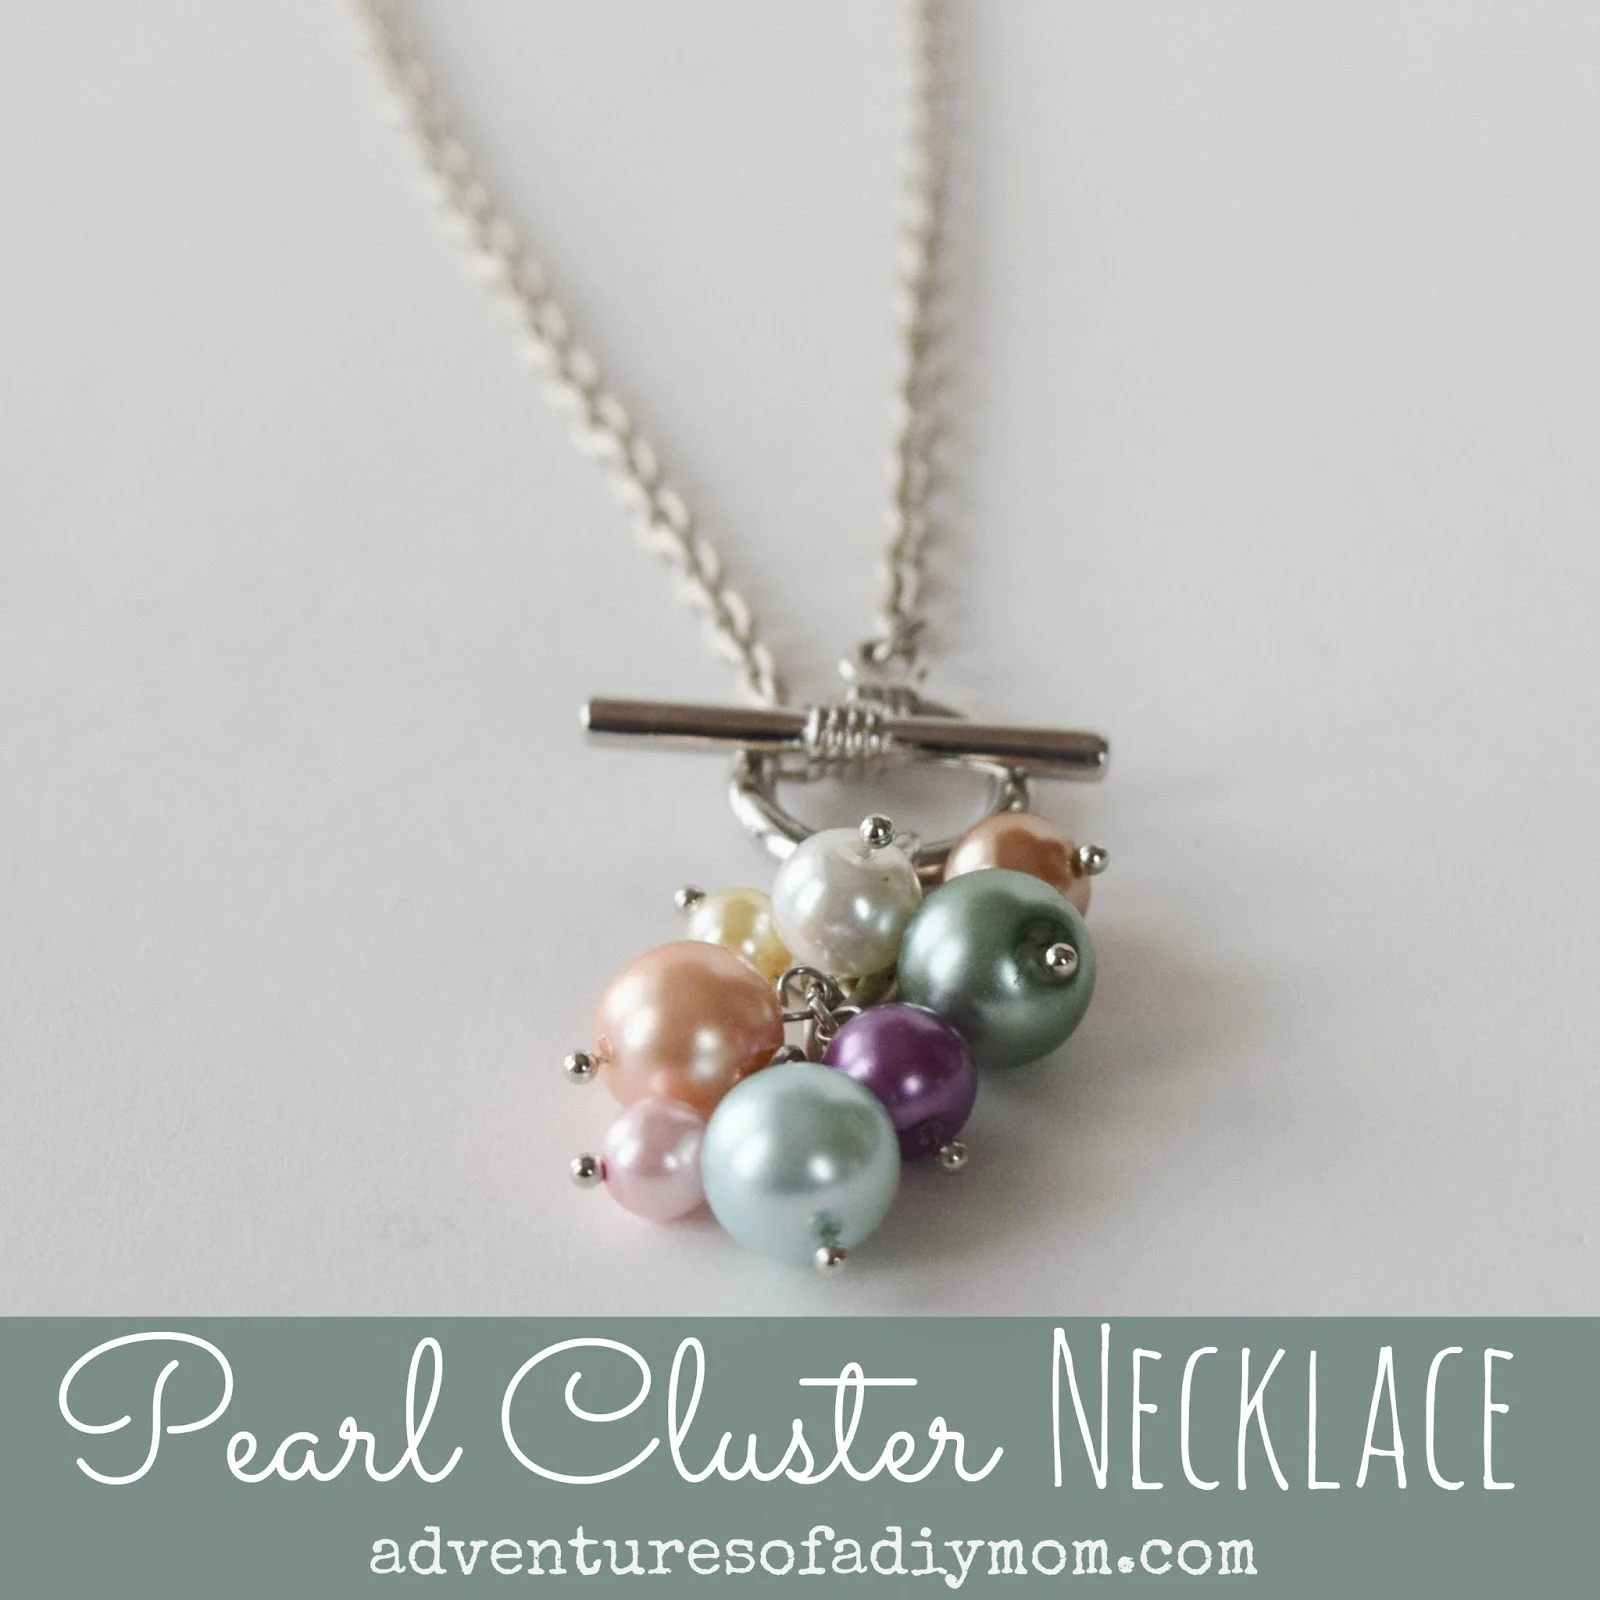
DIY Pearl Cluster Necklace Tutorial
I've taken a long break from blogging over the holidays. But that doesn't mean I wasn't busy creating. I wanted to make something special for my Young Women girls for Christmas. Since there are 18 of them it had to be something not too time consuming and something they would like. I came up with this simple pearl cluster necklace, with the pearls being the colors of the Young Women Values.

For those of you not familiar with Young Women's, it is the organization for girls ages 12-18 in The Church of Jesus Christ of Latter Day Saints. There are 8 values that the girls learn about and try to live by. Each value has a color associated with it.

DIY Pearl Cluster Necklace Tutorial in Young Women Value Colors


Faith - white
Divine Nature - blue
Individual Worth - red
Knowledge - green
Choice and Accountability - orange
Good Works - yellow
Integrity - purple
Virtue - gold

I wanted a softer look, so I went with pastel colors. For example, instead of red I did pink. The girls loved the necklaces.

Want to make your own Pearl Cluster Necklace? 


You will need:

Chain
Toggle Clasp
Ball Pins
Large Jump Rings

Pearls - you could do any color combo that you like - or even do them all the same color. Below are the colors I used.  I used a few different sizes of pearls ranging from 6mm to 10mm

White 8mm Pearl
Turquoise 10mm Pearl
Pink 6mm Pearl
Sage 10mm Pearl
Peach 10mm Pearl
Light Yellow 6mm Pearl
Purple 8mm Pearl
Gold 8mm Pearl

Making your Pearl Cluster Necklace:

DIY Pearl Cluster Necklace Tutorial

Cut a 20" piece of chain, add each piece of the toggle clasp to the ends of the chain with a jump ring.

DIY Pearl Cluster Necklace Tutorial

Cut another piece of chain 6 links long {or about 3/4" if using another type of chain}. Add it to the toggle clasp with a jump ring.

DIY Pearl Cluster Necklace Tutorial
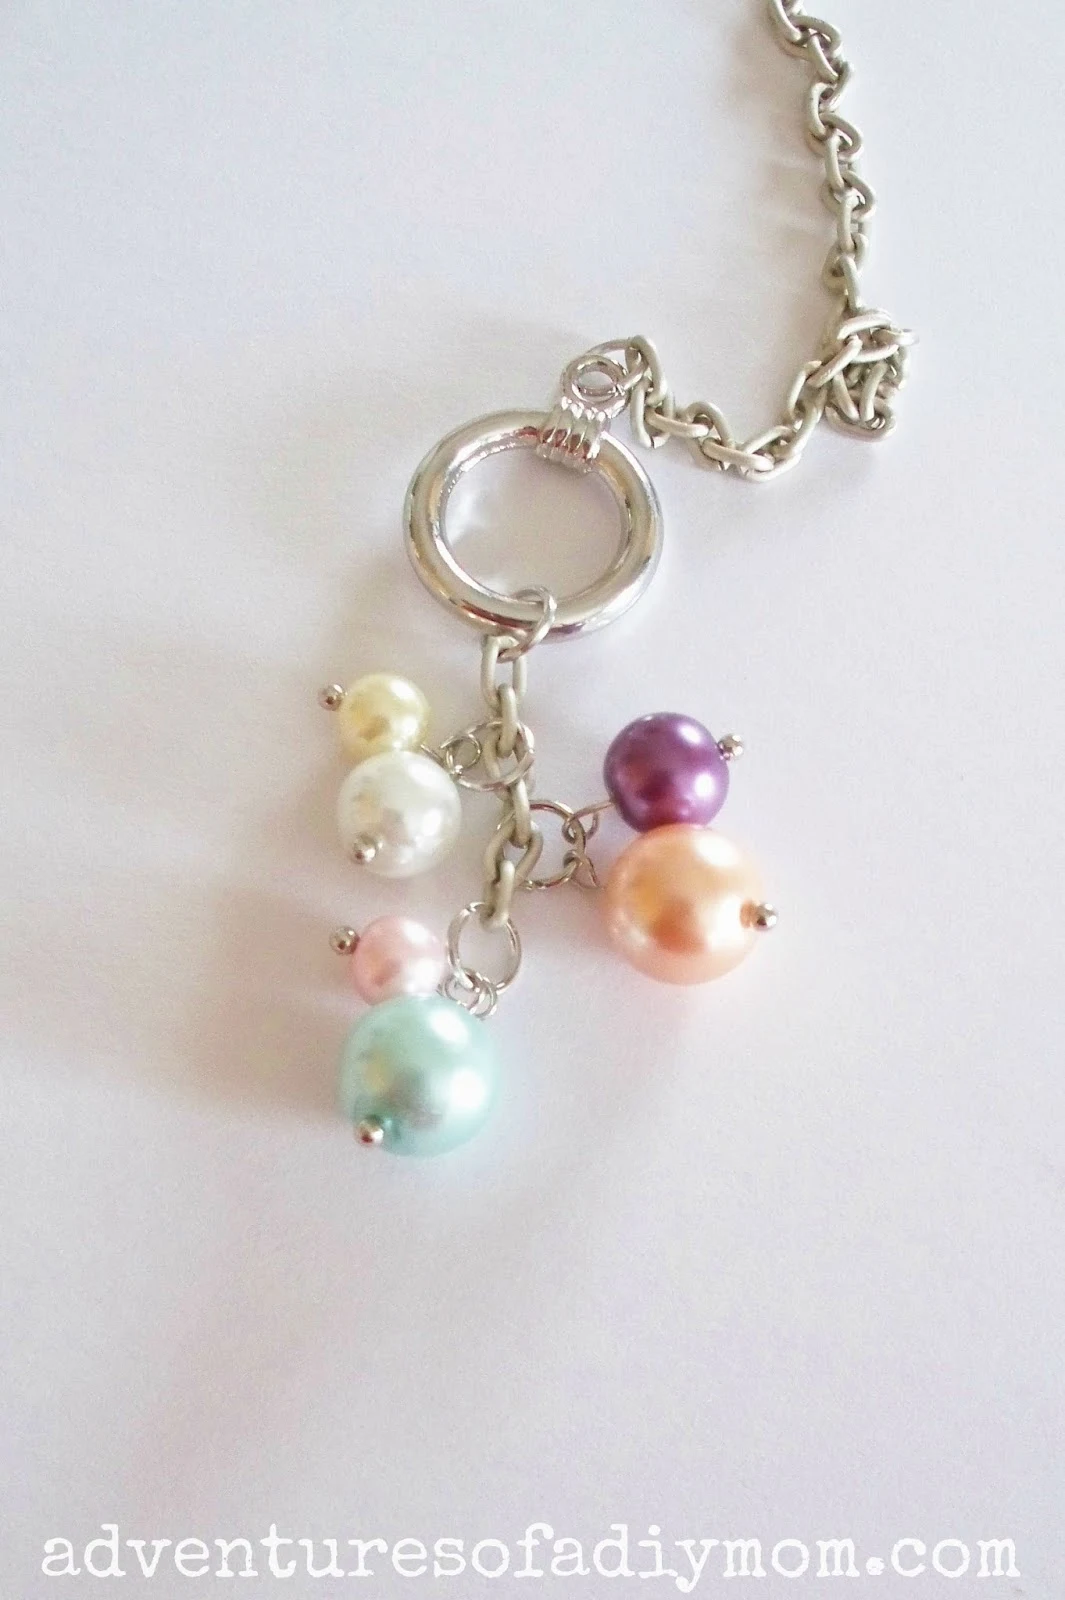
Insert each pearl onto a ball pin and form a loop at the top. I love these little ball pins, it gives the necklace a much more finished look.

Now it's time to add the pearls to the little piece of chain we cut.

DIY Pearl Cluster Necklace Tutorial

Add two pearls to a jump ring and attach it to the bottom link of the chain.

DIY Pearl Cluster Necklace Tutorial

Add two more pearls to a jump ring and attach it to the 3rd from the bottom link.

DIY Pearl Cluster Necklace Tutorial

Add another two pearls to a jump ring and attach it to the 2nd from the top link.

DIY Pearl Cluster Necklace Tutorial


Add the last two pearls to a jump ring and attach it to the top link of the chain.

And that's all there is to it. Super easy and yet so pretty!

DIY Pearl Cluster Necklace Tutorial in Young Women Value Colors

What do you think? What color{s} would you make your necklace?