Thursday, February 26, 2015

Karate Board Breaking Display - How To

Today I'm going to show you how I decided to display the boards my son broke at his Karate class. This has been on my to-do list for well over a year.

So when I was brainstorming homemade Christmas gift ideas for my kids to do for each other, I thought of this. My daughter did all the work. She's 12 and thought it was pretty cool to use the power saw and nail gun. {with supervision, of course}

How to Make Karate Board Breaking Display

The first time he broke this one, it was right at the end. So they decided to have him break the same board again. It makes for a much cooler display than just having two pieces.

This was pretty easy to put together. I'll walk you through it.

How to Make a Karate Board Breaking Display

1- Cut three pieces of 1 X 4 to 18 inches long. {adjust to fit the size of your broken boards}

2- Sand the wood.

3- Stain the wood. {I used Early American by Minwax} Let dry thoroughly.

4- Spray with a clear coat of lacquer.

5- To connect all the boards together we nailed some paint sticks on the back. Just check the length of your nails so they don't go all the way through to the front.

6- Attach a D-ring hanger to the back.

7- Attach the broken boards to the front using wood glue. Then set something heavy on top until it's dry.

How to Make Karate Board Breaking Display

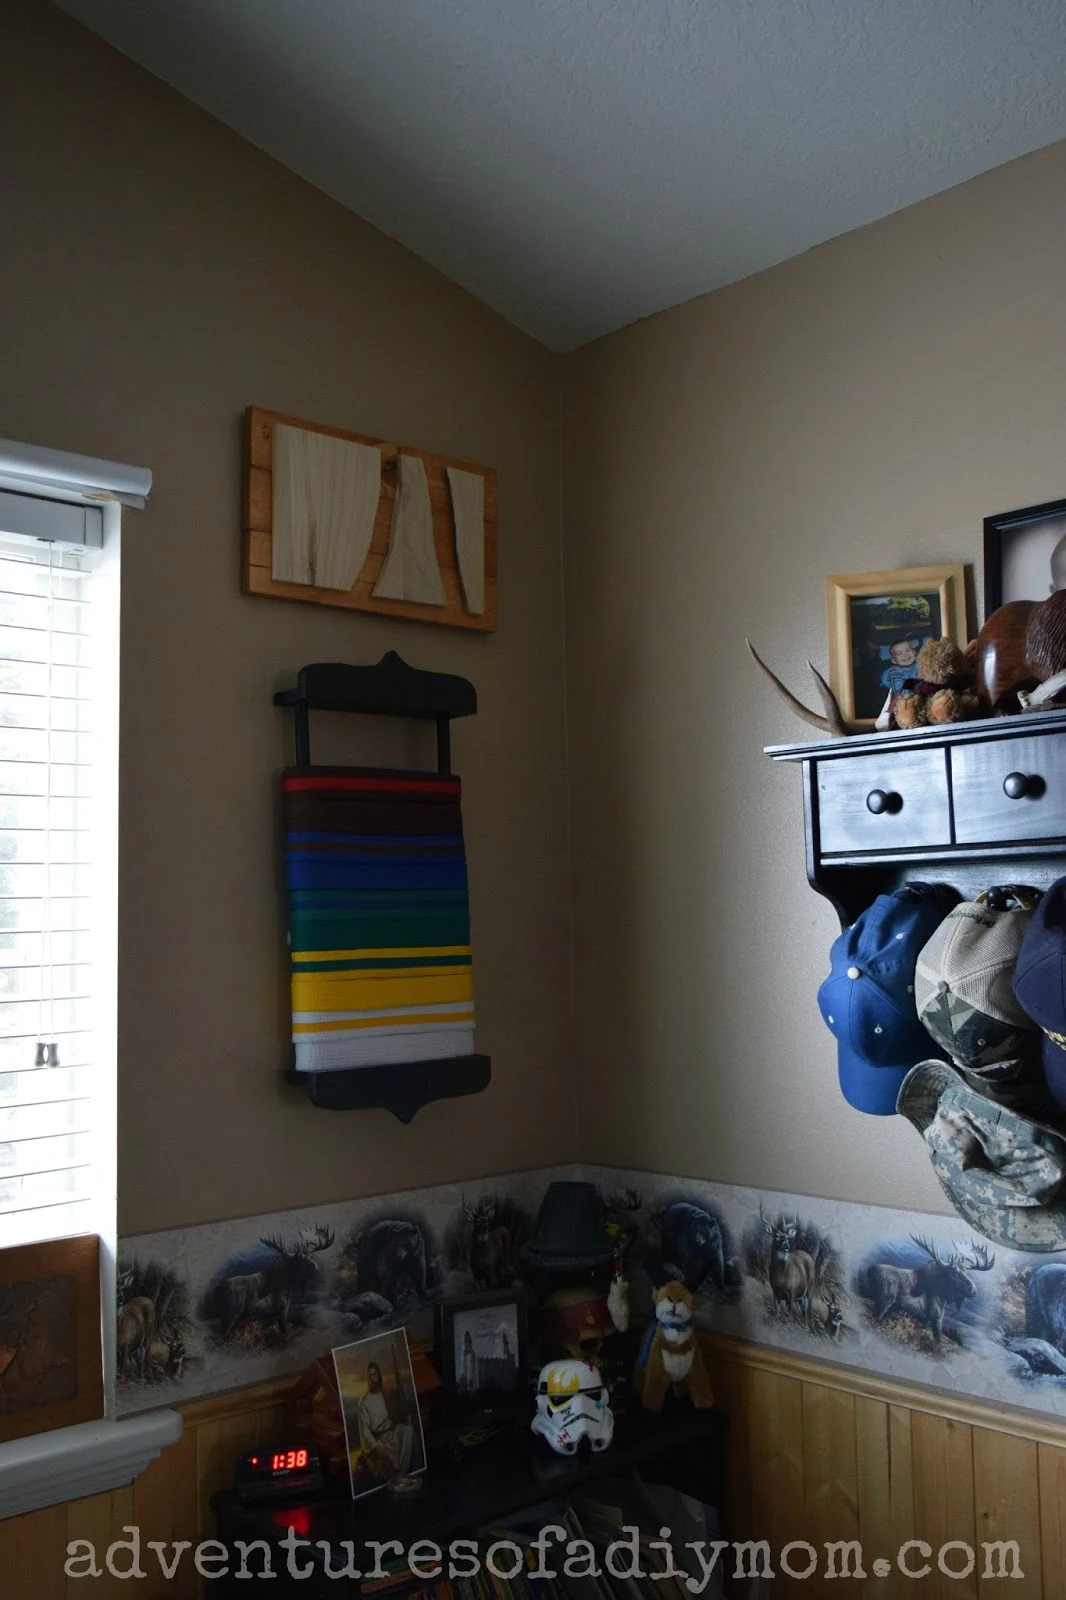
 Here it is in his room with his DIY Karate Belt Holder. 

How to Make Karate Board Breaking Display


Monday, February 23, 2015

Orange Knots

One of my favorite treats in the wintertime is Orange Rolls. In this version I made them into a knot shape. I usually use Rhode's rolls to make them, but this year I decided to try making them all the way from scratch.

I used the same dough recipe as my Garlic Knots, but of course used an orange topping instead of garlic. They turned out perfect! The knots are rolled in butter and then in a sugar/orange rind mixture before baking. While they are still warm I drizzled an orange glaze over the top.

Orange Rolls - Orange Knots Recipe

These orange knots are simply scrumptious!

Orange Rolls - Orange Knots Recipe


Orange Rolls - Orange Knots Recipe
Enjoy!


Orange Knots

Orange Knots

Yield: 16
Author:
prep time: 60 H & 20 Mcook time: 15 Mtotal time: 60 H & 35 M
Orange knots dipped in orange sugar and drizzled with orange glaze. YUM!

ingredients:

Dough
  • 1 1/2 c. warm water
  • 1 T. honey
  • 2 1/4 t. yeast
  • 2 T. olive oil
  • 3 1/2 - 4 1/2c. bread flour
  • 1 t. sea salt
Topping
  • 1/4 c. butter, melted
  • 1 c. sugar
  • zest of one orange
Glaze
  • 1 c. powdered sugar
  • 1 T. butter, melted
  • juice of one orange
  • 1/2 t. vanilla

instructions:

How to cook Orange Knots

  1. Combine water, honey and yeast in a small bowl, mix and let sit for 5 minutes.
  2. Combine the remaining dough ingredients, then add the yeast mixture.
  3. Knead 5 minutes in a stand mixer.
  4. Let rise until double (about an hour).
  5. Punch down the dough and divide into 16 pieces. 
  6. Roll each piece into a snake and then form a knot.
  7. Combine sugar and orange zest in a small bowl. Melt the butter in another bowl. Dip each knot into the melted butter, then dip in the orange sugar. 
  8. Place knots on a greased cookie sheet and bake at 350 for 15-20 minutes.
  9. While rolls are baking, mix together all of the glaze ingredients. Drizzle glaze over orange knots while still warm.
Calories
233
Fat (grams)
6.5
Sat. Fat (grams)
2.9
Carbs (grams)
42.6
Fiber (grams)
1.1
Net carbs
41.5
Sugar (grams)
23.2
Protein (grams)
2.7
Nutritional information is automatically generated and is not guaranteed to be correct.
orange rolls, orange knots, homemade orange rolls
Desserts
American
Created using The Recipes Generator

Thursday, February 19, 2015

How to Make a Burlap and Twine Memo Board

One of the biggest sources of clutter on my kitchen counters are memo's to myself. I forever have sticky notes or papers from school taking over my space.

So I set out to make a little memo board to help me keep track of important papers or appointments without all the clutter.

I love the burlap and twine combo. And the cute little metal flowers are the perfect embellishment.


how to make a burlap and twine memo board

I love how it turned out. Here is the whole "desk" area of my kitchen. You may remember by little mini dresser and my mail slot organizer.

how to make a burlap and twine memo board
I didn't want to damage the wood of the cabinets, so I bought some command strips that are kind of like velcro. They attach to the frame and also the wall and the pieces interlock and are very strong.

Want to Make Your Own Memo Board?

You will need:
frame, painted and distressed if desired - I used a 10X13 size.
foam board
batting
burlap
twine
upholstery tacks, decorative brads, or buttons
hot glue

how to make a burlap and twine memo board
1- Begin by cutting the foam board to fit inside the frame.
2 - Cut a piece of batting the same size as the foam board, Cut a piece of burlap about an inch bigger all the way around.
3 - Place the batting and the foam board on top of the burlap and then wrap the burlap over the edges of the foam board and hot glue in place.
4 - Attach your twine with hot glue. I started from corner to corner, gluing the twine to the back side. Then I glued twine from the middle to middle.
5 - Insert into your frame.
6 - Add embellishments - I used the little metal flower embellishments. Upholstery tacks, buttons, or brads would work.

how to make a burlap and twine memo board
Here's just a few things on it - I've had it over a month now and it's filled up quite a bit. 

I have a funny story about this. This happened about a week after I hung the memo board.  My son got a picture packet for basketball pictures. A few days before the pictures, I could not find the packet any where. I searched in all the places where I thought I would have put it. The night before, I found it. Guess where it was? You got it, on my memo board. Needless to say, now that's the first place I look.

Have you ever started a new organization system?

Wednesday, February 11, 2015

Valentines Day Crafts

Today I'm going to show you some of my favorite Valentines Crafts. Please click through to the post before pinning. Thanks!

12 Valentines Crafts


Love Letters

I love these Love Letters by Beyond the Picket Fence.  
I even found a little heart shaped pan at a yard sale, but I haven't had a chance to make my own version yet.
Easy Valentine Heart Specimen


Easy Valentine Heart Specimen by Shaken Together Life
This is so cute and looks pretty easy. I also love the yarn wrapped trees. So cute!

Cherry Berries on a Cloud
 Cherry Berries on a Cloud by  Can't Stay Out of the Kitchen
I was going to stay with crafts, but I saw this and I just had to include it. It looks simply divine! I'm totally making it.


Heart Collector Pillow
Anthro Knockoff Heart Collector Pillow by Miss Lovie
I like her knockoff version better than the original.

Personalized valentines Candles
These are super easy and fun for kids. My kids made them last year for their teachers and grandparents.


Intertwined Heart
Intertwined Heart made from scrap molding by Remodelando la Casa. Check out the easy and inexpensive way she crackled the paint.

carved wood

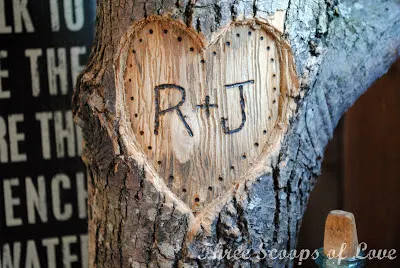
You and Me on a Tree by Three Scoops of Love
 This looks like a bit of work, but I love the end result!

DIY Valentines Art


DIY Heart Tree
DIY Heart Tree by A DIY Project
This looks to be a simple project and I love the outcome.


Valentine Heart Jars
Valentine Heart Jars by Mason Jar Love
Love those little hearts!

Valentines Mason Jars

Valentines Jars by The Pleated Poppy
 How easy are these?! The baker's twine add the perfect finishing touch.

Valentines Embroider
Valentines Embroidery by i heart linen
Another simple, yet adorable project!

key to my heart valentine art

Key to my heart Valentine Art by Shaken Together

Hope you were inspired to create something this Valentines.


Monday, February 9, 2015

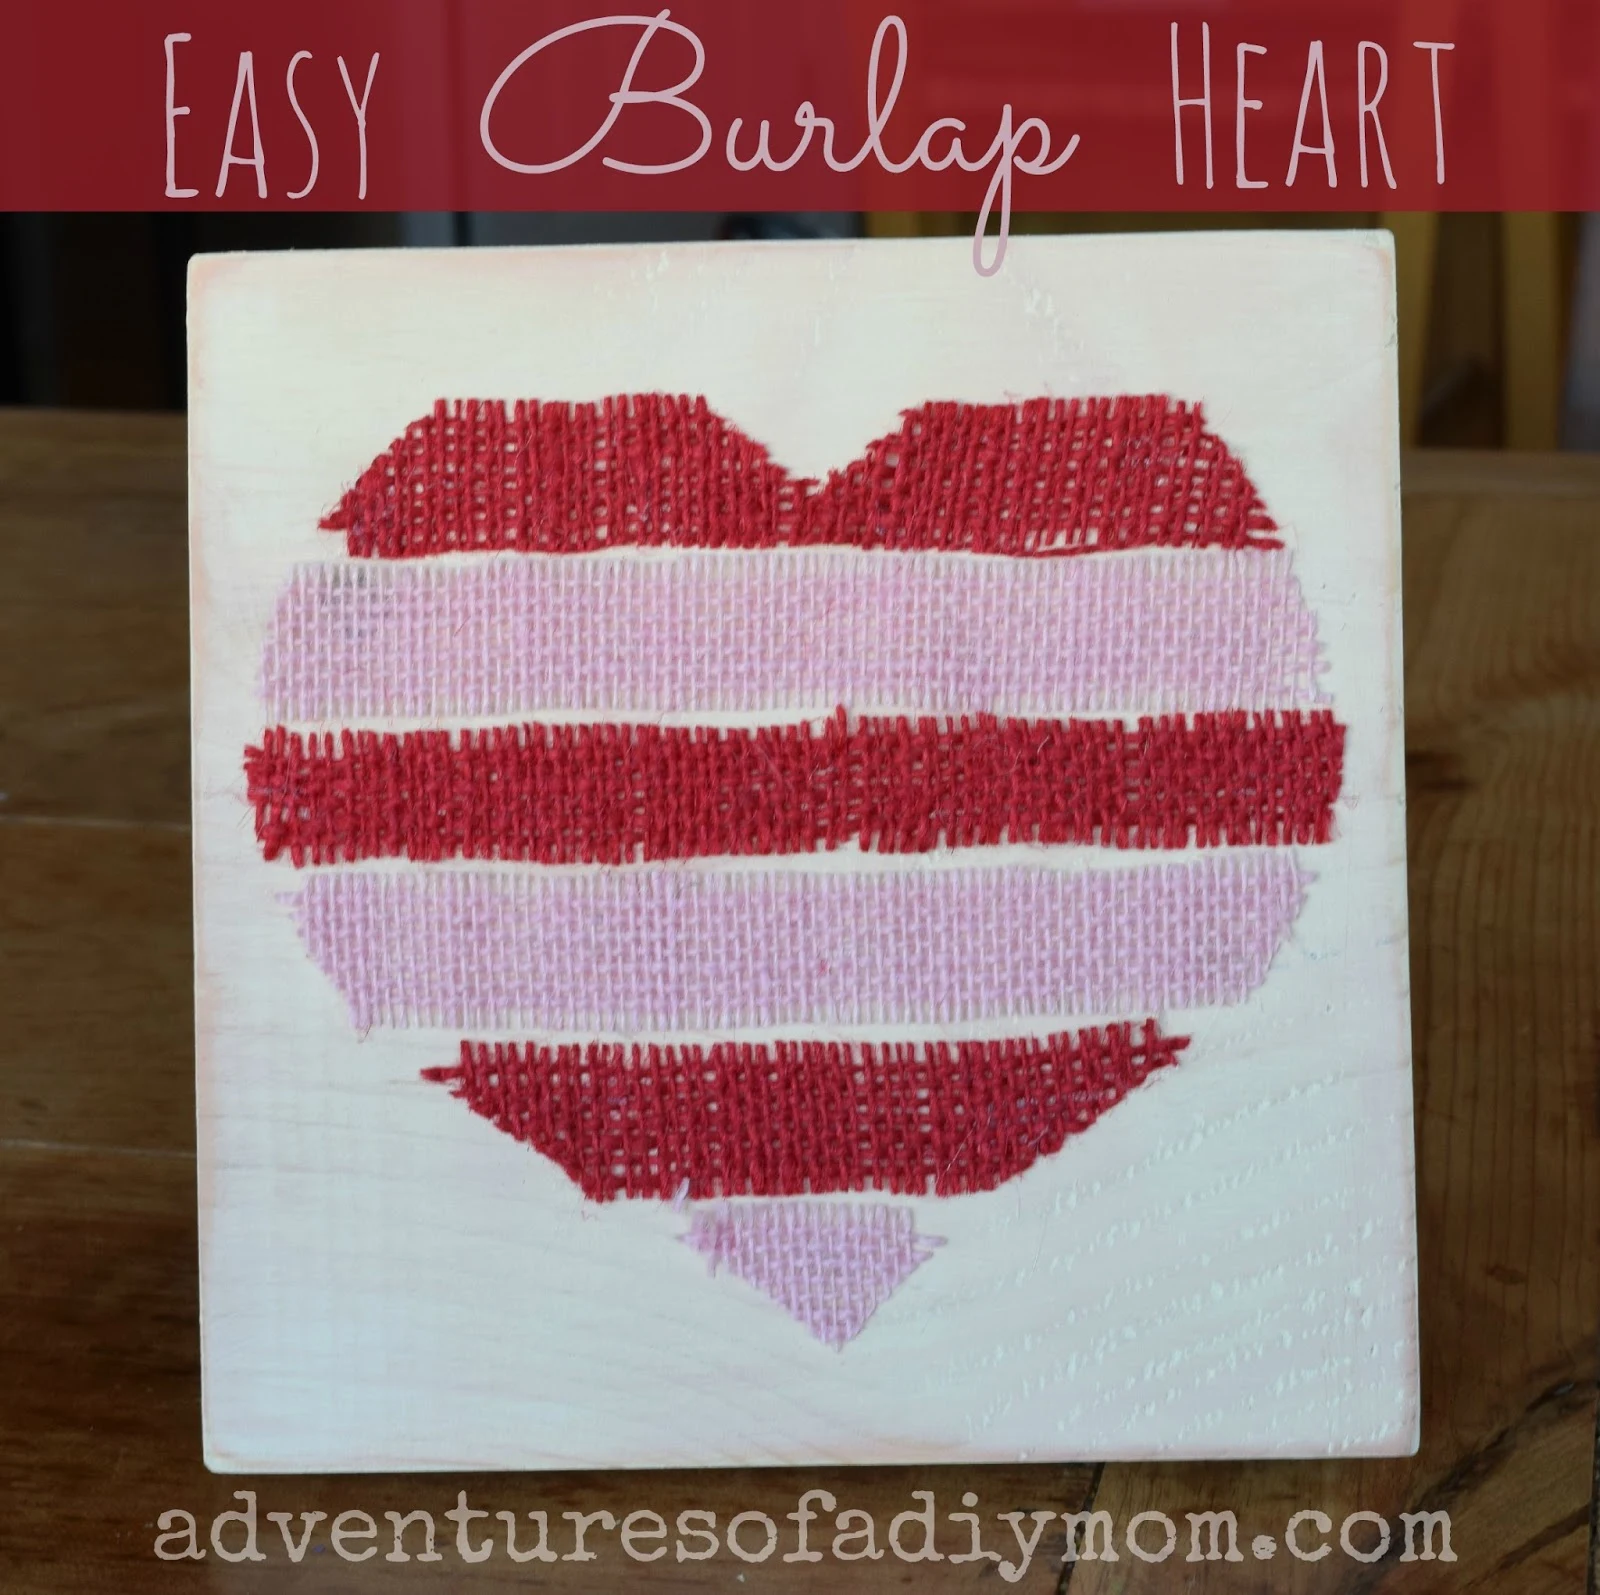
Easy Burlap Heart Valentines Board

Easy Burlap Heart Valentines Board
Need a quick Valentines project? This easy burlap heart decoration is perfect for Valentines Day. It's super easy to make and so cute. I happened to have scraps of all the materials needed, so it was free too. I love projects like that!  

Want to make your own Burlap Heart? 

Here's how:

I started off with a piece off wood from the scrap pile. It was about 6x6. To make it stand, I added a piece to the back like I did with my Vinyl and Wood Valentines Art from last year. Then I painted one coat of cream paint, sanded the edges down a bit, and then took a distressing ink pad and rubbed over it slightly.

Easy Burlap Heart Valentines Board
For the burlap heart, I took strips of red and pink burlap and laid them out. I cut out a heart on a piece of paper. I set the heart on the burlap and then carefully cut the heart shape a piece at a time. Once they were all cut out, I simply hot glued them to the board.

I think a heart from regular burlap on a stained piece of wood would look nice too.


Friday, February 6, 2015

Valentines Earrings

This is the last installment of Valentines jewelry week here on Adventures of a DIY Mom. These have got to be the easiest earrings I've ever made.  I actually made these in December and have been wearing them ever since. They are super light weight. You can't even feel that you're wearing them.

Heart Valentines Earrings
For these earrings you will need:
Heart Charms
Jump Rings
Earrings

Attach the charm to a jump ring. Attach that jump ring to the earring with another jump ring. Super simple!  And so pretty!

In case you missed it -
Here's the schedule for Valentines Jewelry Week:
Monday: Valentines Bracelet and Earring Set Tutorial
Tuesday: Valentines Heart Bracelets {for little girls}
Wednesday: Valentines Heart Necklace
Thursday: Valentines Sparkle Heart Necklace {for little girls}
Friday: Valentines Heart Earrings


I am a member of the Cousin Creative Circle. I receive product from Cousin Corporation of America. In return, I create jewelry pieces from that product, and share about them through my blog and other social media outlets. All opinions expressed in this post are mine.

Thursday, February 5, 2015

Sparkle Heart Valentines Bracelets

Sparkle is a girls best friend. These sparkle heart bracelets are perfect for the little girls in your life. These bracelets are easy to make and festive for the Valentines season.

Sparkle Heart Valentines Bracelet
Welcome back to Valentines Jewelry week. We started it off with my Valentines Bracelet and Earring Set. Then I showed  you some fun heart bracelets and a heart necklace. Today I'm back with some more fun heart bracelets. But this time they are made with SPARKLE heart beads. My two little girls are totally into sparkles so they will love these.

Sparkle Heart Valentines Bracelet


They are super easy to make. I don't really have a tutorial, just string the beads onto elastic and knot the ends. Your kids can do the stringing and you can help them tie the knots. I always add a touch of glue to the knot to help it hold.

Sparkle Heart Valentines Bracelets
Enjoy!

Here's the schedule for Valentines Jewelry week:
Monday: Valentines Bracelet and Earring Set Tutorial
Tuesday: Valentines Heart Bracelets {for little girls}
Wednesday: Valentines Heart Necklace
Thursday: Valentines Sparkle Heart Bracelet {for little girls}
Friday: Valentines Heart Earrings

 I am a member of the Cousin Creative Circle. I receive product from Cousin Corporation of America. In return, I create jewelry pieces from that product, and share about them through my blog and other social media outlets. All opinions expressed in this post are mine.

Wednesday, February 4, 2015

Valentines Necklace

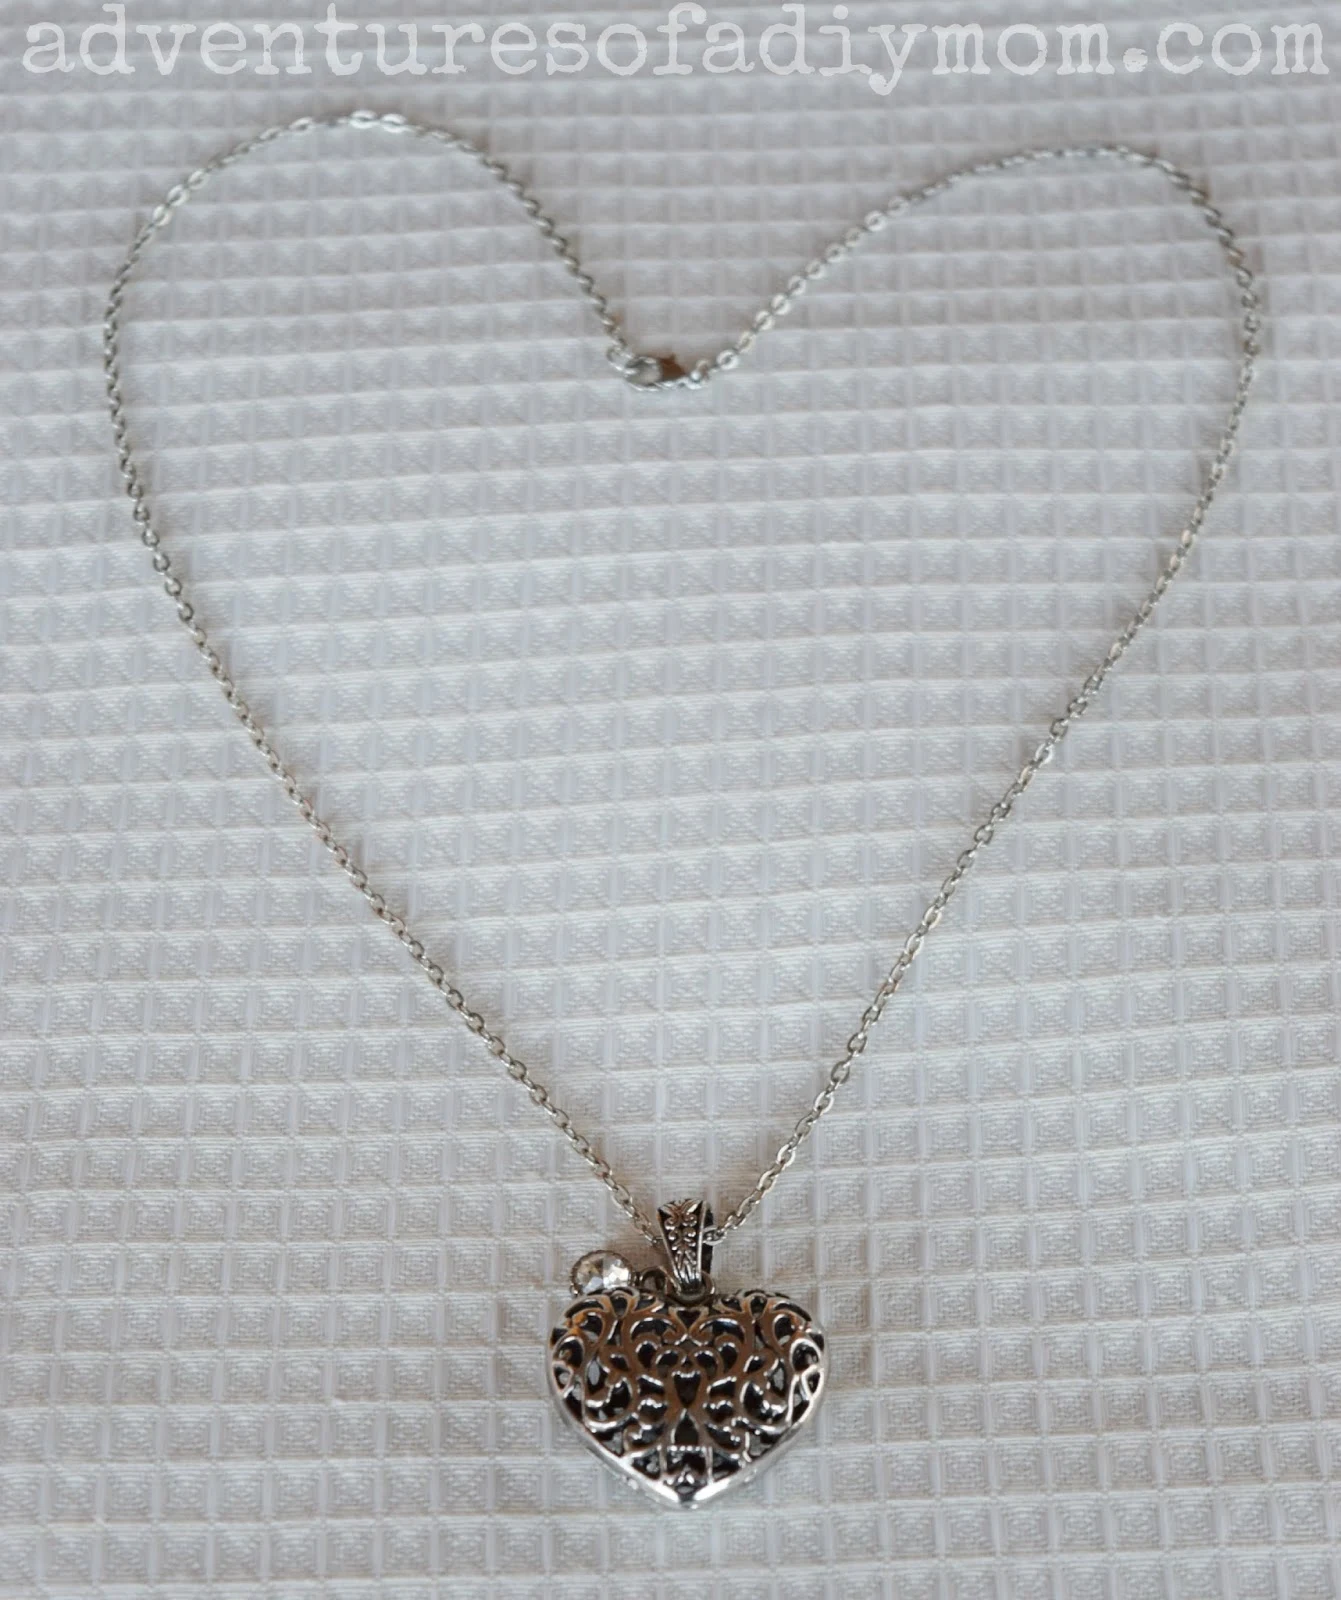
It's Valentines Jewelry week here and today I finally made something for myself - a heart necklace. It was super simple and it can be worn even after Valentines is over.


Valentines Heart Necklace

  I made this super easy necklace with this heart pendant. I simply cut  a piece of chain to the desired length. Attached a jump ring to one end and a clasp to the other. Then I slid on the pendant. So easy!


Valentines Heart Necklace


Here's the schedule for Valentines Jewelry Week:
Monday: Valentines Bracelet and Earring Set Tutorial
Tuesday: Valentines Heart Bracelets {for little girls}
Wednesday: Valentines Heart Necklace
Thursday: Valentines Sparkle Heart Necklace {for little girls}
Friday: Valentines Heart Earrings


 I am a member of the Cousin Creative Circle. I receive product from Cousin Corporation of America. In return, I create jewelry pieces from that product, and share about them through my blog and other social media outlets. All opinions expressed in this post are mine.

Tuesday, February 3, 2015

Heart Valentine Bracelets

Create an adorable Valentines bracelet for your little girl. This bracelet is comprised of colorful heart beads and is easy to make.

 It's Valentines Jewelry week here at Adventures of a DIY Mom. I had a jewelry making session a few weeks ago and made my girls {and myself} some fun and festive Valentines jewelry.
Kids Heart Valentines Bracelet

I made my oldest daughter a bracelet and earring set for Valentines. So, of course, I had to make my little girls some too. I'm loving these fun heart beads.

Heart Valentine Bracelets


Monday, February 2, 2015

Valentines Bracelet and Earring Set Tutorial

Welcome to Valentines jewelry week. Each day this week I'll be sharing a different piece of Valentines jewelry. I'm super excited to show you all my different creations, so be sure to follow along.
Valentines Earrings Tutorial

 These darling heart earrings are made with heart eye pins, heart chain and of course a heart charm. I made them for my daughter for Valentines Day. And of course, I made a matching heart bracelet for her too. 

Valentines Bracelet Tutorial
I've been making a lot of jewelry lately. And there is a reason for that. I don't think I've mentioned it on the blog yet, but Cousin Corporation of America asked me to be part of the Cousin Creative Circle. As an ambassador, I get to help them design pieces for their clients. I also get to try out their products and then create tutorials for you. You can find their products at Walmart, Joann's, Michaels and more. Their online store is Prima Bead, who I've worked with for over a year.

So when I create a tutorial, I will  try to share with you the exact products I used. I really feel that Cousin products are a good value. In fact, before I knew anything about them, I was using their jewelry supplies from Walmart. My jewelry posts are not sponsored. I do not get paid if you click the links to check out their products. My compensation is in the free product that I create the tutorials from.

I'm really loving the heart chain and eye pins. They are SO cute and add the perfect touch to these Valentines pieces. They are so easy to make. It's the perfect jewelry project for beginners.

You will need:

Heart Necklace Chain
Heart Pins
Heart Charms
Earwires
Jump Rings
Red Beads  
Wire Cutters
Jewelry Pliers


Tutorial for Valentines Bracelet 

Valentines Bracelet Tutorial
 1 - Cut the necklace to bracelet length. I did 7" for my 12 year old. Make sure to leave the clasp on one end. Remove jump ring from the end of the excess chain and attach it to the end of the bracelet.

2 - Form a loop on 6 red beads using the heart eye pins. 

3 - Attach charms and beads to chain with jump rings.


Tutorial for Valentines Earrings

Valentines Earrings Tutorial
1 - Cut a piece of chain 4 links long. Attach to earring with small jump ring.

2 - Attach heart charm with jump ring to the end of the chain.

3 - Form a loop with heart eye pin on red bead. Attach to chain in the second link from the top.

4 - Repeat to make other earring.

Here's the schedule for Valentines Jewelry week:
Monday: Valentines Bracelet and Earring Set Tutorial
Tuesday: Valentines Heart Bracelets {for little girls}
Wednesday: Valentines Heart Necklace
Thursday: Valentines Sparkle Heart Necklace {for little girls}
Friday: Valentines Heart Earrings


I am a member of the Cousin Creative Circle. I receive product from Cousin Corporation of America. In return, I create jewelry pieces from that product, and share about them through my blog and other social media outlets. All opinions expressed in this post are mine.