Monday, August 31, 2015

Zucchini Bread Recipe

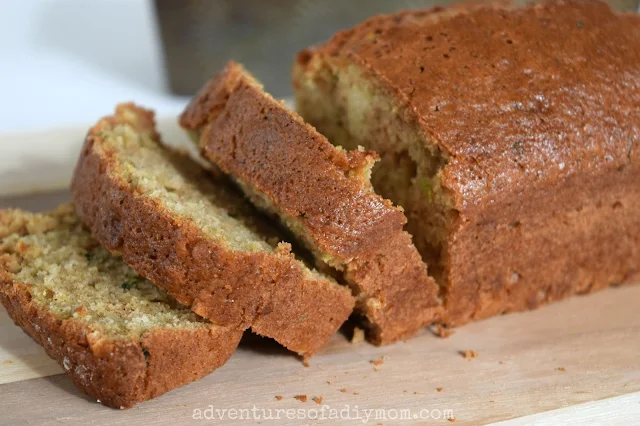
 Zucchini bread is moist in the middle, while the crust is crisp. The slight hint of cinnamon brings out the best in this yummy fall treat.
 
Zucchini Bread Recipe
This time of year we always have an excess of zucchini. While I like to eat it with dinner, sometimes I don't get it picked at it's prime. When I have an extra large zucchini, I always shred it up and make either zucchini bread or zucchini cake. Zucchini muffins are also delicious.

Zucchini Bread Recipe


Or sometimes I just shred it up and freeze it, so I can make it later down the road. Today, I'll share with you my zucchini bread recipe.


Zucchini Bread Recipe


Zucchini Bread Recipe
I made this a lighter version by replacing half of the oil with applesauce. I can't taste the difference, and I don't feel guilty in indulging in a few slices. I generally don't add nuts or raisins because then my kids won't eat it.

Zucchini Bread Recipe

What do you do with your "too large" zucchini?

Other recipes you may like:  Peach Tart No Bake Oreo Cheesecake Chocolate Chip Cookies Poppy Seed Muffins
Zucchini Bread

Zucchini Bread

Yield: 24
Author: Rachel Nielsen
prep time: 5 Mcook time: 35 Mtotal time: 40 M
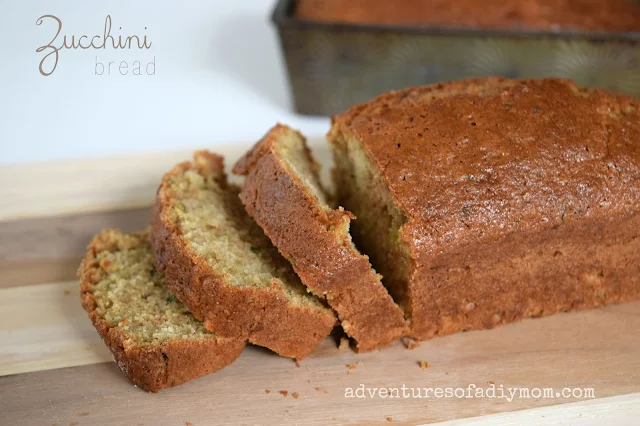
Zucchini bread is moist in the middle, while the crust is crisp. The slight hint of cinnamon brings out the best in this yummy fall treat

ingredients:

  • 2 eggs
  • 1/2 c. vegetable oil
  • 1/2 c. applesauce
  • 2 c. sugar
  • 2 c. grated zucchini
  • 2 t. vanilla
  • 3 c. flour
  • 1/4 t. baking powder
  • 1 t. baking soda
  • 1 t. cinnamon
  • 1 t. salt
  • 1 c. raisins or nuts, optional

instructions:

How to cook Zucchini Bread

  1. Stir together eggs, oil, applesauce and sugar.
  2. Add zucchini and vanilla and mix well.
  3. Sift in the dry ingredients and mix to combine.
  4. Stir in raisins and/or nuts if desired.
  5. Pour into greased and floured bread pans.
  6. Bake at 375 for 35-40 minutes, or until toothpick comes out clean.
Calories
201.48
Fat (grams)
5.81
Sat. Fat (grams)
0.61
Carbs (grams)
35.56
Fiber (grams)
1.04
Net carbs
34.52
Sugar (grams)
21.73
Protein (grams)
2.79
Sodium (milligrams)
165.42
Cholesterol (grams)
15.50
Nutritional information is automatically generated and is not guaranteed to be correct.
zucchini bread, how to make zucchini bread, zucchini bread recipe, the best zucchini bread
Desserts, Quick Bread
American
Created using The Recipes Generator

Thursday, August 27, 2015

How to Make a Pearl and Crystal Headband

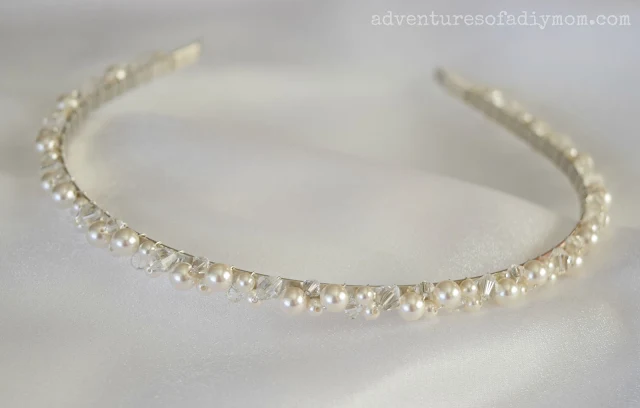
I recently created this elegant headband for my daughters Baptism day. I was pleasantly surprised at how easy it was to make using simple wire wrapping. Swarovski crystals and pearls makes it a timeless treasure that will last. This headband would be perfect for any special occasion, including weddings or prom. Change up the color of the beads to personalize and coordinate with your special occasion.


How to Make a Pearl and Crystal Headband

See my teardrop necklace and earring set for more special occasion DIY jewelry.

Want to make your own pearl and crystal headband?

You will need:
a metal headband - silver in color
pearls - 4mm and 6mm
crystals - 4mm and 6 mm
26g silver wire - 6 to 7 feet long

I used Swarovski crystal pearl mix courtesy of Cousin Corporation. To give you an idea of how many beads to get, I used a total of 114 beads. That could vary depending on the size of bead you use and how far down the headband you go.

How to Make a Pearl and Crystal Headband

I couldn't find any plain headbands, so I ended up buy one with ribbon glued to it. I peeled it off and then had to use goo gone to get all the glue residue off. That whole process took me longer than it did to make the headband.

Cut a piece of wire that is at least 6 feet long. When I started, I had no idea how much to start with and it ended up being too short and I had to start over. Somewhere between 6 and 7 feet will be plenty.

How to Make a Pearl and Crystal Headband
Begin wrapping the wire around the headband. Hold the starting end of wire against the inside of the headband and wrap around it tightly. Wrap for 3/8 of an inch.

How to Make a Pearl and Crystal Headband
Now it's time to start adding our beads. I found that either two small {4mm} beads or a large {6mm} and a small {4mm} worked well for each wrap. I found a pattern that I liked with the first four wraps and then continued that pattern. It was easiest to string on several beads at the same time and then start wrapping. I tried to wrap it as tightly as I could.

How to Make a Pearl and Crystal Headband
Continue adding beads and wrapping until you near the end of the headband. Here's my tip for finishing off the headband. Insert a folded over piece of wire onto the inside of the headband. Wrap the wire {without beads} tightly around that piece of wire for 3/8 inch. Clip the main wire so you have only a few inches of excess wire. Pull out the folded over wire and insert the end of wire and pull tight.

How to Make a Pearl and Crystal Headband
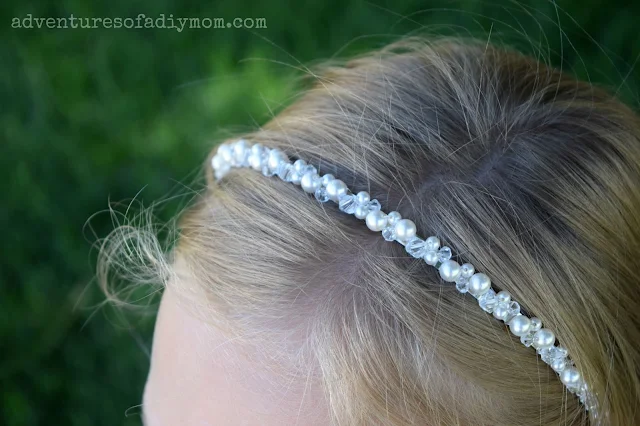
The end result is something that looks very elegant and classy and like it's much harder to make than it is.
Is this something you'd like to try? What occasion would you make it for? What color{s} would you use?
I am a member of the Cousin Creative Circle. I receive product from Cousin Corporation of America. In return, I create jewelry pieces from that product, and share about them through my blog and other social media outlets. All opinions expressed in this post are mine.

Monday, August 24, 2015

Baptism Dress, Purse and Headband

This summer has been really busy. One of the highlights was my daughter's baptism day. I made her dress, a headband, and little purse to match. She looked like a princess.

Baptism Dress
 For the dress, I used Simplicity pattern 4764, Dress B. I found some layered lace for the edging instead making my own with the sheer fabric like the pattern called for. I really like how it turned out. I love the shimmer of the lace. It's hard to photograph, but you can kind of see it in the purse below.

I thought about doing a sew-along on the blog, but in the end I didn't have time. Is that something any of you are interested in? I would probably do a simpler dress pattern and walk you through it step by step, from cutting out the fabric to the finishing touches.
Handmade Purse
For the purse, I used Simplicity pattern 0675. I think it's such a fun addition to the dress and it really didn't cost anything, since I just used the scraps from the dress and luckily had some interfacing on hand.  I added a little sparkle along the top with Swarovski crystals.

Headband with Swarovski pearls and crystals
 I also made her a headband using Swarovski pearls and crystals. It adds another layer of elegance to the ensemble. I'll share a full tutorial for the headband later this week.


Friday, August 7, 2015

Barefoot Jewelry

I have often admired barefoot jewelry. But I've never taken the time to make any.  This summer I decided I'd try it out. This barefoot jewelry would be perfect for walking along the beach, or just lounging around in the backyard.
Barefoot Jewelry Tutorial

Recently, I had the opportunity to go to Florida as an brand ambassador for Cousin Corporation. My kids insisted that I collect seashells for them while I was there.  I found plenty that already had little holes in them. That inspired my version of barefoot jewelry, complete with a seashell accent.

Barefoot Jewelry

These are really easy to make - my girls did most of the work! All I had to do was tie the knot at the end. I tape one end of  the elastic to the table. This prevents a lot of frustration, since the beads won't slide off the other end as they're working.
Barefoot Jewelry


You will need:
small beads - I used fuchsia and lime
stretch cord
seashell with a small hole {or you could use a larger bead}
glue

Barefoot Jewelry


String the small beads onto the elastic cord until you have enough to wrap around your ankle. Make sure the beads are centered on the cord. Insert the seashell onto both strands of cord. Then add beads to both tails of cord until it is long enough to go around your toe. Tie the cord securely with a square knot and I always like to add a dab of glue so the knot doesn't come undone. {I use beadalon stringing glue, but superglue or E6000 would work too.}

How to Make Barefoot Jewelry


Barefoot Jewelry

You may also like:


Pin it!

DIY barefoot jewelry


I am a member of the Cousin Creative Circle. I receive product from Cousin Corporation of America. In return, I create jewelry pieces from that product, and share about them through my blog and other social media outlets. All opinions expressed in this post are mine.