Tuesday, September 29, 2015

Laundry Room Makeover - Shortening the Laundry Cart

I decided that my laundry room needed some sprucing up. In the process I painted, built shelves, built a drying rack and more. I actually did most of this in one week. But as it usually goes around here, there were finishing touches that took me a bit longer to complete. I'm finally done so I can start sharing it all with you.

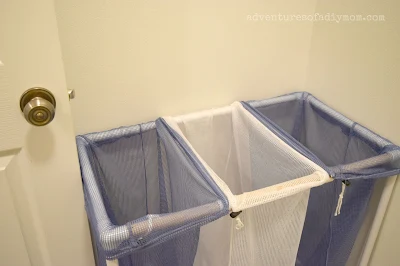
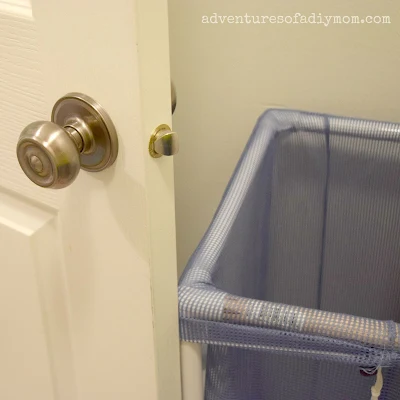
The first thing I did was to shorten this little laundry cart. I've had this thing for several years and it's always been just a tad long for the space.
Shortening the Laundry Cart
I could never quite open the door all the way.

It was an easy fix that took under 10 minutes. Why did I wait so long to do this?

Shortening the Laundry Cart
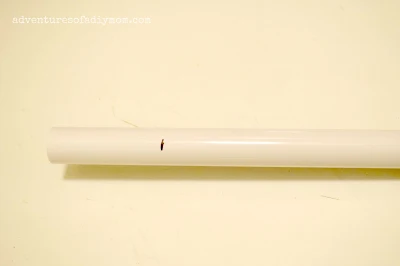
I began by disassembling the cart and marking where to cut.

Shortening the Laundry Cart
Then I grabbed the pipe cutters from the garage. {If you've ever had to put in a sprinkling system, then you probably have some of these too.}

Shortening the Laundry Cart
I found that this is really plastic, not pvc, so the cut was a little jagged. Not a big deal though since it just slides into the corner pieces anyway. I did this with both the top pieces and the bottom pieces.
One of them had broken a few years ago and so I had replaced it with a wooden dowel. I simply cut that piece with a saw.

Shortening the Laundry Cart
I put it back together and now I can open the door completely!

I did end up replacing the blue mesh bags for white ones. Here's a sneak peek.

Shortening the Laundry Cart

Next up:
How to Build  a Shelf
Another way to Build a Shelf
Paint
DIY Drying Rack
Clothesline Craft
Before and After Pictures

Monday, September 21, 2015

Lunch Box Organization

Lunch Box Organization

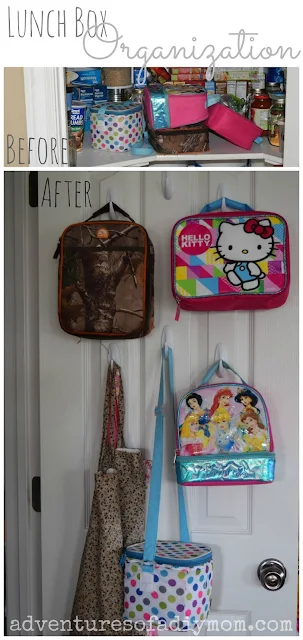
Now that school's been in for over a month, I was starting to get annoyed by the lunchboxes. They were always cluttering up my pantry space. They just take up so much room!  My pantry isn't always the super neat and tidy, but I do try to keep it somewhat organized. {See 3 Steps to an Organized Pantry} I've been trying to find a solution for a while and I finally figured it out.

Lunch Box Organization
It turned out to be a very simple and fairly inexpensive idea. I simply added Command hooks to the inside of the pantry door. Now each lunch box has a spot, plus I can now hang my aprons instead of wadding them up and shoving them in a corner somewhere. I even have an extra hook for something I may need to hang in the future.

Lunch Box Organization
I was a bit worried about the lunch boxes falling off as I swung the door open, but I've had these up for a couple weeks and not once has one fallen off. I got the larger hooks that hold up to 3 pounds. They're very secure and work perfectly with this application.

Lunch Box Organization


I love that the hooks are removable and won't ruin my door. I love that I can now grab whatever I want in the pantry without having to reach over or move lunchboxes.

How do you store your kids lunchboxes?

You may also like: 


Monday, September 14, 2015

Pumpkin Bread Recipe


Fall is in the air, and one of my favorite things about fall is yummy pumpkin treats. I've shared my favorite pumpkin chocolate chip cookie recipe and pumpkin gooey butter cake. Today it's all about pumpkin bread. This bread is so moist and the flavors just scream fall.

Pumpkin Bread Recipe

I've just started a pumpkin board on pinterest {Do you follow me on Pinterest?} I want to try a couple new pumpkin recipes this year. Which one would you try first?

Pumpkin Chocolate Chip Bread Recipe


Pumpkin Bread


What's your favorite pumpkin treat?


You may also like:


 Zucchini Bread
Pumpkin Chocolate Chip Cookies
Pumpkin Pie
Poppy Seed MuffinsRoasted Pumpkin Seeds
Don't forget to pin it!!

pumpkin breadhomemade pumpkin bread
Pumpkin Bread Recipe

Pumpkin Bread Recipe

Servings: 24
Author: Rachel Nielsen
Prep time: 5 MinCook time: 1 HourTotal time: 1 H & 5 M
Delicious pumpkin bread with all the flavors of fall.

Ingredients

  • 2/3 c. shortening
  • 2 c. sugar
  • 1 (16 oz) can pumpkin
  • 4 eggs
  • 2/3 c. water
  • 3 1/2 c. flour
  • 1 t. salt
  • 1/2 t. baking powder
  • 1 t. cinnamon
  • 1 t. cloves
  • 2 c. chocolate chips

Instructions

  1. Cream together shortening and sugar.
  2. Add pumpkin, eggs and water.
  3. Sift in dry ingredients. Mix well.
  4. Stir in chocolate chips.
  5. Bake at 350 for 60-70 minutes.

Nutrition Facts

Calories

266.84

Fat (grams)

11.07

Sat. Fat (grams)

5.18

Carbs (grams)

40.66

Fiber (grams)

1.55

Net carbs

39.11

Sugar (grams)

24.91

Protein (grams)

3.62

Sodium (milligrams)

121.64

Cholesterol (grams)

34.20

Nutritional information is automatically generated and is not guaranteed to be correct.

Pumpkin bread, chocolate chip pumpkin bread, pumpkin bread recipe
Dessert, Quick Bread
American

Thursday, September 10, 2015

Wooden Bead Dangle Earrings

Wooden Bead Dangle Earrings
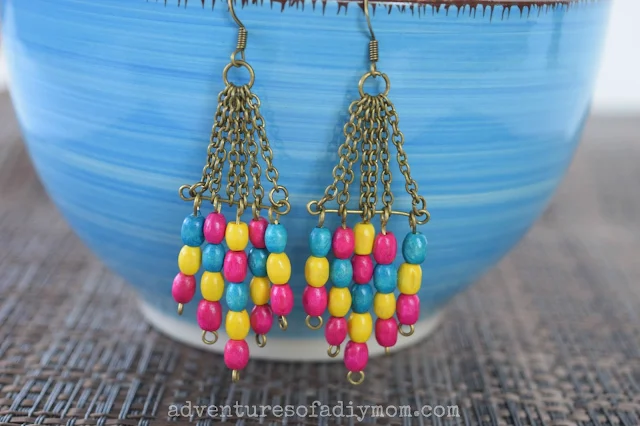
 I love dangle earrings. The problem is that sometimes they can get heavy. I was excited when I had the chance to try out these colorful wooden beads.  One nice thing about wooden beads is that they're lightweight, which makes them perfect to use on earrings. These wooden beads have been dyed  in fun summer colors.

How to Make Wooden Bead Dangle Earrings


You will need:
wooden beads {provided by PandaHall in exchange for post - all opinions are mine}
eye pins
chain
earwires
jump rings


Wooden Bead Dangle Earrings
1 - Begin by adding the wooden beads to 5 eye pins. I did one with 5 beads, two with 4 beads and 2 with 3 beads.

2 - Cut 6 pieces of chain 1 inch long.

3 - Attach small jump ring to two of the pieces of chain. These will be the outer chains and they will connect to the loops of the eyepin.

4 - Add the beads and chain alternating onto an eyepin, starting and ending with beads. {You will have the two chains with the jump rings remaining}

5 - Form a loop at the other end of the eye pin.

6 -  Attach the remaining chain to the loops in the eyepin.

7 - Attach the loose end of each chain piece to a large jump ring, along with an earwire.

8 - Repeat with other earring.

Wooden Bead Dangle Earrings

Hope you enjoyed this earring tutorial.


A few more of my earring tutorials: 


Thursday, September 3, 2015

Yellow Neon Pop Earrings

How to Make Neon Pop Earrings

These fun neon yellow earrings will bring a pop of color to your ensemble. They are easy to make - perfect for beginners - but just as fun for the experienced beader. Pair the earrings with an even easier to make bracelet.

Let's get started:

How to Make Yellow Neon Pop Earrings

You will need:
Yellow Neon Pop Connectors
Yellow Neon Beads
Gold Starter Findings Pack

How to Make Neon Pop Earrings

1 - Insert eye pin in lower holes on connector. Form a loop.

2 - Cut chain 2 1/2" Attach to eye pin at each end with a jump ring.

3 - Insert head pin into bead and form a loop.

4 - Attach to the bottom of connector with a jump ring.

5 - Add earring to the top of the connector with two jump rings.

For the bracelet, I simply added a clasp to one end of a strand of connectors. Can't get much easier than that.  You could add a length of chain to the other end of the bracelet to make it adjustable in length.

How to Make Neon Pop Earrings


Other jewelry tutorials, hand picked by me:

Easy Dangle Earrings

Sapphire Dangle Earrings

Turquoise and Copper Bracelet

I am a member of the Cousin Creative Circle. I receive product from Cousin Corporation of America. In return, I create jewelry pieces from that product, and share about them through my blog and other social media outlets. All opinions expressed in this post are mine.