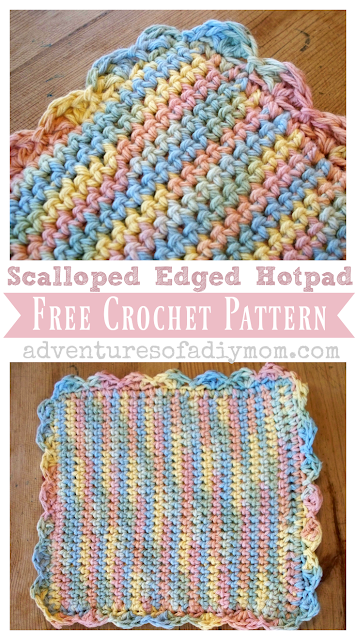
This potholder pattern is simple to make and adjustable in size.
HOW TO MAKE A CROCHET HOTPAD WITH A SCALLOPED EDGE
If you are super new to crochet, you can try this super easy way hot pad. It's the kind my grandma always made.But today I have another version that my sister taught me.
It is not quite as quick and easy, but it makes up for that in style. Doesn't the scalloped edge add so much?
One nice thing about this pattern, is that you can make a longer hot pad.
My sister made me one that is twice as long. It is perfect for cookie sheets, I don't have to get out two hot pads.
HOW TO MAKE A CROCHET POTHOLDER
I started this a while ago and just recently finished it. Because of that I didn't have pictures of the steps. I started a mini hot pad to show you the process.
I used a G hook.
To begin, chain 30.
ROW 1
Single crochet in each chain. Chain 1.
ROW 2
Single Crochet in back loop and unused loop of each foundation chain. Chain 1.
ROW 3
Single Crochet in backloop and unused loop of each stitch in 2nd row. Chain 1.
REPEAT INSTRUCTIONS FROM ROW 3
Repeat this pattern of single crochet in backloop and unused loop from previous row.FINAL ROW
Once you have made the hot pad as big as you'd like, you will do your last row.
Single crochet in both loops and also the unused loop from the previous row.
You could be done at this point...
HOW TO ADD A SCALLOP EDGE
but I wanted to add a pretty scalloped edge.
FINISH ALL EDGES WITH SINGLE CROCHET
To do this you need to single crochet around the three remaining sides of the hot pad. (The row you just finished will already be single crocheted.)
It can get a little confusing when you go down the side, but I just did one single crochet for each row.
CREATE THE SCALLOP EDGE
Skip one stitch.In the next stitch you will double crochet, triple crochet and double crochet all in the same stitch.
Then skip one stitch. Slip stitch in the next stitch.
Repeat all the way around the hot pad.
Fasten off and weave in ends.
MORE CROCHET PATTERNS
- Crocheted Hot Pad
- Crocheted Winter Hat
- Crocheted Mittens
- Crocheted Hats
- Crocheted Monkey
- 25+ Crochet Christmas Tree Skirt Patterns
- 35+ Crochet Leg Warmer Patterns
Don't forget to Pin it!

.jpg)

.JPG)
.JPG)
.JPG)
.JPG)
.JPG)
.JPG)
.jpg)


I'm pinning this tutorial because it's easy enough for this impatient crocheter to complete!
ReplyDeleteThanks Rachel, I am pinning this tutorial also to try at some point among all the other projects I am working on!
ReplyDeleteGreat hand-made
ReplyDeletewomen
health
Thank you so much for joining our party and linking up at the Busy Bee's party. We appreciate you showing us how to make this hot pad. It looks so pretty as well as useful! Thanks again!
ReplyDeletehave a wonderful day!
Joye & Myrna
Rachel,
ReplyDeleteThis is a lovely hotpad. I am pinning it. It is really pretty.
Kay
Wonderful project! I found your post at Daisy Cottage Designs and am now following you on Blogovin and GFC. Hope you can stop by and check out my blog as well. Have a wonderful weekend!
ReplyDelete-Amy
www.thestitchinmommy.com