Creating binding on the bias creates a stretchy, flexible quilt binding that is perfect for binding curves or lots of angles. (Like in my herringbone quilt!) Cutting bias strips at a 45-degree angle can be tricky. But I'll show you how to fold the fabric in just the right way so you can cut in straight lines and still achieve a bias strip.
Follow these instructions and you'll soon have your very own bias binding.
HOW TO MAKE A BIAS BINDING
This post may contain affiliate links. As an Amazon Associate I earn from qualifying purchases. Please see my full disclosure policy for details.
SUPPLIES NEEDED FOR QUILTING
To create binding you will need a cutting mat, straight edge and rotary cutter. An iron and ironing board or wool iron mat is also needed.- fabric
- thread
- rotary cutter / cutting mat / straight edge
- Bernette 05 Academy Sewing Machine (I recently upgraded to this machine and it is AMAZING, yet reasonably priced. It is often out of stock, so get it quickly if you're in the market. Amazon also sells it.)
- sewing scissors
- iron and ironing board or wool iron mat
HOW MUCH FABRIC IS NEEDED FOR BINDING
Before we can make the binding, we need to determine how much fabric is needed. It all depends on the size of the project. Here's how to calculate the yardage needed.Binding Formula
Quilt Permimeter + 20 inches = inches of binding needed. Binding inches needed ÷ 40 = strips needed (roundup) Strips needed X binding width = inches of fabric needed Inches of fabric ÷ 36 = yardage needed (round up to the nearest yardage measurement)Let's do an example. Let's say we are binding a baby quilt that is 30" wide X 40" long. We want the binding to be 2 1/2 inches wide.
Quilt Perimeter + 20 inches.
Quilt Perimeter (30+40) X 2 = 140 140 + 20 = 160
Take that sum and divide by 40. Round up to find the total strips needed.
160 ÷ 40 = 4 (round up if needed)
Take the number of strips needed and times by the width you want the binding.
4 X 2.5 = 10
Divide that number by 36 to determine the yardage needed. Round up to the nearest yardage measurement. (Keep it in quarters or thirds to make it easy)
10 ÷ 36 = .2777 Roundup to 1/3 yard.
It's a handy formula to know but I'll let you in on a little secret.
You can plug in your quilt dimensions and your binding width preference into a free online calculator that will determine the yardage needed for binding.
Yep, it's free, and it gives you the fabric needed for straight or bias binding.
Find the calculator at Quilter's Paradise
WHAT IS THE BIAS OF FABRIC?
In layman's terms the bias is 45 degrees from the selvedge edge. When you stretch the fabric along the bias, it will stretch much more than if you stretch it vertically or horizontally. Creating binding strips along the bias is ideal of you intend to use the binding for curves or angles.
HOW TO FOLD FABRIC TO CUT ON THE BIAS
If you fold the fabric just right, you can easily cut straight cuts along the bias. It's fairly simple to do, but kind of hard to explain. I'll do my best with pictures and instructions. Be sure to watch the video for the best explanation.We are basically creating a fold along the bias and then continuing to fold the fabric in a way so that it is smaller and easier to cut.
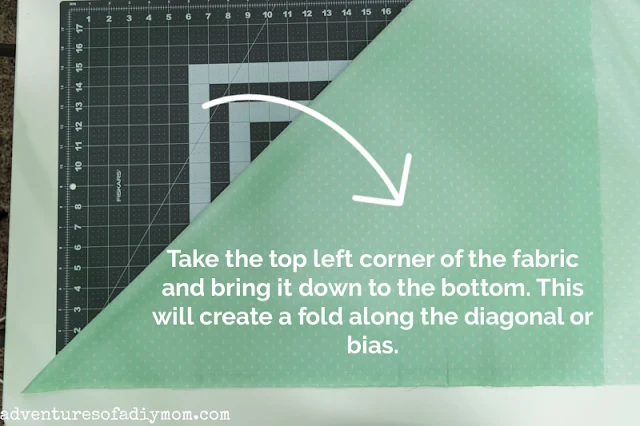
Spread out your piece of fabric with the wrong side up. Take the top left corner of the fabric and bring it down towards the bottom at a diagonal. Make sure to line up the edges of the fabric along the bottom.
The fold that is created is the bias.
Take the pointed edge of the fabric at the bottom left and bring it up to the point at the top.
Take that top point and fold it to meet the bottom point. Make sure the bias edge stays along itself as each of these folds are made.
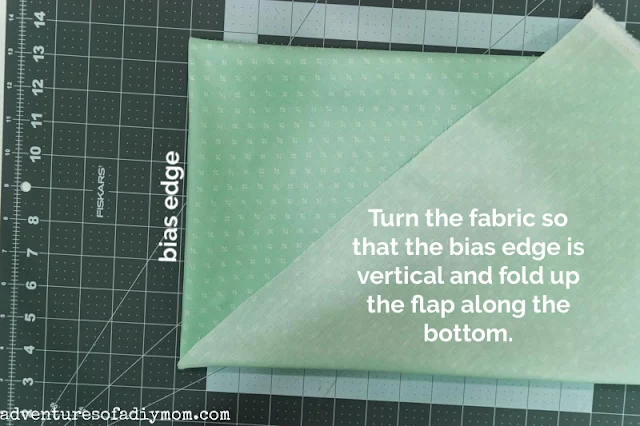
Arrange the fabric so that the bias edge is vertical. Fold the extra flap of fabric up to create more of a rectangle shape.
CUTTING BIAS BINDING
Trim a small amount off of the bias edge.
At this point you can cut your bias binding strips to your desired width. In general, binding is usually 2 1/2 inch wide strips. However, you can make the binding larger than that if desired.
Since the edges of my herringbone quilt have a lot of angles, I opted to go with a 3 inch strip widths. That way there is a little bit of wiggle room with all those points.
Continue cutting fabric strips until you have as many as needed.
SEWING TOGETHER THE BINDING STRIPS
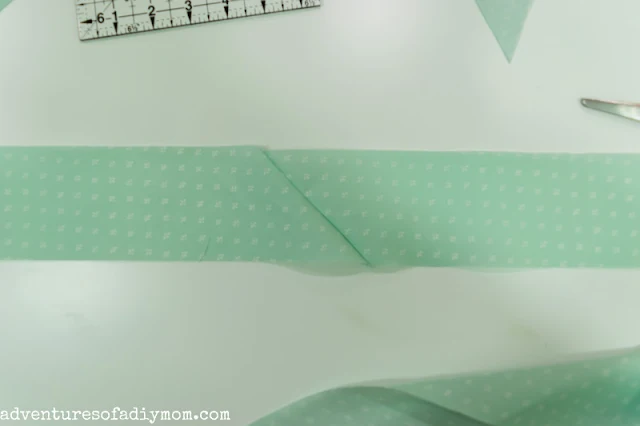
Now it's time to sew the strips into one long strip of fabric. Begin by making a 90-degree cut to get rid of the angles on the ends of the strips.
Place one strip right side up horizontally on your mat. Place another strip right side down vertically. The two strips should sit on top of one another creating a square.
Draw a diagonal line from corner to corner and then sew a straight stitch along this marked line.
Trim the excess fabric 1/4 inch from the seam.
There you have your binding strip. Continue connecting all the pieces to make a long continuous strip.
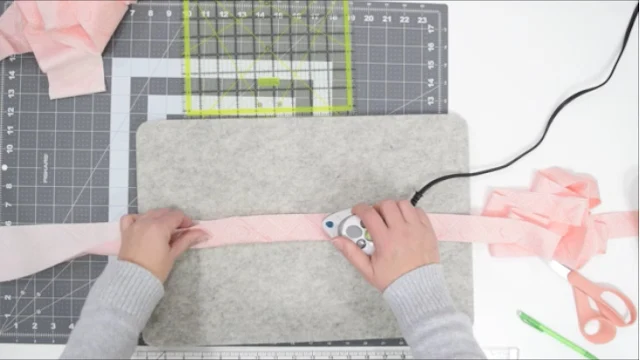
The last thing you need to do before attaching the binding to the quilt is to make a single fold and press the fabric lengthwise.
When you add it to your quilt, you will sew the open raw edges of the binding 1/4 inch from the edge of the quilt.
Then wrap the folded edge of the binding around to the back side of the quilt and and hand sew it in place to create a bound edge.
Want to watch the video? ↓↓Click the link ↓↓
MORE QUILTING TUTORIALS
Don't forget to pin it!!


0 comments