Rag quilts are easy to make and so cute! They are the ideal beginner project.
In this post, you will find step by step pictures, instructions AND a video tutorial.
So grab some flannel and make your first rag quilt!
One of my very first blog posts was how to make a rag quilt baby blanket.
(Fun fact: It published in Oct of 2011 and was my 11th post ever!) The striped flannel rag quilt is even easier to make!
I figured it was about time to share a more traditional patchwork rag quilt.
HOW TO MAKE A RAG QUILT (EASY TUTORIAL FOR BEGINNERS!)
Rag quilts use a quilt as you go method. Each square is sewn together with the top, bottom and batting. Then you simply sew all the squares together.
That's one of the reasons its so great for beginners. You don't have to tie it or quilt it. Once it's sewn together, it's done.
This post may contain affiliate links. As an Amazon Associate I earn from qualifying purchases. Please see my full disclosure policy for details.
BEST FABRIC FOR A RAG QUILT
The best fabric for a diy rag quilt is something that frays easily and yet is both sturdy and easy to work with.- Flannel - My personal favorite is flannel. In my experience it frays the best.
- Denim - Use old jeans to make a denim rag quilt. Denim frays nicely. Using old jeans make for an inexpensive project.
- 100% Cotton fabric- You can also use cotton. In my experience, it doesn't fray as well as flannel or denim. I made a cotton rag quilt years ago and it didn't end up fraying as well as I would have liked.
- knit fabric
- fleece fabric
- minky fabric
BEST SIZED SQUARES FOR RAG QUILT
The size of the square is not set in stone and is a matter of opinion. If you want bigger or smaller squares that's totally fine, but the fabric you need and the number of squares needed may change.I like using a 7 inch square. It's large enough to be able to see the design of the fabric.
It's also the perfect size to use with flannel. You can cut 6 squares from a 7 inch strip of flannel with very little waste.
FABRIC REQUIREMENTS FOR A RAG QUILT
How much fabric you need depends on the size of blanket you wish to make.I used batting for the middle layer in my quilt. It's a great way to use up scraps, since you will be cutting it up anyway. I cut the batting one inch smaller than the flannel squares.
You can also add an additional layer (or two) of flannel instead of batting if you prefer. You would cut all layers the same size. This will create even more raggedy edges.
Below I've included a few common sizes and the fabric you will need to make them.
(Finished sizes are approximate, since seam allowances and washing can affect the final size.)
FABRIC NEEDED FOR A BABY RAG QUILT
For a 31 X 37 inch blanket, you will need:- 1 yard EACH, of two coordinating flannel fabrics
- 1 yard of batting
Total squares needed: 60 of flannel, 30 of batting
The blanket will have 6 rows of 5 squares each.
FABRIC NEEDED FOR A LAP QUILT (this is a good size for a toddler or child blanket)
For a 48 X 54 inch blanket, you will need:- 2 1/2 yard EACH, of two coordinating flannel fabrics
- 2 1/2 yard of batting
Total squares needed: 144 of flannel, 72 of batting
The blanket will have 9 rows of 8 squares each.
(This is the size blanket I made for this tutorial)
FABRIC NEEDED FOR A THROW QUILT (a great sized blanket for teens and adults)
For a 48 X 70 inch blanket, you will need:- 3 1/4 yard EACH, of two coordinating flannel fabrics
- 3 1/4 yard of batting
Total squares needed: 192 of flannel, 96 of batting
The blanket will have 12 rows of 8 squares each.
OTHER TOOLS AND SUPPLIES NEEDED
- sewing machine (this is the machine I use and LOVE)
- rotary cutter
- cutting mat
- straight edge ruler
- scissors
- thread
HOW TO MAKE A RAG QUILT
Let's get started making an easy rag quilt.Be sure to check out the video at the end of the post to watch exactly how I made this blanket.
To begin, cut the fabric into 7 inch squares and the batting into 6 inch squares.
I cut 7 inch strips of fabric. Then I stack several strips together and cut them down into 7 inch squares.
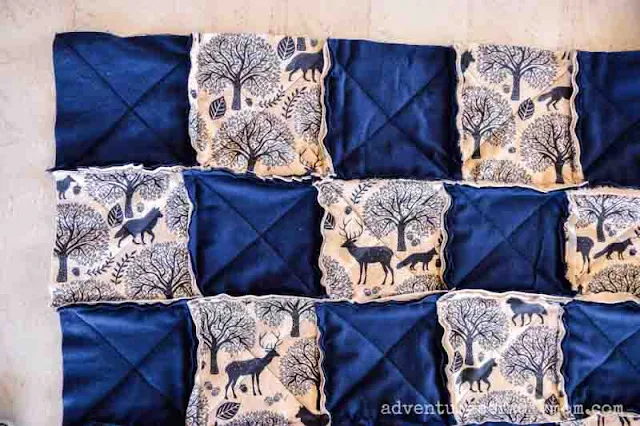
Next begin sewing together the squares. Use the same fabric for both the top and the bottom. You will make 36 woodsy fabric squares and 36 navy flannel squares.
Make a fabric sandwich by placing wrong sides together with a piece of batting the middle.
In other words, lay a 7 inch square of fabric right side down. Add a 6 inch square of batting to the center of the fabric. Then place the top fabric with the right side up.
Sew together all layers of fabric diagonally from corner to corner. Repeat from the remaining corner to corners.
Continue sewing all of the fabric squares together in this manner.
Alternating fabric, sew together 8 squares to make a row. Repeat to make nine rows. Use a 1/2 inch seam allowance.
Make sure that each row begins with an alternating fabric to create a checkerboard pattern.
TIP: Make sure that the exposed seams are all facing up so they will be on the same side of the quilt.
Again, be sure the raw edges are all facing up. And that the fabric alternates.
The last thing you will need to sew is a 1/2 inch seam all the way around the edge of the quilt.
(If you look closely you will see that I forgot to do this until later on, so that final seam is not pictured here.)
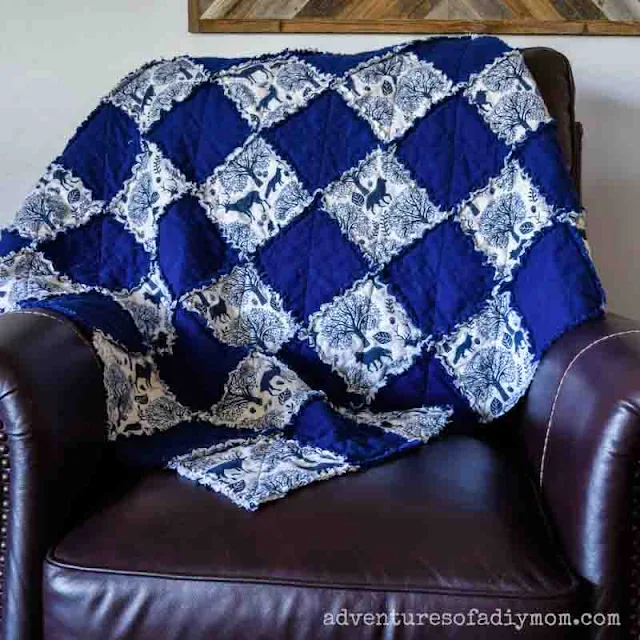
Now it's time to make this quilt all raggedy. To accomplish this we will make cuts along the exposed seams to encourage the fray.
I find that the easiest way to do this is to fold the blanket so that the raw seam is facing toward me. Then I simply clip along the edge.
I make a cut about every 1/4 inch. I don't measure, I just guess.
DO NOT clip through the seam! or your blanket will fall apart.
Continue clipping along all of the seams and then clip around the perimeter of the blanket as well.
The last thing you will do is throw it in the washing machine and dryer. This will jump start the ragging process.
Tip: Make sure you empty the lint trap on your dryer beforehand because drying this blanket will fill it up.
Be prepared with a lint roller. There will be quite a lot of small threads that adhere to the blanket after the first wash.
Each time you wash the blanket it should get more and more ragged, giving it that lovely rag quilt look.
Here's what the back of the quilt looks like.
Want to watch the video? ↓↓Click the link ↓↓
FEATURED RAG QUILTS FROM READERS
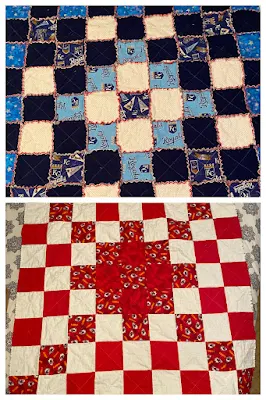
I want to see your rag quilt project!! Send me a picture via email (contactdiymom@gmail.com) and you may be featured in this section!This rag quilt was made by Ginny. She created a unique pattern with her fabrics. She also opted to bind her rag quilt which gives it a finished look.


These rag quilts were made by Anita. She has used different, but coordinating fabrics for the front and the back of her quilts.
MORE SEWING AND QUILTING PROJECTS
- Easy Baby Receiving Blanket
- Rag Top Burp Cloths
- Easy Striped Quilt
- Easy Tie Quilt Blanket
- Puff Quilt Tutorial
- Herringbone Quilt Pattern
- Spool Quilt
- 25+ Rag Quilt Patterns
- 50+ Apron Patterns
Don't forget to pin it!!


0 comments