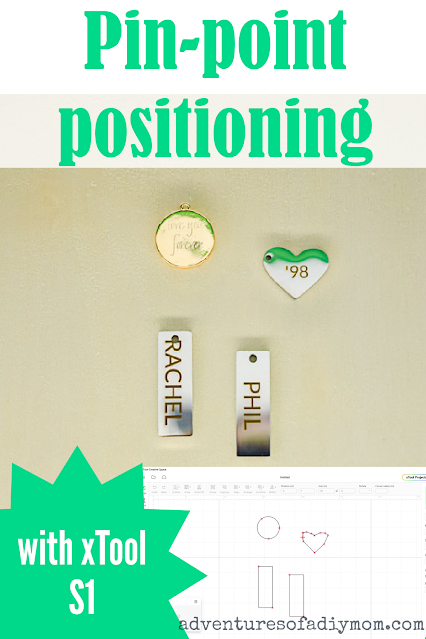
Learn how to engrave on metal of all different shapes using the pin-point positioning feature of the xTool S1 machine.
I used the different modes of positioning to engrave on many different shapes.
This article is written in partnership with xTool. They have provided the machine and supplies. All opinions expressed are my own.
HOW TO USE PIN-POINT POSITIONING WITH XTOOL S1 (PERFECT ALIGNMENT EVERY TIME!)
Achieve perfect alignment on your laser engraving and cutting projects using the pin-point positioning system of the xTool S1 machine.This post may contain affiliate links. As an Amazon Associate I earn from qualifying purchases. Please see my full disclosure policy for details.
XTOOL MACHINE AND SUPPLIES USED
Below are the machine, accessories, and materials used in the tutorial.xTool Machine and accessories used:
Materials used:
- Bar Necklace
- Anodized Aluminum Dog Tags
- 14K Gold Placed Round Pendant with Heart
- Heart and Bar Necklace
WHAT IS PIN-POINT POSITIONING?
Pin-point positioning technology is a feature unique to the xTool S1 machine.Instead of using a camera (which can be distorted), it shows the laser head coordinates which are communicated from the machine to the software. You can watch the crosshairs move on your screen as you physically move the laser head.
This groundbreaking technology allows for precise placement and accurate results while laser cutting and/or engraving.
There are 4 different modes of marking your projects using pin point positioning. They are rectangle, circle, polygon and line. We will go over the first three modes in this tutorial.
Rectangle pin-point positioning mode
This mode uses two points of reference to create a rectangle. Marking opposite corners of the rectangle conveys to the software exactly where the rectangle-shaped object lies on the machine.
Circle pin-point positioning mode
This mode uses three points of reference to create a circle. Mark any three points on the edge of the circle to let the software know precisely where your circle object is.
Polygon pin-point positioning mode
This mode is handy for any other shape. You must mark at least three points, but you can mark as many as you need to tell the software exactly what shape you are working with and where it is.This is super handy with scrap wood or leather that are completely random shapes.
Now that we know the different type of positioning modes, there are a few things to do before we start marking the processing area.
- Make sure you select the type of laser project you are doing and the material you are using.
- Measure the distance.
- Since I am engraving on tiny jewelry pieces, I placed a piece of wood on top of my honeycomb panel as a base, so the pieces wouldn't fall through. This is not completely necessary. You could remove the honeycomb and process the pieces directly on the base tray.
- Turn auto-snapping on in your settings. This is helpful for centering your engraving on your materials.
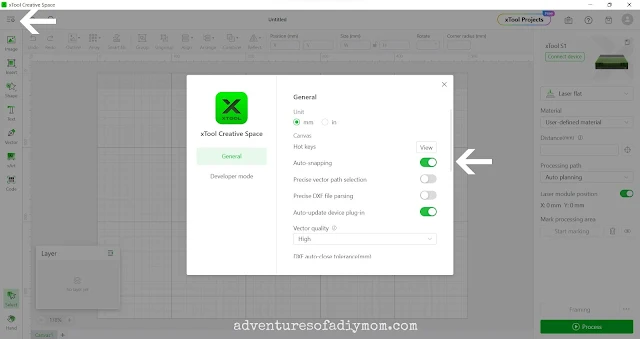
Click on the settings button in the very top left corner. The setting box will pop up. Then toggle on auto snapping.
Now it's time to mark your processing area. We are using the batch marking feature for this tutorial.
This allows us to mark several different shapes at once and engrave them all at the same time.
HOW TO USE CIRCLE PIN-POINT POSITIONING
Circular positioning uses three points to mark the exact location of your object. On the righthand side of your screen you will see an area called mark processing area. Click the 'Start marking' button.
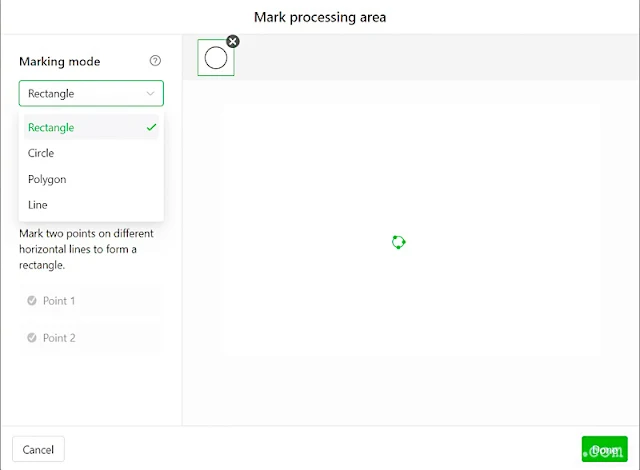
This box will pop up. Select the circle option and click start marking.
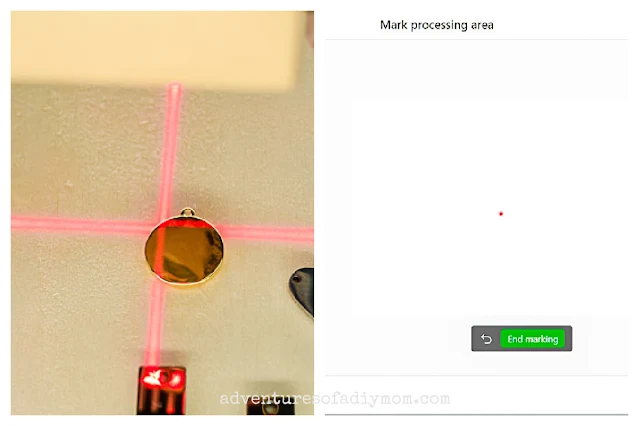
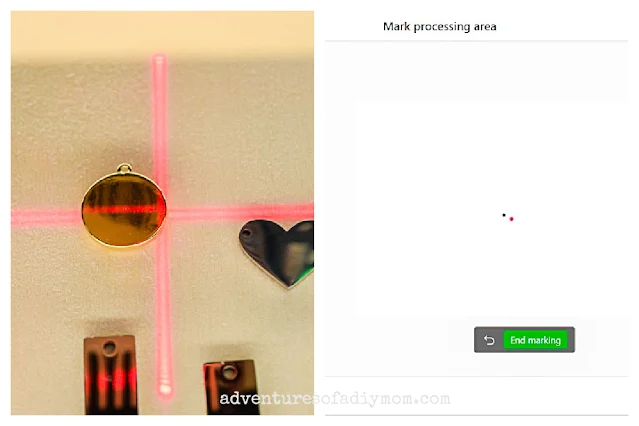
Next, you will move the laser on the machine to the edge of the circle. Click the button on the front of the machine and the first point will show up on your computer screen.
Move the laser to another edge of the circle and push the button on the front of the machine. A second point will appear on your computer screen.
Again, move the laser to a third edge of the circle. Press the button on the front of the machine. This time your third point will appear and the software will connect the dots with a circle.
Click end marking.
HOW TO USE RECTANGLE PIN-POINT POSITIONING (TWIN POINT POSITIONING)
If you were only marking one object, at this point you would click done. If you have several objects as we do, then you can continue marking another processing area.
Our next pendant is a rectangle. So on the left hand side, click the little down arrow. A box with different options will come up. Select the rectangle option.
This option is also sometimes called twin point positioning, because you mark two points to identify the rectangles position.
Over at the machine, move the laser to one corner of the rectangle. Press the machine button. Your first point is now on your screen.
Move the laser to the opposite corner of the rectangle and press the machines button. A second point will register on the screen and a rectangle shape will appear to connect the two dots. Click End Marking.
Note: It is important to use opposite corners when marking the rectangle!
I have two rectangle pieces, so I repeated this process again with the other pendant.
HOW TO USE POLYGON PIN-POINT POSITIONING
Polygon positioning is very useful. You can mark any shaped object using this mode. To use the polygon mode, you need to mark at least 3 spots. However, you can add as many points as needed toFor this example, we are marking a heart.
Change the marking mode to polygon.
Move the laser to the edge of the shape. Press the button. Working your way around the shape, move the laser and press the button. Do this again and again, until you have made your way around to the starting point.
The closer your points are around curves, the more exact your shape will be.
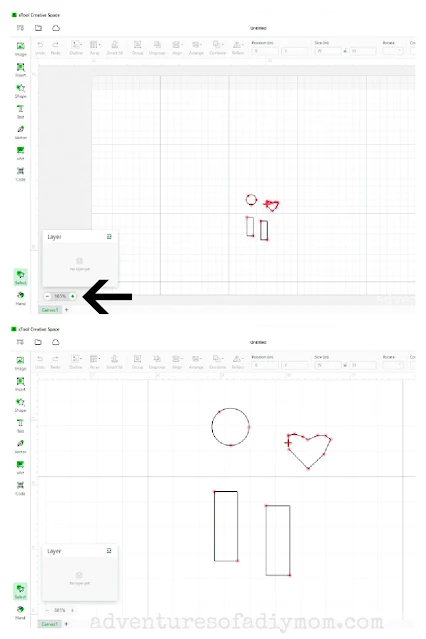
You can see the heart shape is now marked on the computer. Click End Marking. Then click Done.
Since these jewelry pieces are so small, it's a good idea to enlarge the screen. Then you can place the text to be engraved precisely.
Once the heart is enlarged, you can see that it's not perfect. That's ok. For this project, I just need a general idea and to know where the center point is. I can use the top and bottom points of the heart to center my work.
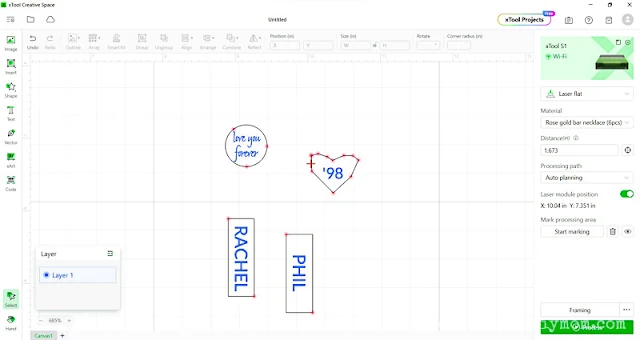
Then all that's left to do is to add your desired words or images to be engraved.
PROJECT IDEAS USING PIN-POINT POSITIONING
Engraving on metal is new to me. I want to thank xTool for providing the 2W 1064 laser module.Below are some of the projects I came up with.
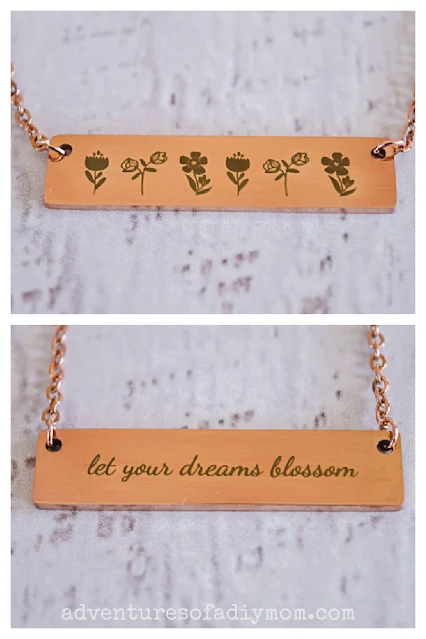
This bar necklace was my first project to try things out. I used flowers in the xTool Creative Space on the front and the Dancing Script font for the words on the back.
Positioning mode: rectangle Settings: 90 % power, 160 speed, 1 pass and 300 lines/cm.
Next, I made this dog tag. It's made from anodized aluminum. I love how it shows up white where it's been engraved.
Positioning mode: polygon
Settings: 90% power, 250 speed, 1 pass, 300 lines/cm
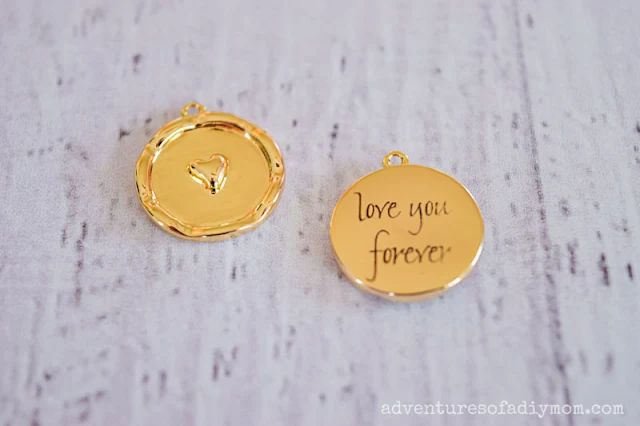
I absolutely love this gold plated round pendant with the heart! I engraved 'love you forever' on the back and intend to give them to my daughters.
However, it was one of the more challenging pieces to engrave. The heart shape is raised just slightly higher than the edge making the piece wobble when placed face down.
In my first attempt the piece moved as it was engraving resulting in crooked letterings. What I ended up doing, is creating a bit of an indent in the wood that I was using as my base. Then placed the heart in the indent and it held it in place.
Positioning mode: circle
Settings: 90% power, 160 speed, 1 pass, 300 lines/cm
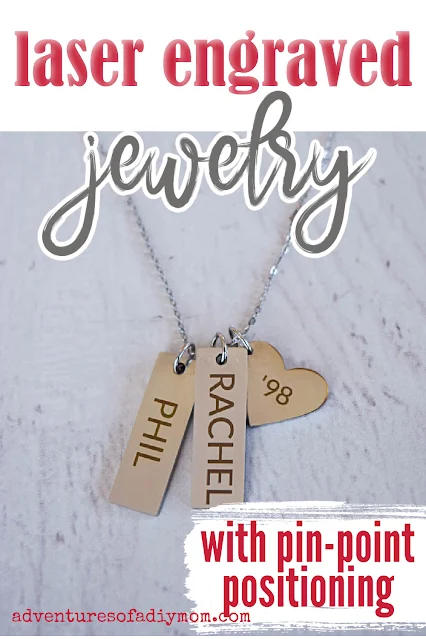
This bar and heart necklace has my name, my husband's name, and the year we were married.
I used the font Lato in all caps.
Positioning mode: rectangle and polygon
Settings: 90% power, 160 speed, 1 pass, 300 lines/cm.
Want to watch the video? ↓↓Click the link ↓↓
MORE xTOOL PROJECTS AND TUTORIALS
- xTool unboxing, features and getting started
- Laser cut and engraved leather bookmarks
- Laser Cut Succulent Magnets
- Laser Cut Shamrock
- DIY Candle with Laser Engraved Lid
Don't forget to pin it!!







0 comments