Want to make your own Burlap Bag?
You will need:
burlap
ribbon
sewing machine
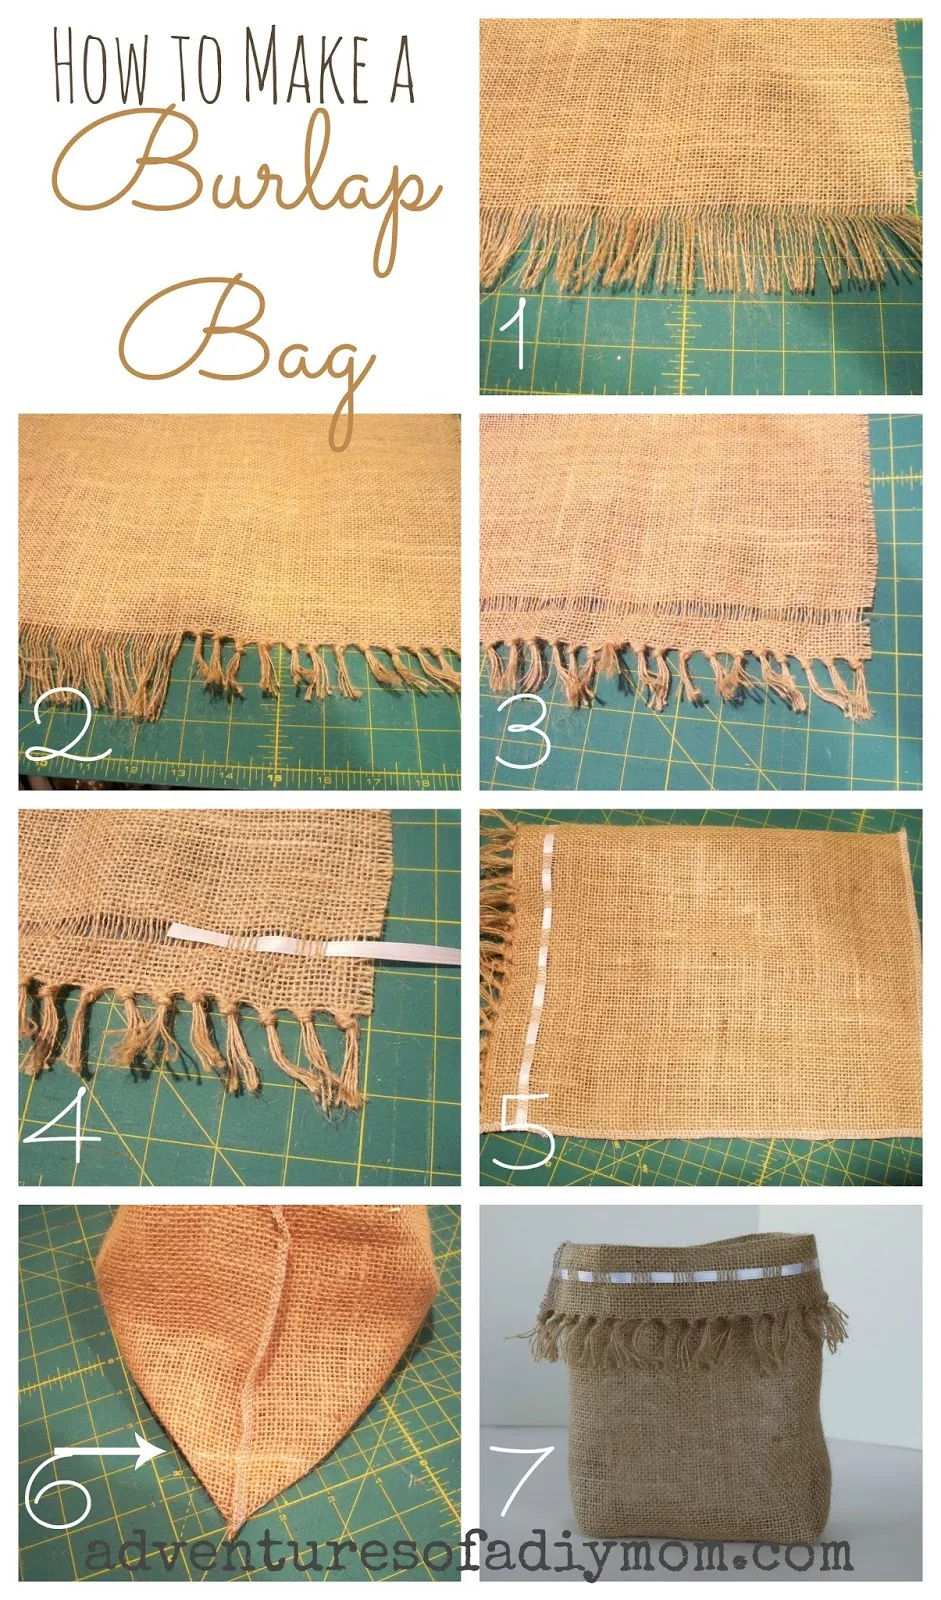
Step 2 - Take 6 strands at a time and knot them. When you get to the end, you may not have exactly the right amount. I had 10 pieces left so instead of 6 and 4, I did the last two knots with 5 strands each.
Step 3 - About 1 inch from the knots start removing strands of burlap. I used 1/4" ribbon, so I removed 4 strands.
Step 4 - Weave the ribbon through the burlap. I wove it through 6 strands at a time so it would match up with the knots.
Step 5 - Fold your bag in half and sew along the side and bottom. I would recommend either a zig zag stitch or surge it so it won't unravel.
Step 6 - With your bag still right side out, sew a straight stitch to make a little triangle as shown in the picture above. Repeat with both sides. This will form the bottom of the bag.
Step 7 - Turn right side out. Then fold over the top edge of the bag.
What will you fill your bag with?
Other projects with burlap:


.jpg)
.jpg)
No comments :
Post a Comment