Monday, March 31, 2014

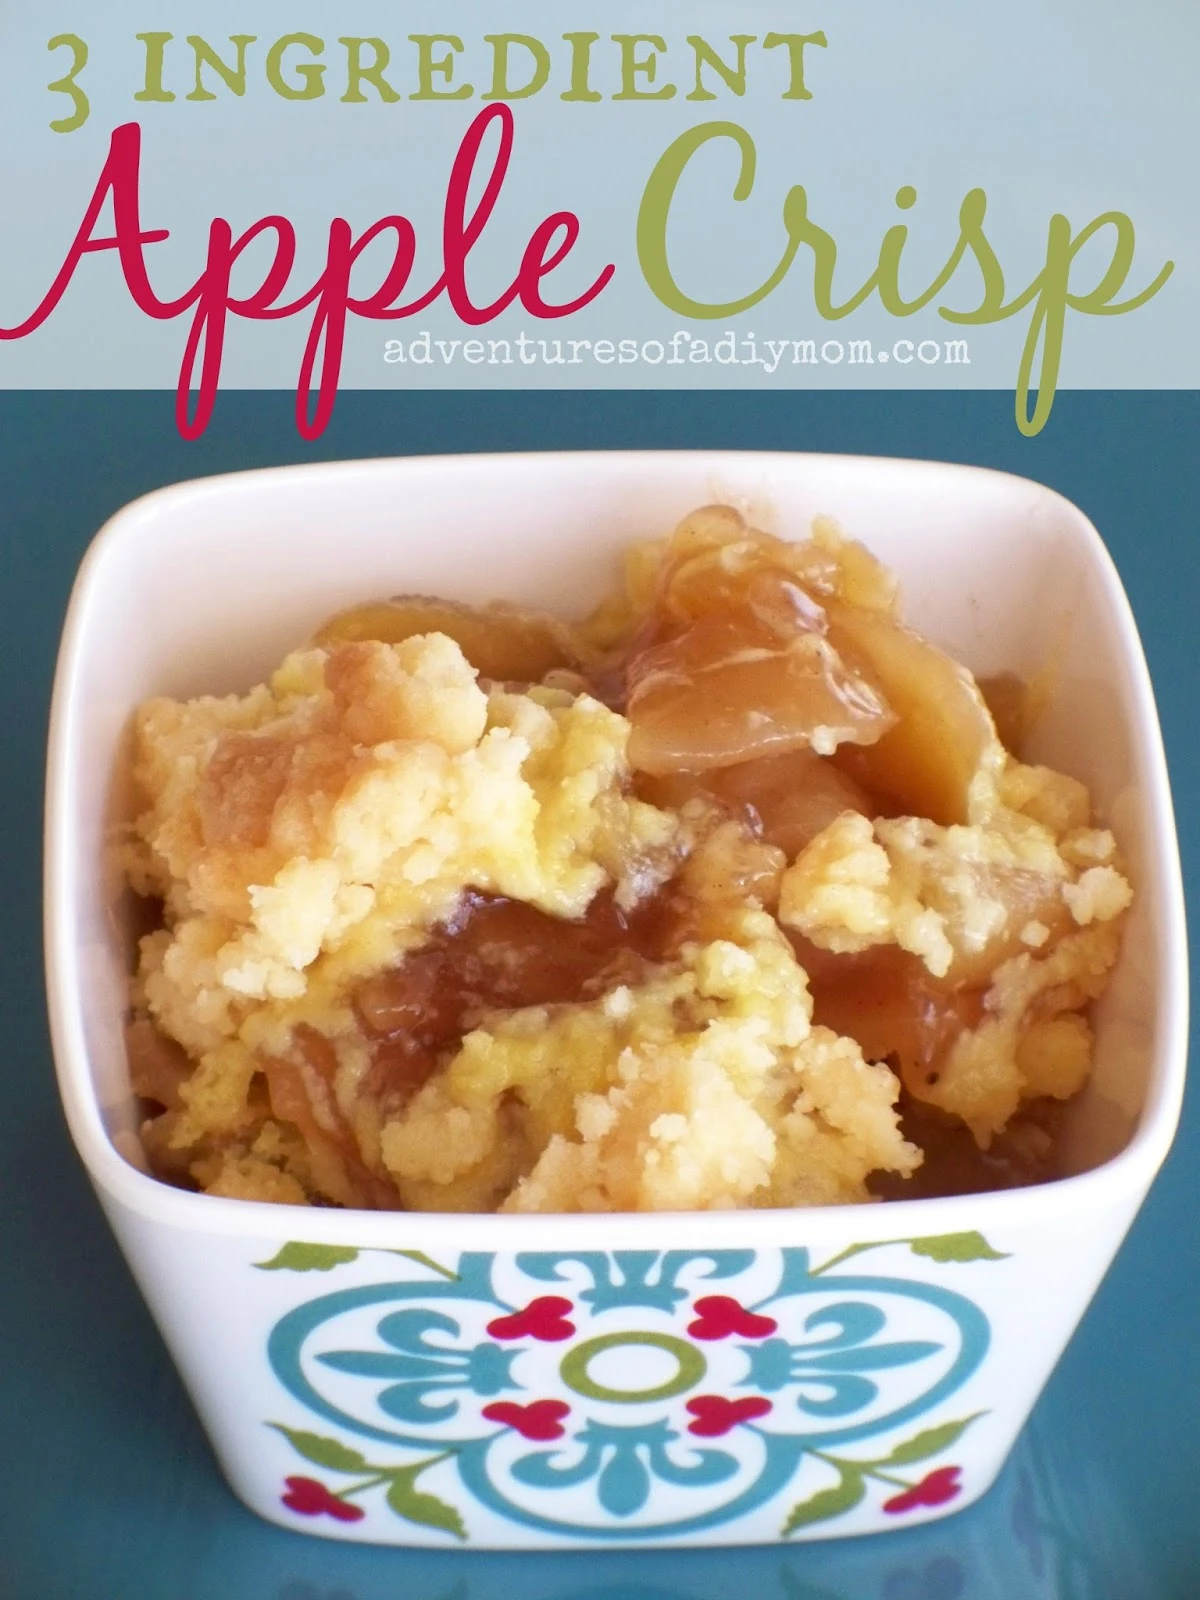
3 Ingredient Apple Crisp

Have you ever tried something at a pot luck dinner and were just dying to know how to make it.

Well that's what happened to me. Several years ago, someone brought an apple crisp to a work party. It was so good and I had always been meaning to ask for the recipe.

After a while, it seemed kind of awkward to say "Do you remember 2 years ago when you brought that apple crisp?" And then they moved. So I never asked.

3 Ingredient Apple Crisp
 
Well, earlier this month we had a chance to visit the town they moved to and they invited us to dinner at their house. And guess what she made for dessert? The very apple crisp I'd been dying to know how to make. And guess what else? It's SO easy! Only 3 ingredients!

3 Ingredient Apple Crisp


3 Ingredient Apple Crisp

I can't wait to play around with this recipe a little more. You could substitute any other pie filling for a totally different flavor. I also think adding some quick oats to the cake mix would be yummy.


3 Ingredient Apple Crisp

Go ahead and try it! I'm sure you'll love it too!

3 Ingredient Apple Crisp

3 Ingredient Apple Crisp

Servings: 12
Author: Rachel Nielsen
Prep time: 5 MinCook time: 30 MinTotal time: 35 Min
The EASIEST apple crisp you'll ever make with only 3 ingredients!

Ingredients

  • 1 quart apple pie filling 
  • 1 stick salted butter
  • 1 yellow or white cake mix

Instructions

  1. Pour apple pie filling in a greased 9x13 pan. 
  2. Melt butter in the microwave and stir in cake mix. 
  3. Sprinkle it over the top of the pie filling. 
  4. Bake at 350 for 25 - 30 minutes or until slightly browned on top.

Nutrition Facts

Calories

151.44

Fat (grams)

8.45

Sat. Fat (grams)

5.05

Carbs (grams)

19.52

Fiber (grams)

0.68

Net carbs

18.83

Sugar (grams)

15.81

Protein (grams)

0.49

Sodium (milligrams)

111.63

Cholesterol (grams)

20.37

Nutrition information is generated automatically and is not guaranteed to be correct.

Apple crisp, easy apple crisp
Dessert
American

Thursday, March 27, 2014

Crafty Spring Tree

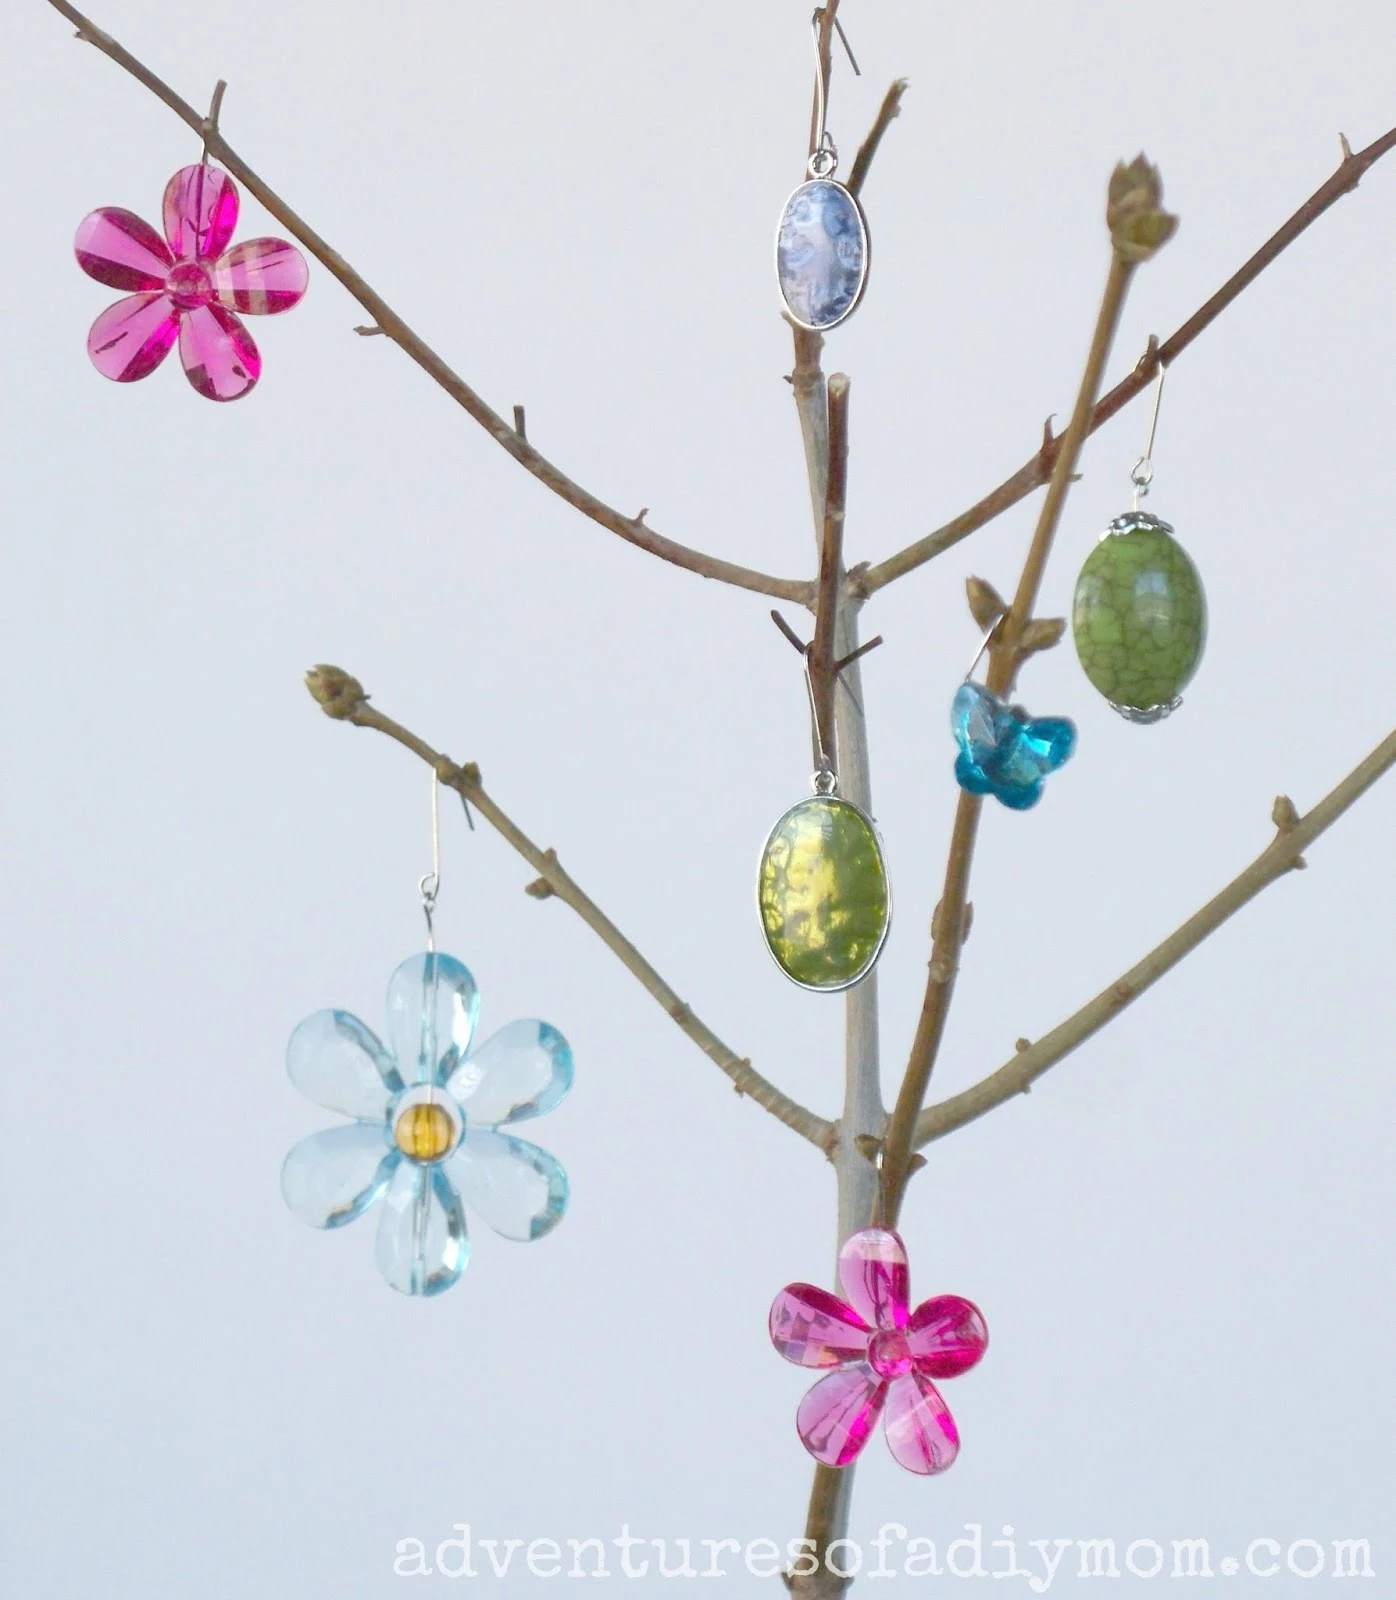
Today I have a fun little project for you. It's a Spring Tree. I love the Easter trees  - but I wanted this one to be a little less holiday specific. That way I can still use it once Easter is over.  The base is one of my Painted Mason Jars. The tree itself is made from a branch pruned from our lilac bush. Then I've added a few fun beads to decorate the tree.

{By the way, I also have an Easter egg tree in the works. Hopefully I'll be sharing it in the next couple of weeks}
Crafty Spring Tree

 Want to make your own Crafty Spring Tree?

You will need:
jar
beans {jelly beans would be fun for a clear jar}
stick
beads
head and eye pins
Crafty Spring Tree

Crafty Spring Tree


To begin insert your stick into the jar. Fill with beans. This will help stabilize the stick and keep it in place.
Crafty Spring Tree

 Next create your ornaments using beads. You could totally use Christmas tree ornament hooks. I didn't want dig through all my Christmas stuff to find them, so I made my own hooks using eye pins.

Crafty Spring Tree
Step 1 - using a head pin, form a loop at the top of your bead.
Step 2 - grab an eye pin
Step 3 - slightly open up the eyepin
Step 4 - attach it to the loop at the top of the bead
Step 5 - bend over the wire
Step 6 - clip the wire

Crafty Spring Tree
I found the blue flower beads on clearance at Walmart at Christmas time. I thought they were the perfect addition to this tree. I also made some bracelets with them for my girls which I'll be sharing soon.

The green and blue oval shaped beads are courtesy of my latest box from Prima Bead.

The pink flowers and blue butterflies are actually earrings that I've had in my stash to forever.

Crafty Spring Tree

This was really a fun little project.

What do you think of it?


Monday, March 24, 2014

Violet Necklace and Earrings Set

This violet necklace and earring set is perfect for spring. Both the earrings and the necklace are quite simple to make. This set is perfect for the beginning jewelry maker. You only need a few basic jewelry making skills like opening jump rings and forming a loop.

Violet Necklace and Earrings Set
Lately my kids have been asking "what's your favorite color?, what's your second favorite color?" For me that's green, then purple. So when I got these purple connector beads from Prima Bead in my March package I was thrilled.

Want to make your own Violet Necklace?
You will need:
chain
8 jump rings {1 large, 7 small}
1 clasp
3 violet gem connectors
wire cutters
jewelry pliers

How to Make a Violet Necklace

Step 1 - Gather your supplies and cut your chain to length. You will need two pieces 1 1/2" long and 2 pieces 6 1/2" long
 Step 2 - Using a jump ring, attach one of your small pieces of chain to a connector bead.
Step 3 - Using a jump ring, attach your other small piece of chain to the other side of the connector bead.
Step 4 - Attach a connector bead to the end of each chain using a jump ring
Step 5 - Attach the long pieces of chain to each connector bead. Add a jump ring to one end of chain and a clasp to the other end of the chain.

The earrings are super simple.

Violet Earrings


Here's how to make them.
You will need:
2 violet gem connectors
2 fishhook earwires
4  6mm bicone beads
6 jump rings
4 head pins
jewelry pliers
wire cutters

How to Make Violet Earrings
Step 1 - Gather your supplies.
Step 2 -  String a bicone bead on each head pin and form a loop.
Step 3 - Attach one bicone bead to each end of connector bead with a jump ring
Step 4 - Attach the earwire to the top jump ring using a large jump ring.


Violet Necklace and Earrings Set
So go ahead and give it a try. You can change the look by simply using a different style connector bead and chain.


I am a Prima Bead Blog Team Member. I receive product from Prima Bead. In return, I create jewelry or craft pieces from that product, and share about them through my blog and other social media outlets. All opinions expressed in this post are mine.

Thursday, March 20, 2014

How to Make Beaded Hair Clips

These cute beaded hair clips come together fairly quickly. They will add a touch of elegance to your child's hair.
How to Make Beaded Hair Clips

This month my friends at Prima Bead sent me a fun package. The first thing I thought of was SPRING! Look at this fun collection! My March project as a Prima Bead Blogger is to incorporate what they sent me into some fun crafts to support National Craft Month.

Beaded Hair Clips

The first project I made were these beaded hair clips. I made two - they can be worn together or my two little girls can each wear one and match.

It's so fun to have my two little girls so close in age. When you have a two year old and a newborn, it's HARD. But just wait a few years and they'll be best friends. They'll disappear in their room and play for hours with each other. The other day I heard one of them mention that the other was their best friend. That was music to my ears! And no, they're not perfect, there is plenty of arguing too, but I try to think about the good times :)

Anyway....

Beaded Hair Clips


 Want to Make Your Own Beaded Hair Clips?

For each clip you will need:
1- small hair clip - this style is called a "french barrette" - you can find it at any craft store.
8-  6mm Rose pearl beads
1- metal charm
2- crimp beads
10 inches of .3mm beading wire
wire cutters
crimping pliers

How to Make Beaded Hair Clips

Step 1 - Begin by gathering your supplies and cutting a piece of wire 10 inches long.
Step 2 - Remove the center piece of the clip.
Step 3 - Attach the wire to the  hole in the clip using a crimp bead to secure.
Step 4 - String on 4 pearl beads.
Step 5 - Place two of the beads on the top of the clip. Wrap the wire around the bottom.
Step 6 - Place the other two beads on top of the clip and wrap wire around the bottom.
Step 7 - Slide the metal charm onto the wire.
Step 8 - Place the charm on the top of the clip and wrap the wire around the bottom.
Step 9 - String on 4 more pearl beads. Place two of beads on top of the clip and wrap wire around bottom.
Step 10 - Place the last two beads on top of the clip and wrap wire around the clip.  Add a crimp bead and string the wire through the hole in the clip and back through the crimp bead and crimp. Cut off excess wire. Lastly,  insert the center piece of the clip.

The most important thing, and probably the hardest too, is to keep the wire tight as you're working.

Beaded Hair Clips

There you have it - Beaded Hair Clips.
 
  
 I am a Prima Bead Blog Team Member. I receive product from Prima Bead. In return, I create jewelry or craft pieces from that product, and share about them through my blog and other social media outlets. All opinions expressed in this post are mine.

Monday, March 17, 2014

No-Bake Fudge Oatmeal Bars Recipe

Today I have a really easy, quick and tasty dessert for you. No-Bake Fudge Oatmeal Bars. They are very simple to make and require no bake time. These bars are very rich. The fudge layer was perfectly smooth and was nicely complimented by the crispy oat crust. 

 My son ate one bite and said "Can you make these again?"


No-Bake Fudge Oatmeal Bars Recipe


No-Bake Fudge Oatmeal Bars Recipe


Hope you enjoy these as much as we did.


No-Bake Fudge Oatmeal Bars

No-Bake Fudge Oatmeal Bars

Yield: 9
Author:
prep time: 15 Mcook time: total time: 15 M
A quick and easy no-bake dessert.

ingredients:

  • 1 c. butter
  • 1/2 c. brown sugar
  • 3 c. quick oats
  • 2 t. vanilla
  • 1 c. milk chocolate chips
  • 1/2 can Dulce de Leche

instructions:

How to cook No-Bake Fudge Oatmeal Bars

  1. Melt butter in a saucepan.
  2. Add brown sugar and vanilla. Once the sugar has melted, add the oats and cook and stir for 3-4 minutes.
  3. In a separate bowl, melt chocolate chips and Dulce de Leche in the microwave for 1-2 minutes, stirring every 30 seconds. Mix well to combine.
  4. Press 3/4 of the oatmeal mixture into the bottom of a well greased 9 X 9 pan. Pour fudge over oatmeal crust. Sprinkle remaining oatmeal mixture on top.
  5. Place in the fridge for a few hours to set up. Bring to room temperature to cut and serve.
Calories
410.73
Fat (grams)
27.83
Sat. Fat (grams)
16.79
Carbs (grams)
36.31
Fiber (grams)
2.72
Net carbs
33.60
Sugar (grams)
20.88
Protein (grams)
4.70
Sodium (milligrams)
242.58
Cholesterol (grams)
59.16
Nutritional information is automatically generated and is not guaranteed to be correct.
no bake fudge oatmeal bars, no bake oatmeal bars recipe, oatmeal fudge bars,
Desserts
American
Created using The Recipes Generator

Thursday, March 13, 2014

Upholstery Tack Candles

Today I have a very quick and easy tutorial for you. Upholstery Tack Candles! Those little tacks can add so much rustic charm to a candle.

Upholstery Tack Candles

Although this was a really easy project, it didn't start out so well. In fact, I almost put it in the failed file. You see, the first time I tried to insert the tacks, this was the result:

Upholstery Tack Candles

The tacks broke the candle into chunks. I mentioned my complete failure to my husband and he said "Why don't you get a lighter and heat up the tacks? Then they will melt the candle as you put them in." Genius!

So that's what I did.

Want to try making your own upholstery tack candles?

Here's what you need:

Candles
Burlap
Upholstery tacks - I used two varieties
Scissors
Lighter
Candle for burning
Hot glue gun {not pictured}


Upholstery Tack Candles

Begin by cutting a piece of burlap to wrap your candle with. I did two different sizes.  The burlap for the small candle was 1 1/4" X 10". The large was 3 3/4" X 10".

Upholstery Tack Candles

Wrap the burlap around the candle and secure with hot glue.

Upholstery Tack Candles

Now for the fun part - adding the tacks. I found it was easier to light a small candle and have an open flame ready when I needed it.

Upholstery Tack Candles

Place the tip of the tack into the flame for 10-15 seconds. Be careful, if you keep it in the flame too long, the whole tack will heat up and you'll burn yourself. {Yeah, I learned the hard way}

Upholstery Tack Candles


Then quickly insert it through the burlap and into the candle. It will burn the burlap a little as you slide it through, but the top of the tack will cover any discoloration. They slid right in without any cracking.

Upholstery Tack Candles

I decided that I liked the look of smaller and larger tacks together.

Upholstery Tack Candles

Here they are in their new home.

Upholstery Tack Candles

Don't miss my other candle projects.

 Pine Cone Flower Candles

Monday, March 10, 2014

DIY Lucky Sign

 St. Patrick's Day is one of my favorite holidays. My mom always made a big deal about it because, you see it's my birthday as well. So she always decorated with fun St. Patty's Day decor. And she was sure to pinch us as soon as we woke up, before we could put on some green. We soon learned to wear green to bed the night before.

So each year I like to add something to my St. Patrick's Day decorations. This year, I made a little Lucky Sign.

DIY Lucky Sign

As I was looking through the decor I already had, I realized that I really liked the things that were white and dark green the most. So I grabbed some scrap wood, screws, paint and vinyl and whipped this little sign together in no time.You may remember my Valentines sign. It's just like it, except I used paint instead of stain. Click over to my Wood and Vinyl Valentine's Art for the full tutorial.

I love projects where I use supplies I have on hand. I get such a sense of accomplishment making something from scraps.

What have you made for St. Patrick's Day? 

You may also like:

Tuesday, March 4, 2014

Rice Heat Bags

I've got a quick tutorial for you today. Rice Heat Bags. These little bags have been around forever. But for some reason we only had one. I decided that for Valentines, I'd use up some of my flannel and make each of the kids their own. That way they'll quit stealing mine. They are super easy.

Rice heat bags
You can make these any size you like. If you want to make them super easy just grab two pieces of fabric the same size. Sew them right sides together and leave a small opening. Fill with rice and hand stitch the opening closed.

I wanted to dress them up just a tiny bit, without making it too complicated so I added a strip of coordinating fabric. They match the pillowcases that I also made my kids for Valentines. I'll have a tutorial for that later this week.

Here's how I did it:


Step 1: Cut your fabric.
Main fabric cut three pieces to the following sizes:
13 1/2" X 13 1/2"
13 1/2" X 4"
13 1/2" X 10"
Accent fabric cut one piece:
13 1/2" X 2"

{Don't get confused by my fabric colors in step 1. I cut out the fabric one day and sewed them up another. I forgot which bag I was using for the tutorial}

Step 2: Press the accent fabric in half lengthwise.

Step 3: Place your 10" piece down right side up. Then add your accent piece on top with the opening up and the fold down. Place your 4" piece on the very top with right side down. Sew along the top with 1/4 inch seam allowance.

Step 4: This is the front. Press it flat and this is what it should look like at this point.

Step 5: Place your front and back pieces together, with right sides together. Sew all the way around with 1/4 inch seam allowance. Be sure to leave an opening 2-3 inches long for turning and filling.

Step 6: Clip the corners off.

Step 7: Turn right side out.

Step 8:  Fill with rice. I used about 10 cups per bag. Then hand stitch the opening closed.

To use: Place in microwave for 3-5 minutes. We place them under the covers to keep our feet warm on cold nights.


Do you have a rice bag?