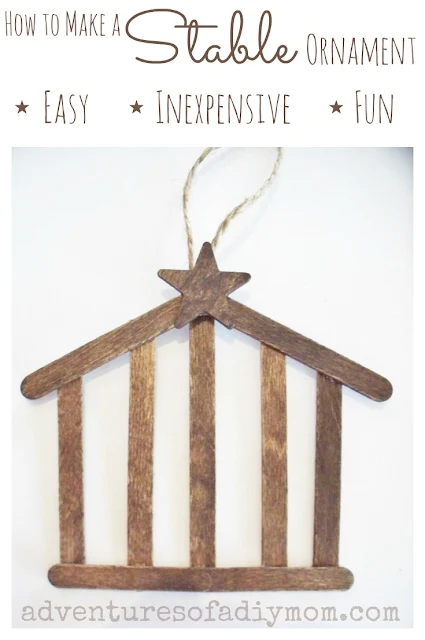
Today's nativity ornament is a stable. Using craft sticks, I created an simple, inexpensive ornament that is easy to make.
Adding a coat of stain to the sticks gives it that rustic look that I love. Create your own. All you need is a few supplies and a couple minutes.
"And she brought forth her firstborn son, and wrapped him in swaddling clothes, and laid him in a manger; because there was no room for them in the inn." Luke 2:7
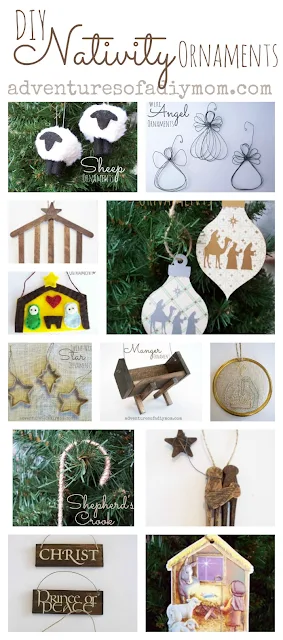
***For those of you new to my blog, I've created a series of nativity ornaments to help remind my family of the true meaning of Christmas. Here's a list of them {pictures at the bottom of the post}:
Wood Slice Nativity Ornaments
Angel Wire Ornaments
Clothespin Nativity Ornament
Twine Wrapped Star
Sheep Ornament
Felt Nativity Ornament
Shepherd's Crook Ornament
Stable Ornament
Wiseman Ornament
Manger Ornament
Canning Ring Framed Embroidered Ornament
Paint Stick Ornament
Greeting Card Ornament
How to Make a Nativity Stable Ornament
This project is so easy! Warm up your glue gun and grab some popscicle sticks. Let's get crafting!
With a little supervision, this is an easy craft for kids too.
Supplies you will need to make a stable ornament:
- 8 crafts sticks
- wooden star
- hot glue
- twine
- stain {optional}
- scissors
How to assemble your stable ornament:
Note: If you would like your stable to be a darker color, then stain your craft sticks and allow to dry before beginning.Step 1: Cut your craft sticks to the following measurements.
Cut 2 at 3 3/8" - these are the sides of the stable
Cut 2 at 3 7/8" - these are the middle pieces of stable walls
Cut 2 at 3 1/4" - these are the roof
Leave two uncut - these are your floor and center wall.
To cut the sticks, I used some big wire cutters I found out in the garage. An old pair of sturdy scissors would probably work too.
Step 2: Glue the walls of the stable to the floor.
To space them evenly, I started with the outer walls, then the very middle, and finally the other two middle sticks.Step 3: Turn your stable over so that the floor is on the front.
You don't want to see the curved ends of the craft sticks. I think it looks nicer this way.
Step 4: Glue on your roof.
Step 5: Hot glue the star in place.
Step 6: Hot glue a piece of twine to the back of the ornament for hanging.
Now you have your own stable ornament!
One of my mantra's is to use what you have. Here's an idea of what a stable looks like using the large craft sticks. I made this, but it seemed to large for my little 3 foot nativity tree, so I went with the smaller sticks. But use what you have!
Don't forget about my other nativity ornament ideas.


OOH I love this!! Such a great wooden stable ornament, totally pinning now to my Crafty Christmas board - thanks for sharing :)
ReplyDeleteHappy Christmas!
Hannah ♫
Sew Lah Tea Dough
This is so simple but really beautiful. Thanks for sharing, and would love if you came by and linked up to What'd You Do This Weekend. Pinned it! :-)
ReplyDelete--Ashley @ PioneerMomma.com
Super cute and easy! Thanks for sharing!
ReplyDelete