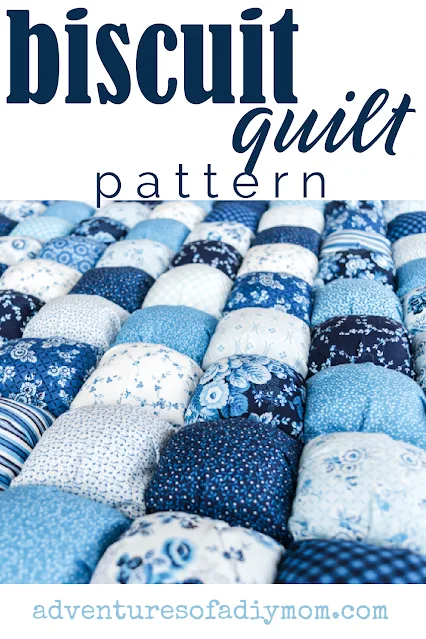
Learn how to make this stunning puff quilt.
Sometimes referred to as a bubble quilt or a biscuit quilt, this blanket will add interest to any room you place it in.
A puff quilt is a type of patchwork quilt with squares of fabric that are stuffed to create lots of tiny cushions.
The overall effect is impressive.
This puff quilt pattern is sized to be a lap quilt.
Using precut charm packs (5 inch squares) helps this quilt come together so quickly because there's very little cutting to do.
If you'd like more charm pack quilt ideas, I've got a list of over 30 quilt patterns made using charm packs.
OR check out these EASY Quilt Patterns!
DIY PUFF QUILT (BUBBLE QUILT, OR BISCUIT QUILT)
↑ ↑ ↑ PIN IT ↑ ↑ ↑
This post may contain affiliate links. As an Amazon Associate I earn from qualifying purchases. Please see my full disclosure policy for details.
SUPPLIES NEEDED FOR THIS PROJECT
- fabric (see below)
- thread
- sewing machine (This is my new machine that I absolutely love!)
- sewing scissors
- embroidery thread
- needle
FABRIC REQUIREMENTS FOR A PUFF QUILT
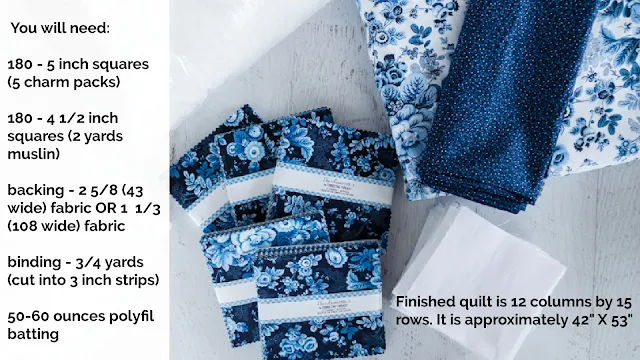
This pattern produces a finished quilt that is approximately 42" X 53".
To make this quilt really easy, I opted to use charm packs. A charm pack is a precut package of coordinating fabric. They are 5 inches square and really simplify the process. I used a line called tea service volume 2.
To make this quilt you will need:
- Five 5" charm packs (180 5" squares are needed, there will be leftovers. Alternately, a total of 2 yards of fabric should suffice if you'd like to cut your own squares)
- 2 yards of white or muslin fabric - cut into 180 4 1/2" squares
- For the back fabric: 2 5/8 yards 43" wide fabric OR 1 1/3 yards 108" wide backing fabric
- For the binding: 3/4 yards fabric (43" wide) to be cut into 3" strips
- 50-60 ounces of polyfil - two 32 oz bags should be enough
HOW TO MAKE A PUFF QUILT
I've organized this project into several sections. I suggest reading the post in its entirety before starting. I also have created a video that is helpful. Be sure to watch it.
However as you are working on the project it will be helpful to skip to the section you are working on. Simply click the links below to be taken to that section of the post.
Cutting out the fabric Sewing together the puff blocks Laying out the quilt and stacking the blocks Sewing together the columns Stuffing the puffs and sewing together the columns Adding the back and binding
Note: All seams will be sewn with a 1/4 inch seam allowance.
CUTTING OUT THE FABRIC
Since I used charm packs for my top layer, there was not cutting required for these pieces.
If you have scrap fabrics or fat quarters that you would like to use, instead of precuts, simply cut your fabric into 5 inch squares. You will need 180 squares for the top.
Cut out 180 squares from the white or muslin fabric that are 4 1/2 inches. These will be for the back of each puff.
Cut the binding into 3 inch strips and sew each end together to make one long binding strip. Press it in half lengthwise.
SEWING TOGETHER THE PUFF BLOCKS
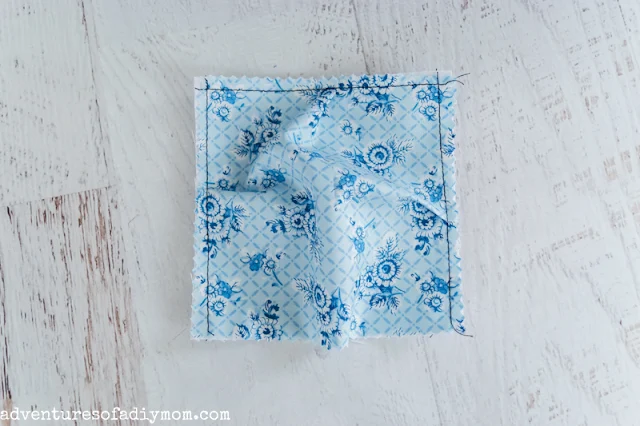
The first step is to make the puff squares. Begin by placing a 5 inch square on top of a 4 1/2 inch square. Line them up so that the top and the right side of the square is flush.
Next, using a 1/4 inch seam allowance, sew a little ways down the right side of the block (3/4 of an inch or so)
Line up the bottom edge of both fabrics, then create a pleat near the center of the square with the top fabric.
Continue sewing until you get 1/4 inch away from the edge.
With the needle down, lift up the presser foot and turn the fabric to the next side. Lower presser foot and continue the same process, lining up the bottom edges of the fabric and creating a pleat near the middle of the square.
Turn and repeat this process with the third side of the square. At this point leave one side of the square open so we can stuff it later.
Once you have pleated and sewn three sides of the square, continue this same procedure for all of your puffs.
Another alternative, is to chain stitch the squares, working on the first side of many squares all in a row, then moving on the the second side and then the third.
LAYING OUT THE QUILT AND STACKING THE BLOCKS
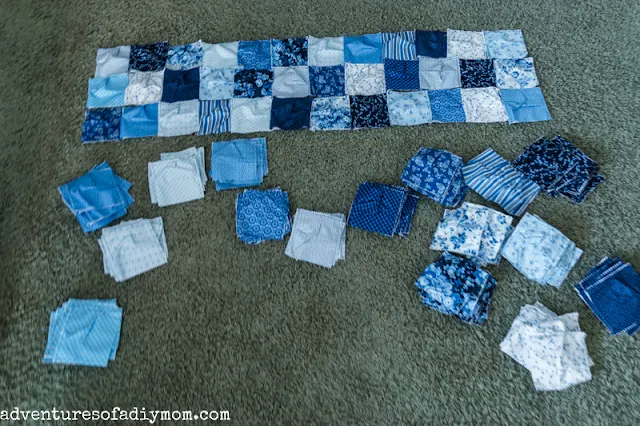
Once all of your blocks have been sewn together, it's time to lay out the quilt.
I placed them on the floor in a random layout. I placed 12 across and 15 down.
I tried to keep the dark and light colors somewhat scattered so there was an even look throughout.
Next I stacked up each column and labeled them. Beginning at the top, I placed each square on top of the one below it.
I added a sticky note indicating which column it was. Then I placed a binder clip on each stack to keep them in order until I was ready to sew them together.
(I realize I used the word row on the sticky notes, I did work in columns. You can work in rows or in columns, it doesn't really matter, just be consistent throughout the project.)
SEWING TOGETHER THE COLUMNS
Next, sew together all the blocks in each column.
- Always keep the open side of the square on the right
- Sew the bottom of each square to the top of the next.
- Always sew with right sides together.
- Continue on until the entire column is sewn together.
Once the entire row or column is sewn pin the sticky note back onto the top square.
STUFFING THE BLOCKS AND SEWING TOGETHER THE COLUMNS
Now it's time to stuff our squares. I like to do this one square at a time.Add a generous amount of stuffing into the square. Then sew the opening closed, making a pleat near the center.
Continue all the way down the column of squares until they are all stuffed and sewn closed.
Try to be consistent in the amount of polyfil you add to each square.
Once you finish stuffing the first column but before you stuff the next one, sew them together.
It is much easier to sew them together when one of them is not stuffed as opposed to when they're both stuffed.
With right sides together, sew the side you just sewed to the closed side of the next column.
Then repeat the process of stuffing and sewing closed the openings of each square.
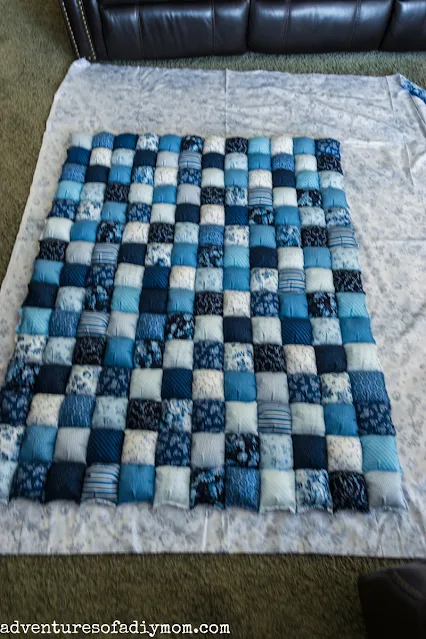
Continue this process until the whole quilt has been sewn together and stuffed.
BACKING AND BINDING
Now all that's left to do is to add the backing and the binding.If desired you could add a layer of batting. I filled my quilt so full, that it's already kind of heavy and I didn't feel that it needed any more bulk, so I skipped the batting.
Cut out your backing fabric so that it is approximately 4 inches bigger all the way around.
Next pin the top to the back.
I opted to sew the top, binding and back all in one seam. I felt like it was a little tricky with the puffs and I didn't want to have to go around the whole thing twice.
With the raw side of the binding lined up with the edge of the quilt, sew 1/4 all the way around the quilt. Be sure to capture the binding, the quilt top and the backing in your seam.
Trim the backing along the edge of the quilt.
Fold the edge of the binding towards the back and hand sew in place.
Hand tie the quilt together, placing a knot at each intersection. I used embroidery thread to do this, but you could use yarn too. I worked so that the ties were on the back of the quilt.
Want to watch the video? ↓↓Click the link ↓↓
MORE QUILTING PROJECTS
Don't forget to pin it!!










Great tutorial for the puff quilt . It is th e best one I have read.
ReplyDelete