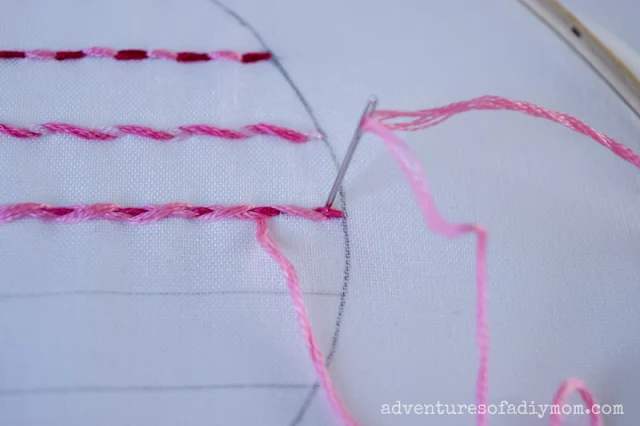
The double whipped running stitch is another easy stitch with a unique look.
It's another variation of the running stitch.
It has a distinctive crisscross appearance and it's a quick and simple stitch to create.
I doubt I'm the first to come up with this stitch, but I can't find it in any of my embroidery stitch books.
Basically it's a whipped running stitch(aka cordonnet stitch) with another layer of whips going in the opposite direction.
This tutorial is part of the heart sampler stitch along. The stitch along is a great opportunity to learn new hand embroidery stitches, and specifically features line stitches. Each day I'm sharing a new embroidery stitch tutorial.
We began by learning how to transfer embroidery patterns. Then we learned the running stitch, the double running stitch also known as the holbein stitch, and the whipped running stitch.
Come back tomorrow to learn the laced running stitch.
DOUBLE WHIPPED RUNNING STITCH FOR EMBROIDERY
The double whipped running stitch is an ideal outline stitch. It can be worked in straight lines or curved lines.
Create different effects by using different colors of thread. In this tutorial, I used two colors.
But you could even try three different colors. Or try adding a metallic thread with this decorative stitch.
This post may contain affiliate links. As an Amazon Associate I earn from qualifying purchases. Please see my full disclosure policy for details.
HOW TO SEW THE DOUBLE WHIPPED RUNNING STITCH
Want to watch the video tutorial? Check it out here: Double whipped running stitch video.Start by sewing a running stitch.
Weave a contrasting color of thread through each stitch. Begin by bring your needle up just under the center of the first stitch. Weave the thread DOWN through each stitch.
When you get to the end of the line, work your way back the other direction, continuing to weave the thread DOWN through each stitch. This will create the crisscross effect.
End by inserting your needle on the upperside of last (which also happens to be the first) stitch. Tie off on the back of your work.
Keep in mind that the weaving part of the stitches are all worked on the surface of the fabric. You will be inserting your needle between the fabric and the existing stitches.
Want to watch the video? ↓↓Click the link ↓↓
Hope you enjoy using this whipped stitch in all your embroidery projects.
MORE EMBROIDERY STITCHES
Coming Soon:
Don't forget to pin it!!


0 comments